Forte Max Manual.pdf - 第53页
ForteMAXDispensingSystemAddendum Recipe Creation © 2023 Nordson Corporation 49 6. Click on Next . > Th e Du al Head Setup window opens (Figure 4-50). 7. Make sure you set Enable Dual Head Dispensing to Off . Figur…

ForteMAXDispensingSystemAddendum Recipe Creation
48 © 2023 Nordson Corporation
4.5.1.4 Placing the Container
In this section, we are going to place the container four (4) times to cover the board.
To place the container:
1. Select the Workpiece pattern in the Recipe Tree.
2. Select Place Container .
> The Place Container Instruction Wizard opens (Figure 4-48).
3. Select the container to place and the dispense mode.
> To reduce total travel distance and cycle time, it is suggested that if the number of
columns is greater than the number of rows, select Serpentine by Rows. If the number
of rows is greater than the number of columns, select Serpentine by Columns.
Serpentine modes are typically faster that raster modes.
Figure 4-48 Place Container Wizard
4. Select the left-to-right and right-to-left patterns.
> In this example, both patterns are the same.
5. Jog the camera crosshairs to the container starting corner and click on Teach.
> Since we have selected Lower Left, the starting corner will be the lower left corner of
the rectangle (Figure 4-49).
Figure 4-49 Container Starting Point
C
o
n
t
a
i
n
e
r
S
t
a
r
t
i
n
g
Corner
ForteMAXDispensingSystemAddendum Recipe Creation
© 2023 Nordson Corporation 49
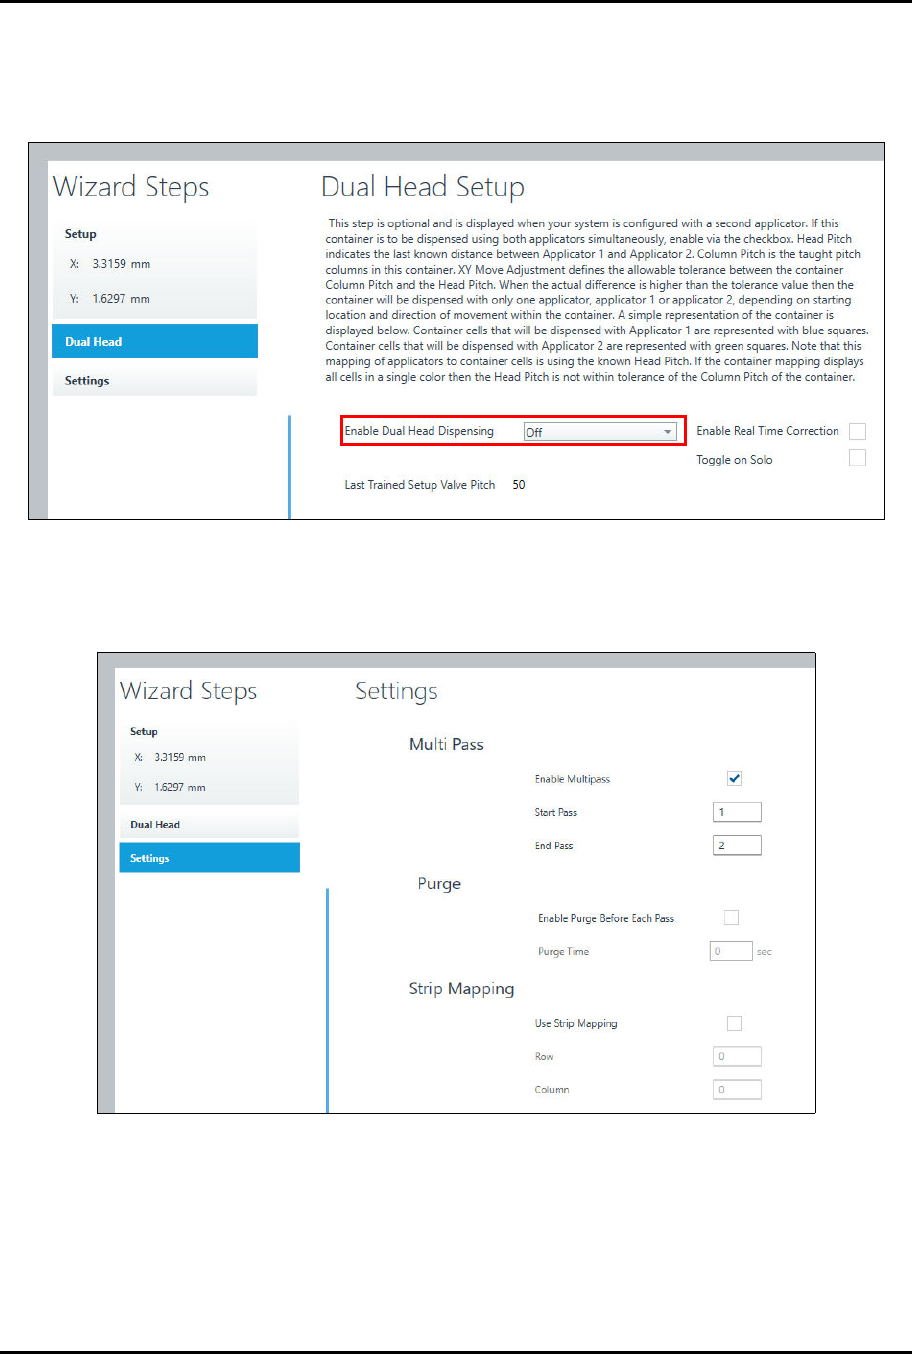
6. Click on Next.
> The Dual Head Setup window opens (Figure 4-50).
7. Make sure you set Enable Dual Head Dispensing to Off.
Figure 4-50 Place Container – Dual Head Setup
8. Click on Next.
> The Settings window opens (Figure 4-51).
Figure 4-51 Place Container – Settings
ForteMAXDispensingSystemAddendum Recipe Creation
50 © 2023 Nordson Corporation
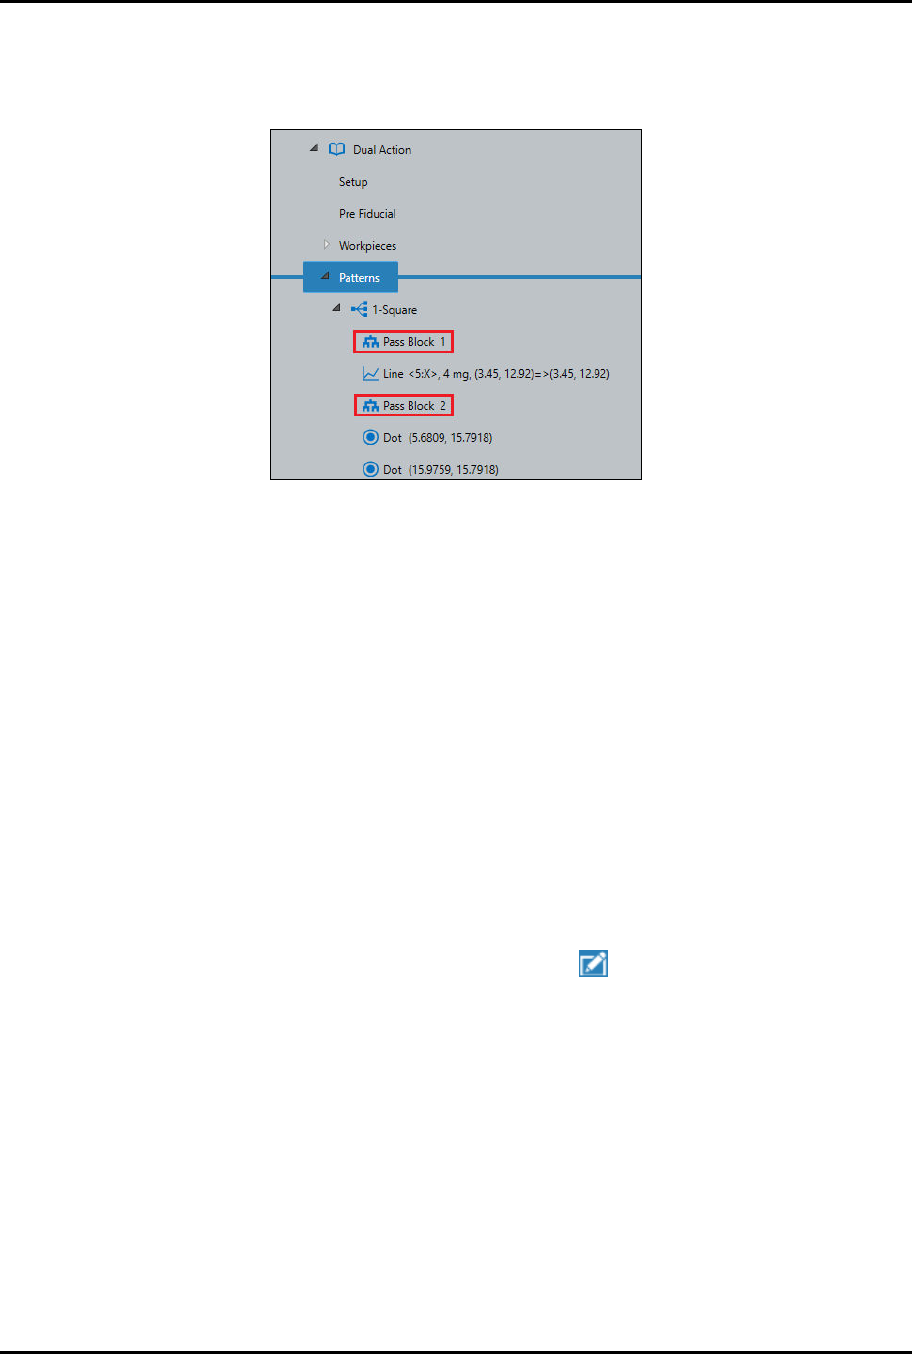
9. Because you used two pass blocks (Figure 4-52) in the program, you must select Enable
Multipass in the Settings window.
10. Enter 1 in the Start Pass field and enter 2 in the End Pass field.
Figure 4-52 Pass Blocks
11. If desired, select Enable Purge Before Each Pass.
12. Click on Done when finished.
> A "Do (Container Name)" instruction appears in the Recipe Tree.
> You will return to the Recipe Editor.
13. Repeat Step 1 through Step 12 for the remaining three containers.
> To save time, you may duplicate the container instead, see Step 14.
14. If desired, duplicate the container by performing the following steps:
a.
Right click on the "Do Rectangle" instruction and select Copy.
b.
Right click on the "Do Rectangle" instruction again and select Paste.
c.
Repeat Step 14b two (2) more times until there are four (4) "Do Rectangle" instructions.
d.
After you have pasted the instructions, you need to edit the starting point for the
additional containers.
e.
Select the first duplicated instruction and click on .
> The Place Container Setup window opens.
f.
Jog the camera crosshairs to the container starting point and click on Teach.
g.
Click on Done when finished.
h.
Repeat Step 14e through Step 14g for the remaining containers.