Forte Max Manual.pdf - 第55页
ForteMAXDispensingSystemAddendum Recipe Creation © 2023 Nordson Corporation 51 15. When finished, there will be four (4) "Do Rectangle" instructions in the Recipe Tree (Figure 4-53). > All four (4) conta…
ForteMAXDispensingSystemAddendum Recipe Creation
50 © 2023 Nordson Corporation
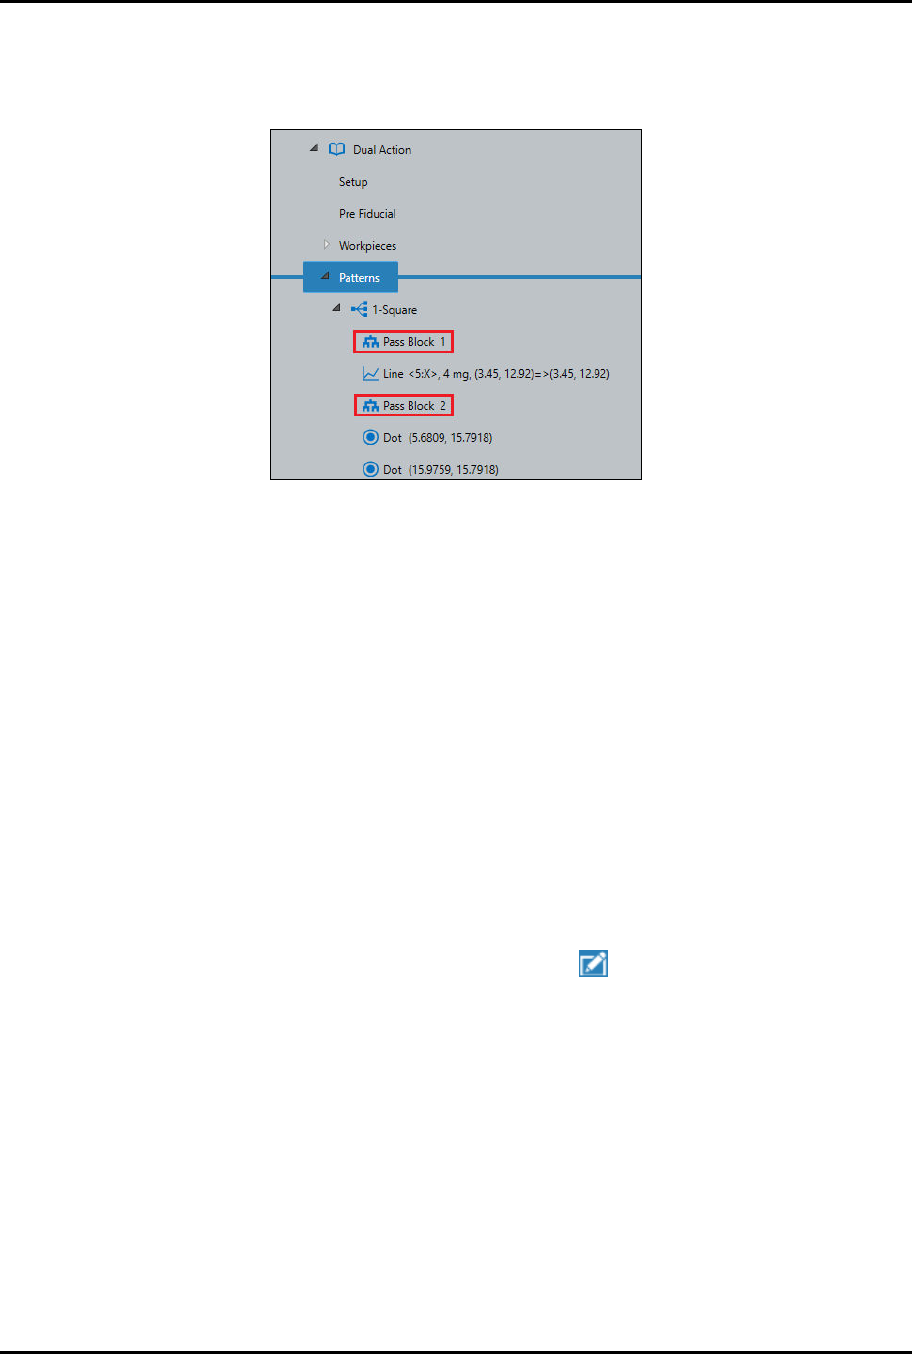
9. Because you used two pass blocks (Figure 4-52) in the program, you must select Enable
Multipass in the Settings window.
10. Enter 1 in the Start Pass field and enter 2 in the End Pass field.
Figure 4-52 Pass Blocks
11. If desired, select Enable Purge Before Each Pass.
12. Click on Done when finished.
> A "Do (Container Name)" instruction appears in the Recipe Tree.
> You will return to the Recipe Editor.
13. Repeat Step 1 through Step 12 for the remaining three containers.
> To save time, you may duplicate the container instead, see Step 14.
14. If desired, duplicate the container by performing the following steps:
a.
Right click on the "Do Rectangle" instruction and select Copy.
b.
Right click on the "Do Rectangle" instruction again and select Paste.
c.
Repeat Step 14b two (2) more times until there are four (4) "Do Rectangle" instructions.
d.
After you have pasted the instructions, you need to edit the starting point for the
additional containers.
e.
Select the first duplicated instruction and click on .
> The Place Container Setup window opens.
f.
Jog the camera crosshairs to the container starting point and click on Teach.
g.
Click on Done when finished.
h.
Repeat Step 14e through Step 14g for the remaining containers.
ForteMAXDispensingSystemAddendum Recipe Creation
© 2023 Nordson Corporation 51
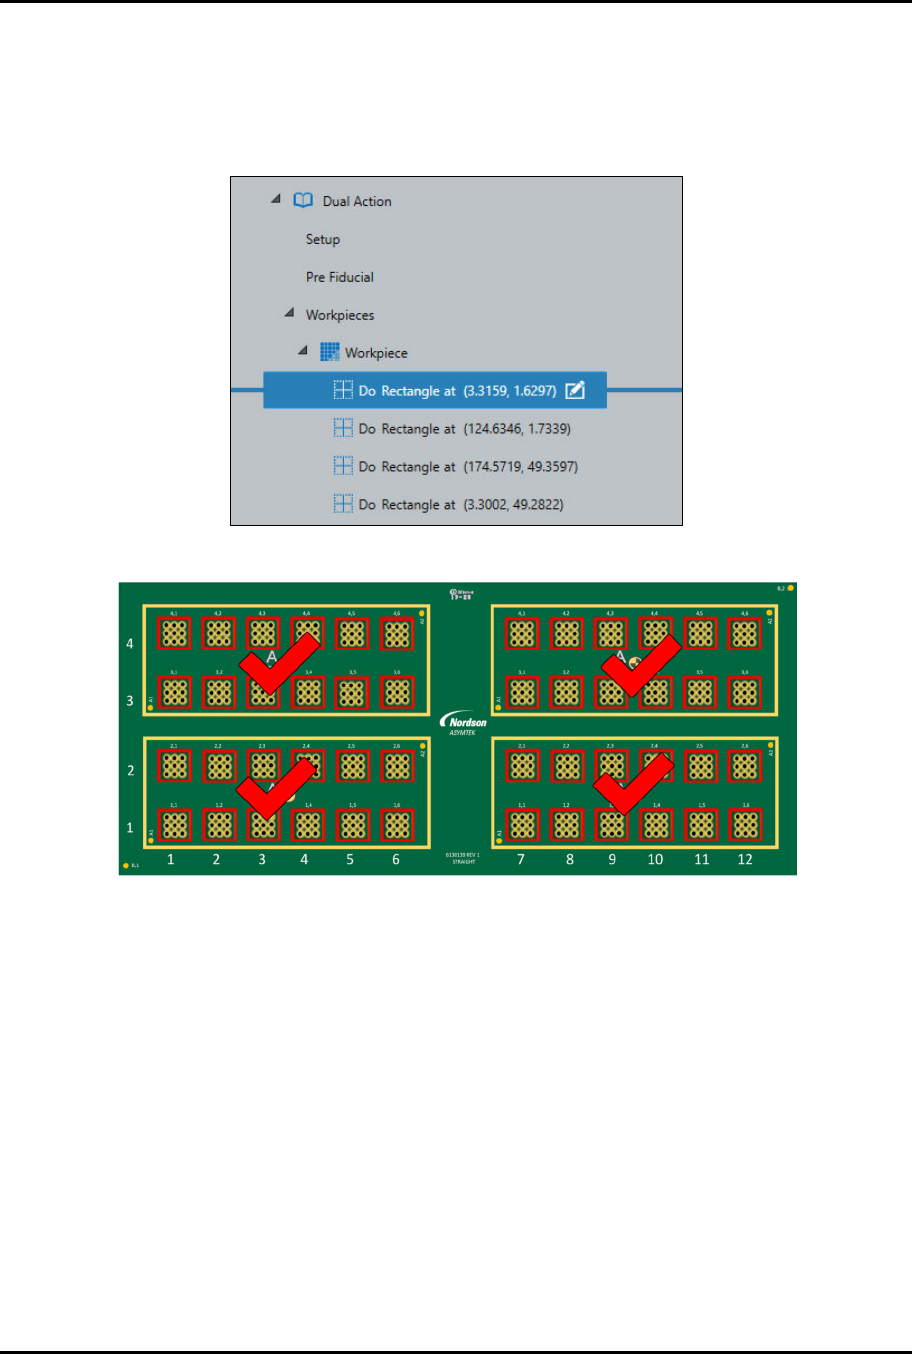
15. When finished, there will be four (4) "Do Rectangle" instructions in the Recipe Tree
(Figure 4-53).
> All four (4) containers have been placed (Figure 4-54).
> Figure 4-54 shows Applicator 1 in red dispensed squares and Applicator 2 in black
dispensed dots.
Figure 4-53 Do Rectangle Instructions
Figure 4-54 Containers Placed

ForteMAXDispensingSystemAddendum Recipe Creation
52 © 2023 Nordson Corporation
4.6 Running Production
1. Prior to running the recipe, install the dispensing fluid and perform a wet valve offsets
procedure. Refer to the Canvas Dispensing Software User Guide if necessary.
> Wet Valve Offset procedures are shown in Figure 4-55.
1
2
3
4
6
7
5
Wet Offsets
9
10
11
12
13
8
9
14
15
Dry Offsets
Wet Offsets
Figure 4-55 Setup Procedures
2. Select the Production button on the Navigation Panel to open the Production Home
screen (Figure 4-56).
3. Make sure you are in Production Mode. The Production Mode icon should appear at the
left of the screen. If the system is in Setup Mode , click the mode icon to change to
Production Mode.
4. Verify that Wet mode is selected.
Figure 4-56 Production Home Screen
5. Select Run to run the recipe.
> You can monitor the production run through the data monitors. If a monitor button is
red, attention is required.
> Some monitor tiles, such as heaters, have an ON/OFF indicator.