Tracker-2800-2800S.pdf - 第11页
11 Section 2 Using th e T rack er 2800/280 0S 2-1 Unpacking and wh at you need to get started To set up and use your Tracker 2800 or 2800S, you will need the following: One set of Microprobes (Huntron MP20). This man…

10
Quality
Huntron has been producing quality products and supporting customers all over the world for several
decades. Our products conform to our Quality Manual. For information see our Quality Statement at
www.huntron.com/corporate/docs/quality-statement.pdf.
1-5 Optional Workstations Software
The Tracker 2800/2800S can be used with Huntron Workstation Software.
Note: For instructions on installing the software, see the Getting Started document that comes with the
Huntron Tracker 2800/2800S or Huntron Workstation Software.

11
Section 2 Using the Tracker 2800/2800S
2-1 Unpacking and what you need to get started
To set up and use your Tracker 2800 or 2800S, you will need the following:
One set of Microprobes (Huntron MP20).
This manual (Tracker 2800/2800S User’s manual)
For Tracker 2800S, cables to connect to a PCB connector or DIP clip cables and clips (These
are not included)
Common test lead
Blue test lead for use with DC Voltage source
Using the unpacking list, verify that all that all pieces are included in the shipping container. Contact
Huntron immediately if pieces are missing.
12
2-2 Getting started with the Tracker 2800/2800S
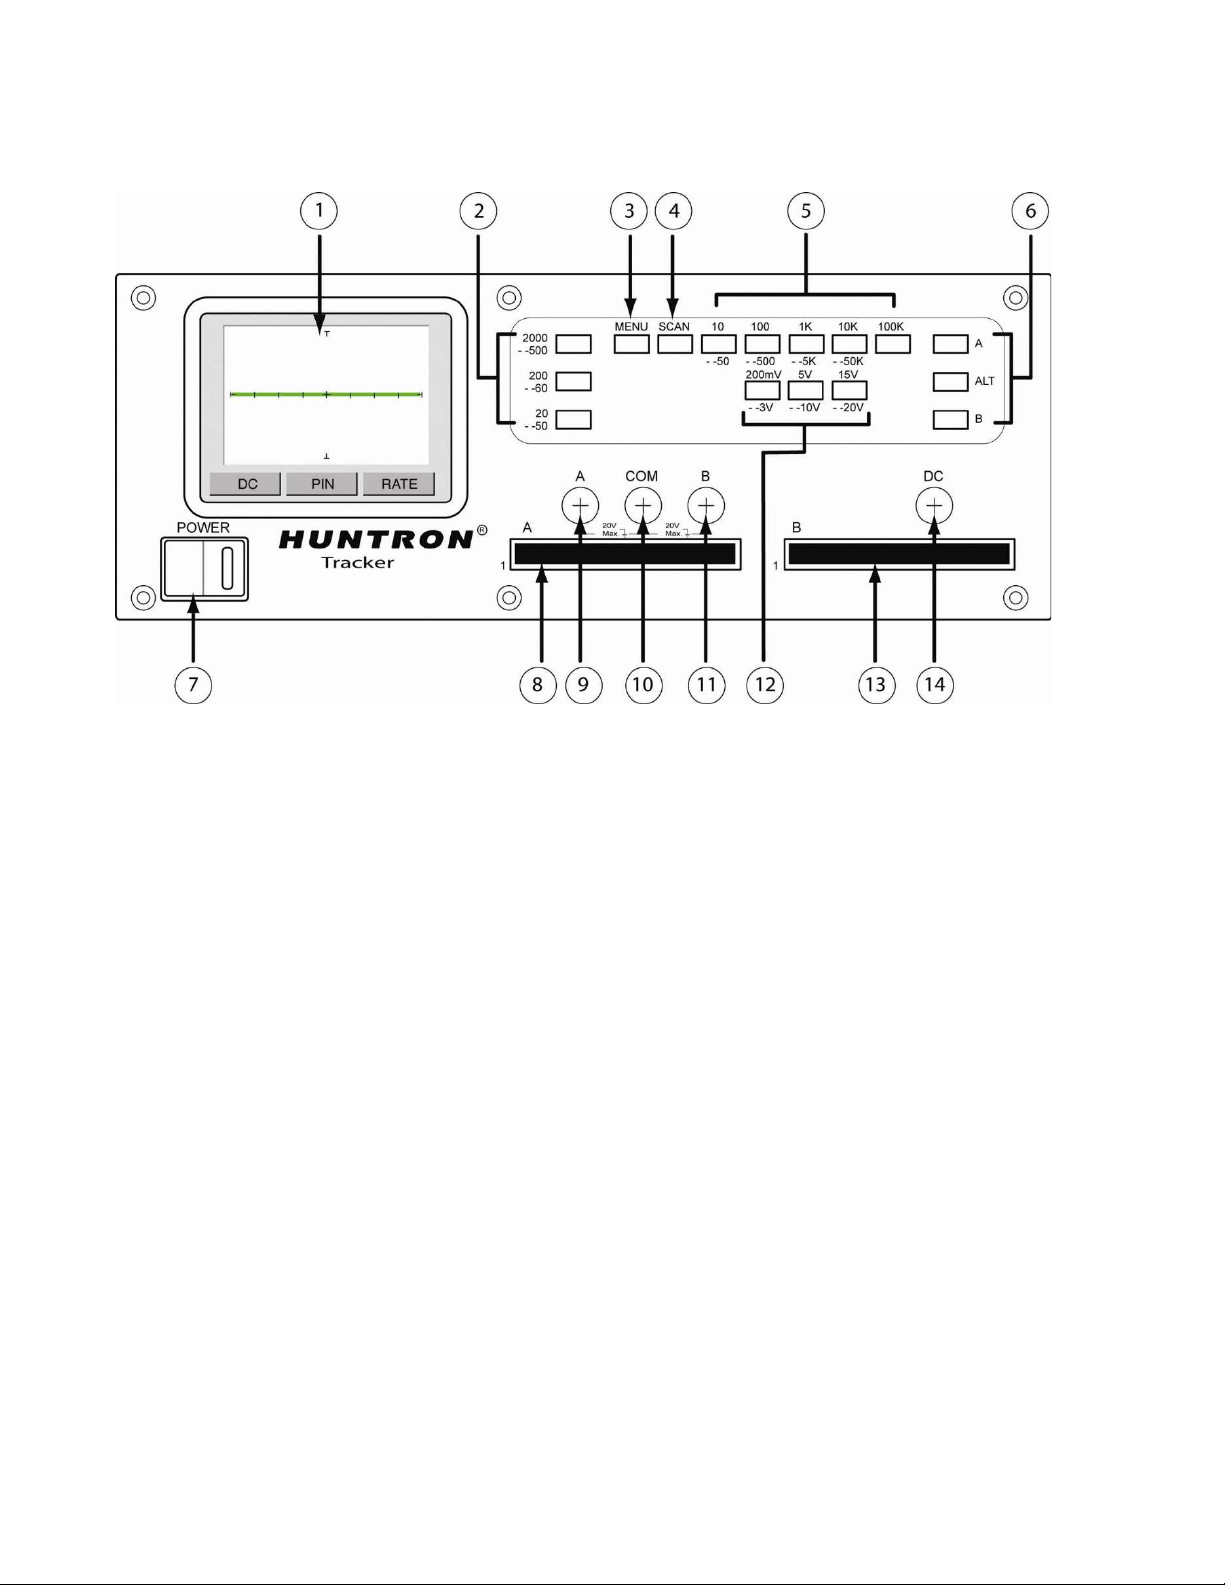
Figure 2-2 Tracker 2800/2800S Overview (Shown with “Power-up” menu on LCD)
1. LCD Display 2. Frequency buttons 3. Menu button
4. Scan button 5. Resistance buttons 6. Channel Select buttons
7. Power switch 8. Ch. A 2800S connector 9. Ch. A banana jack
10. Common banana jack 11. Ch. B banana jack 12. Voltage buttons
13. Ch. B 2800S connector 14. DC Voltage Source banana jack
Connect the Tracker 2800 or 2800S to power.
Turn the Tracker 2800 ON using the front panel power switch. The “Power-up” menu will be
displayed on the LCD touch screen.
Insert your Huntron Microprobes into the shrouded banana jacks marked Channel A (or
Channel B) and Common as shown in Figure 2-3. Typically, the red Microprobe lead will be
used in the Channel A (or B) connection and the black Microprobe used in the Common
connection.
Proceed to test components on a powered off circuit board by holding the tips of the test probes
to the component pins.
Touching the signature area on the LCD touch screen will toggle from full screen signature
display to signature display with text information. NOTE: Use only your fingers to activate
the Tracker touch screen. Using pens, probes or any sharp device can result in damage to
the screen.