00192662-01.pdf - 第142页
3 Introduction and Basic Concepts User Manual SIPLA CE F5/F5 HM 3.3 User Interfac e - Views and Menus Software v ersion SR.407.xx 01/2001 US Edition 142 Access level... 3 It is possi ble to pr otect som e user inte rface…
User Manual SIPLACE F5/F5 HM 3 Introduction and Basic Concepts
Software version SR.407.xx 01/2001 US Edition 3.3 User Interface - Views and Menus
141
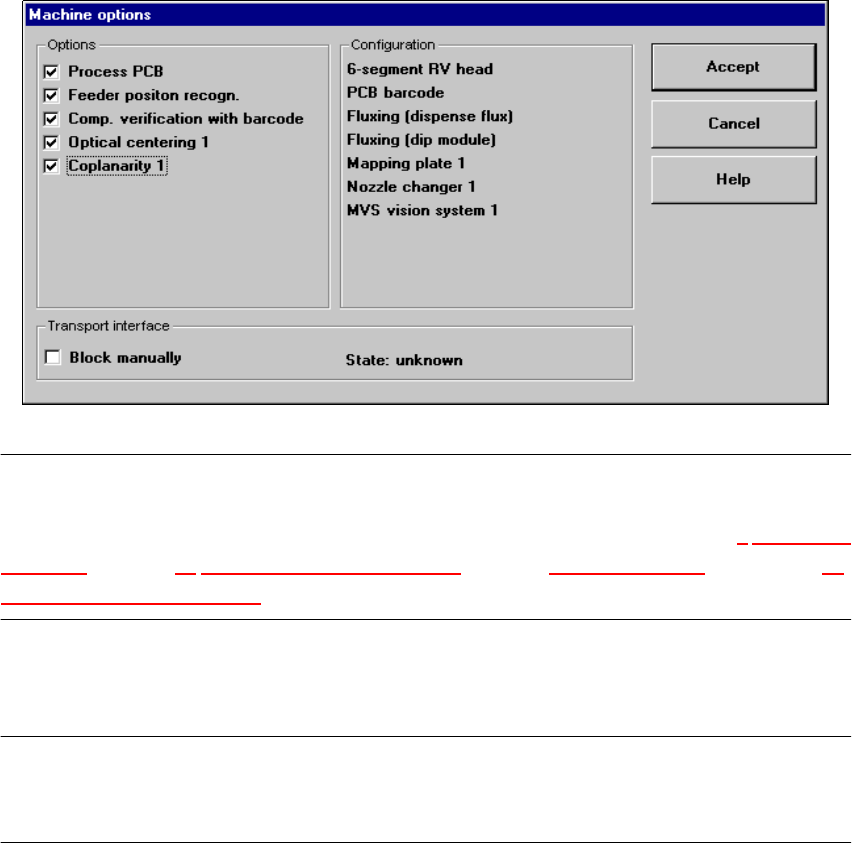
Machine options... 3
Depending on access level, you can obtain information about the station configuration ("Opera-
tor") or activate or deactivate the displayed machine options ("Line engineer", "Service"). 3
Å Click the menu item Machine options...
The following window is displayed.
3
NOTE
Only those machine options are displayed which are configured at the current station.
The different machine options and the associated functions are described in Chapter 4
Placement
Functions, Chapter 11 Station extensions /Hardware, Chapter 6 Vision functions and chapter 12
Station Extensions - Software. 3
Å Click the checkboxes corresponding to the machine options which you want to activate or de-
activate.
NOTE
At "Operator" access level, it is only possible to activate and deactivate the conveyor interface op-
tions. 3
3 Introduction and Basic Concepts User Manual SIPLACE F5/F5 HM
3.3 User Interface - Views and Menus Software version SR.407.xx 01/2001 US Edition
142
Access level... 3
It is possible to protect some user interface functions against unauthorized use by setting an ac-
cess level and allocating a password. Functions which are not accessible from a given access
level cannot be executed since the associated push-button, radio buttons and menu commands
are either inactive or not displayed. 3
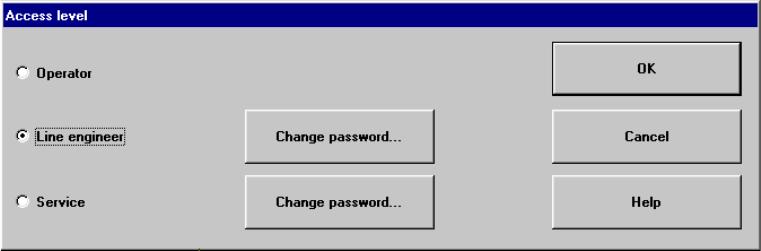
You can choose between the access levels "Operator", "Line engineer" and "Service". Passwords
can be allocated for the access levels "Line engineer" and "Service". 3
Å Click the menu item Access level ...
The "Access level" dialog box is opened.
3
Å Click the radio button for the required access level.
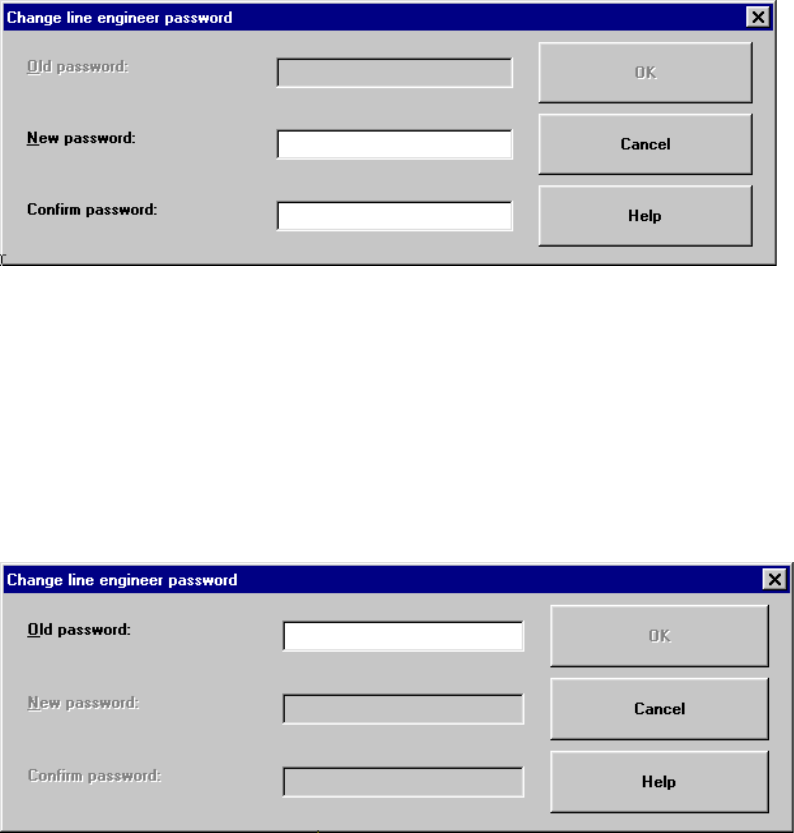
Å Click the "Change password" button to the right of the access level if you want to allocate a
password or change an existing password.
The dialog box for password entry is now displayed.
3
User Manual SIPLACE F5/F5 HM 3 Introduction and Basic Concepts
Software version SR.407.xx 01/2001 US Edition 3.3 User Interface - Views and Menus
143
Example of initial password allocation 3
3
Å Click the "New password" text box and enter the required password.
Å Click the "Confirm password" text box and re-enter the password.
Å Click the OK button to confirm the password.
3
Example for the modification of an existing password 3
3
Å Click the "Old password" text box and enter the current password.
The other two text boxes now become active.
Å Click the "New password" text box and enter the new password.
Å Click the "Confirm password" text box and re-enter the new password.
Å Click the OK button to confirm the password.
Å Click OK to close the "Access level" dialog box.