DFD6361-Maintenance.pdf - 第678页
F-108 5-1-4. Com pletion of replaci ng the consum able parts of the spinner hi gh-pressure p ump Procedur es for compl etion of r eplacing the co nsumable parts of the spi nner hig h-pressure pum p W ARNING If you op era…
F-107
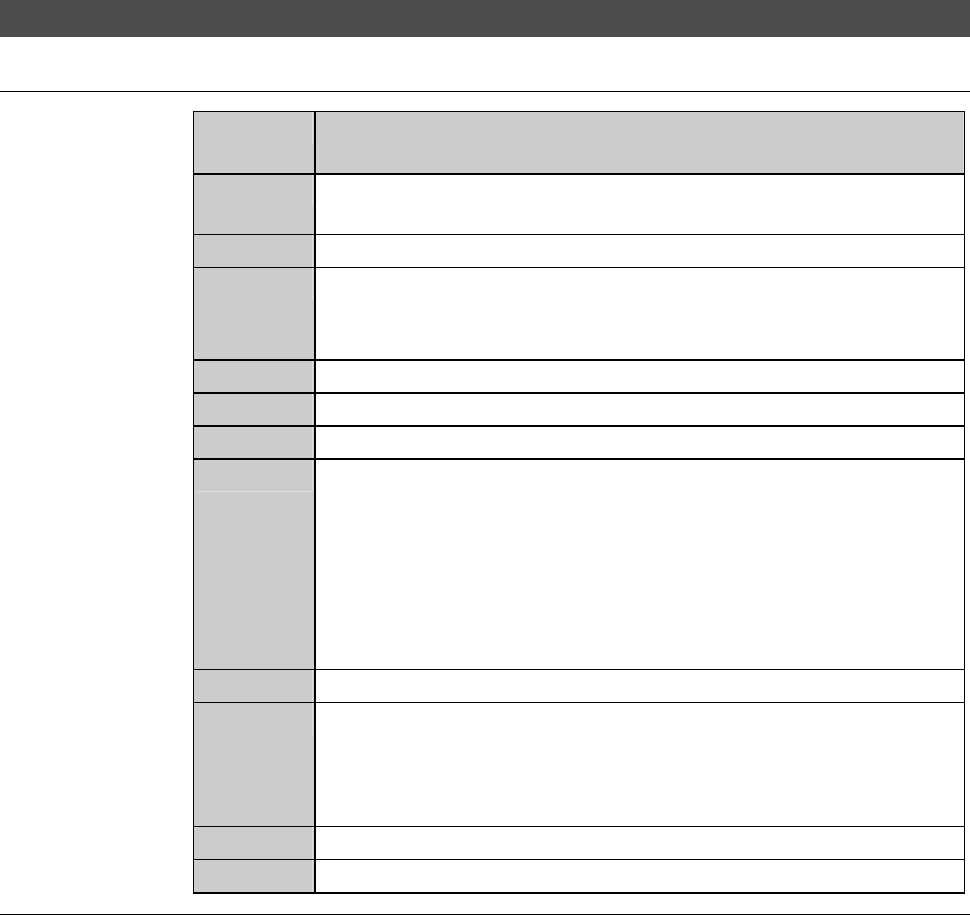
5-1-3-3. Assembling the spinner high-pressure pump
Procedures for assembling the spinner high-pressure pump
Step No. Do This
(Continued from the previous section)
1
Apply the methanol or deionized water to the mating surface
between the cap seal [31] and U-packing [33] to improve slip.
2
Mount the backup ring [23] to the retainer [14].
3
Mount the retainer [14] to the piston rod [13].
- Make sure to mount the retainer straight in to prevent the piston
rod [13] from being scratched.
4
Mount the cap seal [31] to the piston [12].
5
Mount the piston [12] to the piston rod [13].
6
Mount the piston collar [10] to the piston rod [13].
7
Mount the piston lock nut [9] to the piston rod [13].
- Since the employed lock nut is a double nut, tighten the two
nuts with two wrenches.
- Tighten the nut horizontally and uniformly.
- In mounting the piston lock nut [9], be careful to keep the
piston rod [13] from contact with the retainer [14], so that they
do not receive flaws.
8
Mount the lock nut [2].
9
Mount the cylinder [8].
- Do not touch the cylinder inner surface directly by hand.
- The inside of the cylinder is non-oil specification. Do not apply
grease.
10
Mount the end cap [1].
11
Tighten and secure the hex nut [25].
Continued in the next section.
F-108
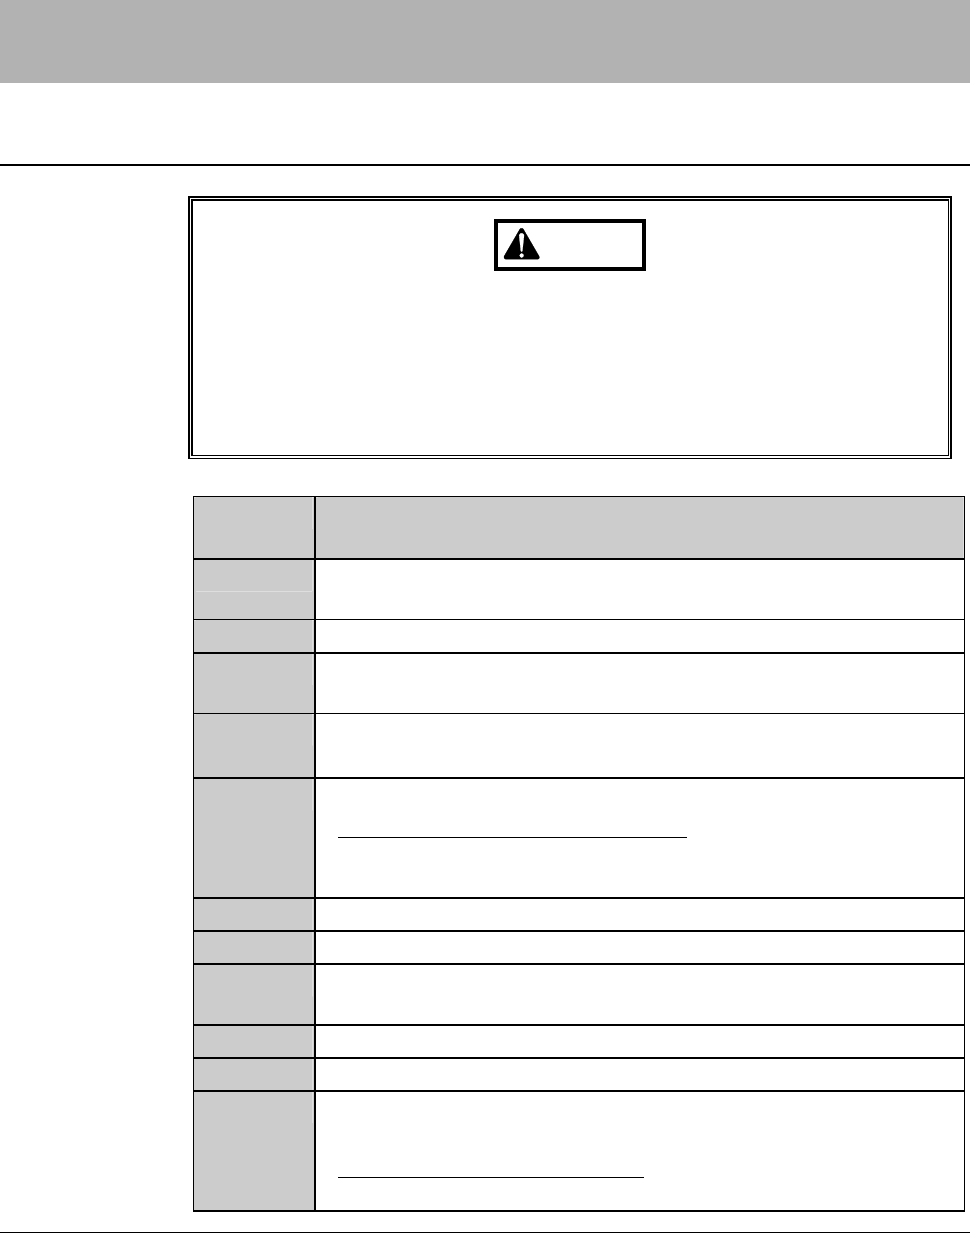
5-1-4. Completion of replacing the consumable parts of the
spinner high-pressure pump
Procedures for completion of replacing the consumable parts
of the spinner high-pressure pump
WARNING
If you operate the machine while its interior is wet with water, you
may receive electric shock that could result in serious injury or death.
If the machine is wet with water, do not turn ON the facility power
supply until it dries.
If the floor is wet with water, turn OFF the facility power supply and
wipe the floor dry.
Step No. Do This
(Continued from the previous section)
1
Make sure that neither the machine interior nor the floor is wet
with water.
2
Reinstall the spinner high-pressure pump.
3
Connect the piping of the spinner high-pressure pump in their
original positions.
4
Connect the joints in their original position.
- The joints should be connected in a horizontal position.
5
Reinstall the covers [H] and [S]..
- For the cover installation procedure;
See the section B-1-6, [Mounting Machine Outer Covers] of
Installation Manual.
6
Turn ON the facility power source.
7
Open the facility main valves of air and the cleaning water
8
Open the circuit breaker lever lockout and turn ON the circuit
breaker.
9
Insert the key into the main switch and turn ON the main switch.
10
Press the <System Initial> button to effect system initialization.
11
Performthemanualcleaningproceduretomakesurethatno
water leakage occurs in the machine.
- When the water leakage occurs;
Repeat the steps 5-1-1 through 5-1-4 of this chapter.
F-109
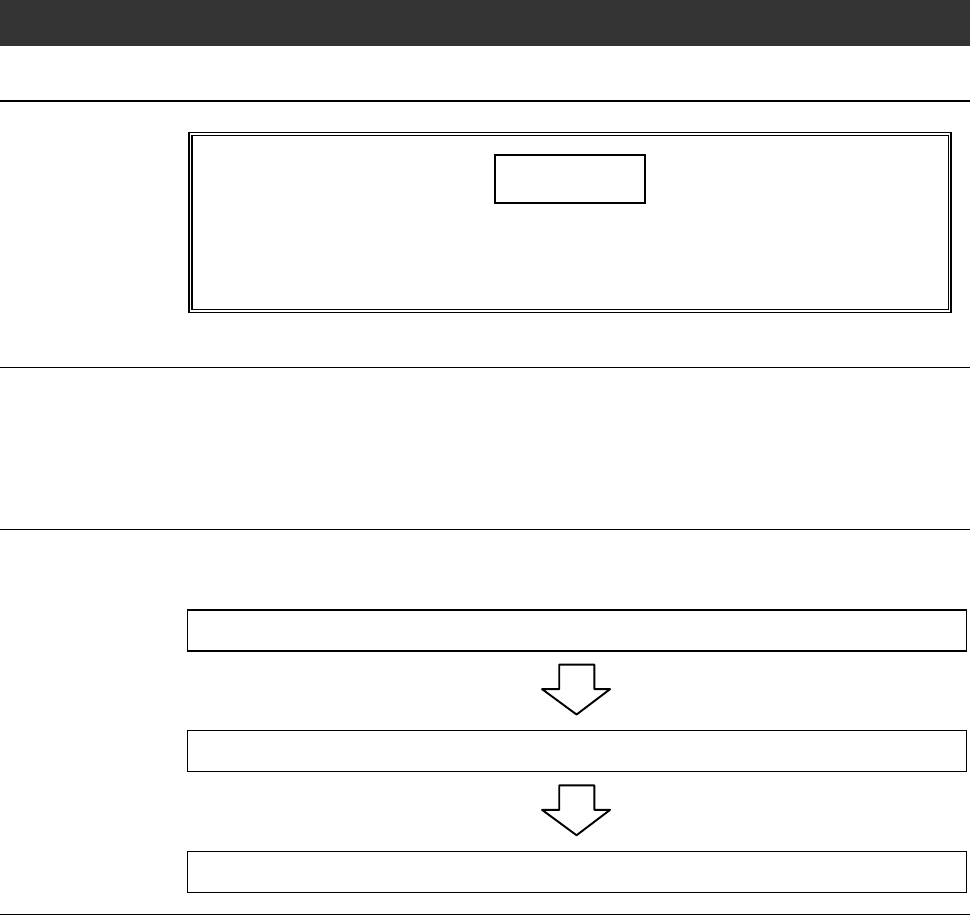
5-2. Replacing the Fluorescent Lamp
Safety items for replacing the fluorescent lamp
NOTICE
The fluorescent lamps are consumables. When you replace them,
turn OFF the machine.
Also, use a DISCO-designated fluorescent lamp.
Replacement timing of the fluorescent lamp
When the fluorescent lamp is used for long hours, the illumination ability will
be degraded.
When the end of the lamp becomes black, replace the lamp.
Operation flow
The procedure for replacing the fluorescent lamp consists of the following
steps.
5-2-1 Preparation of replacing the fluorescent lamp
5-2-2 Replacing the fluorescent lamp
5-2-3 Completion of replacing the fluorescent lamp