Infinity EX Transportation.pdf - 第46页
INFINITY EX TRANSPORT ATION PRE INSTALLAT ION CHECK S 31.4 6 Technical Reference Manual Chapter Issue 3 Jan 04 Figure 31-13 Drop N T ell Shockwatch Shock W atch Replacement On completion of correctiv e action, replace an…
INFINITY
EX
TRANSPORTATION
PRE INSTALLATION CHECKS
Chapter Issue 3 Jan 04 Technical Reference Manual 31.45
PRE INSTALLATION CHECKS
Having removed the transit brackets and located the machine in position, prepare
to install the machine, as follows:
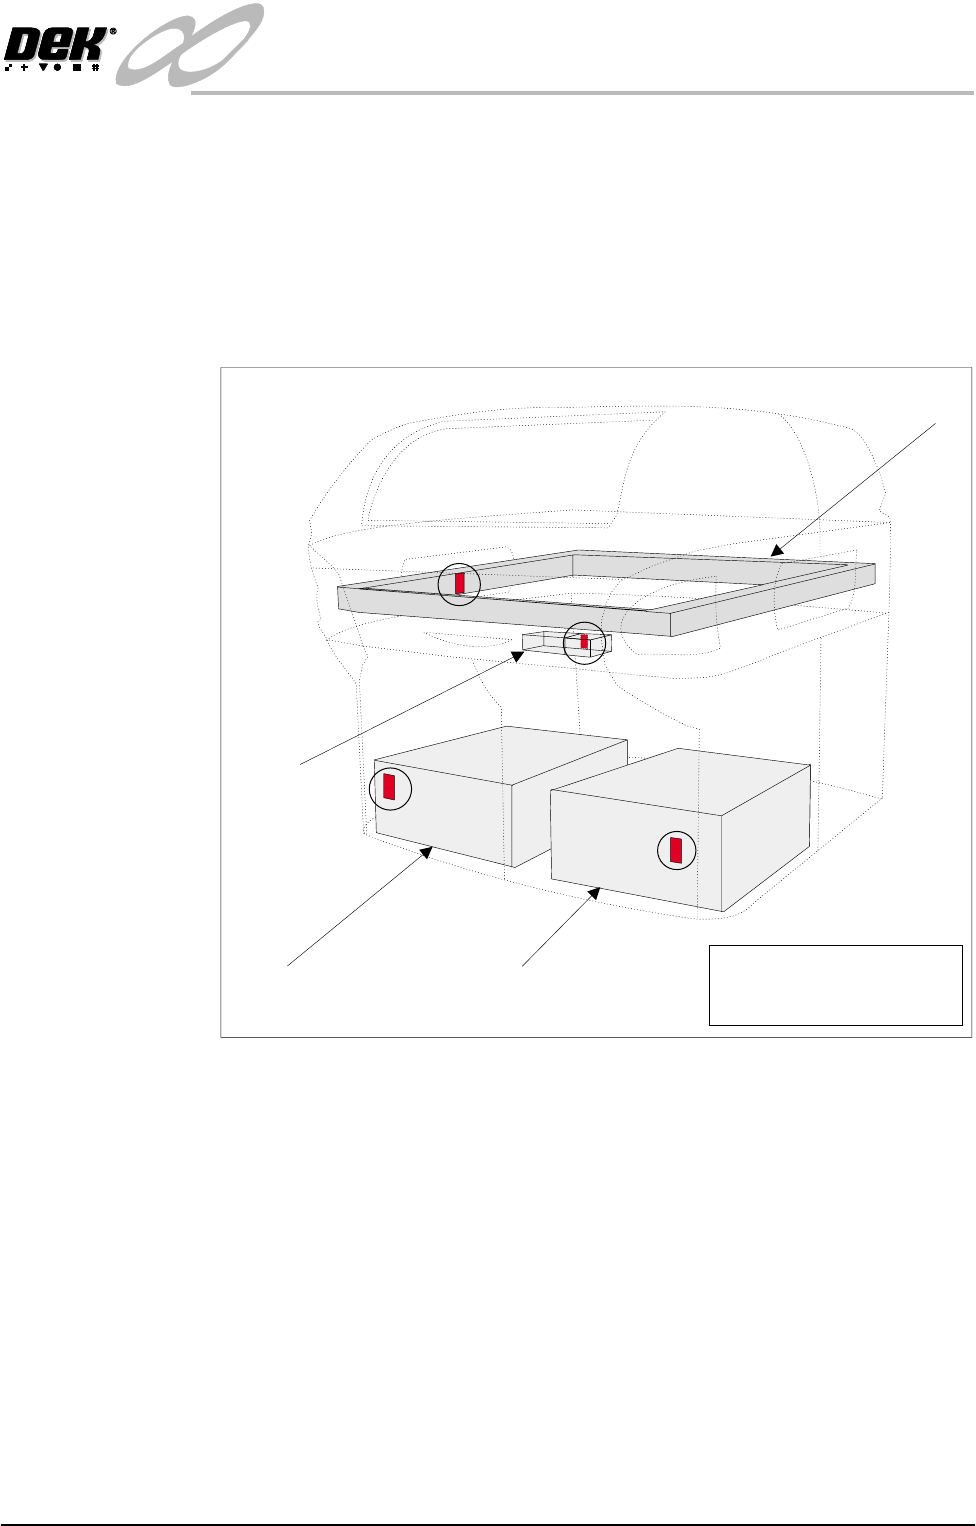
Shock Watches A self adhesive shock watch (DEK Part No. 133517), is fitted in the vertical
plane on the machine in four places (Shock Watch Locations figure refers).
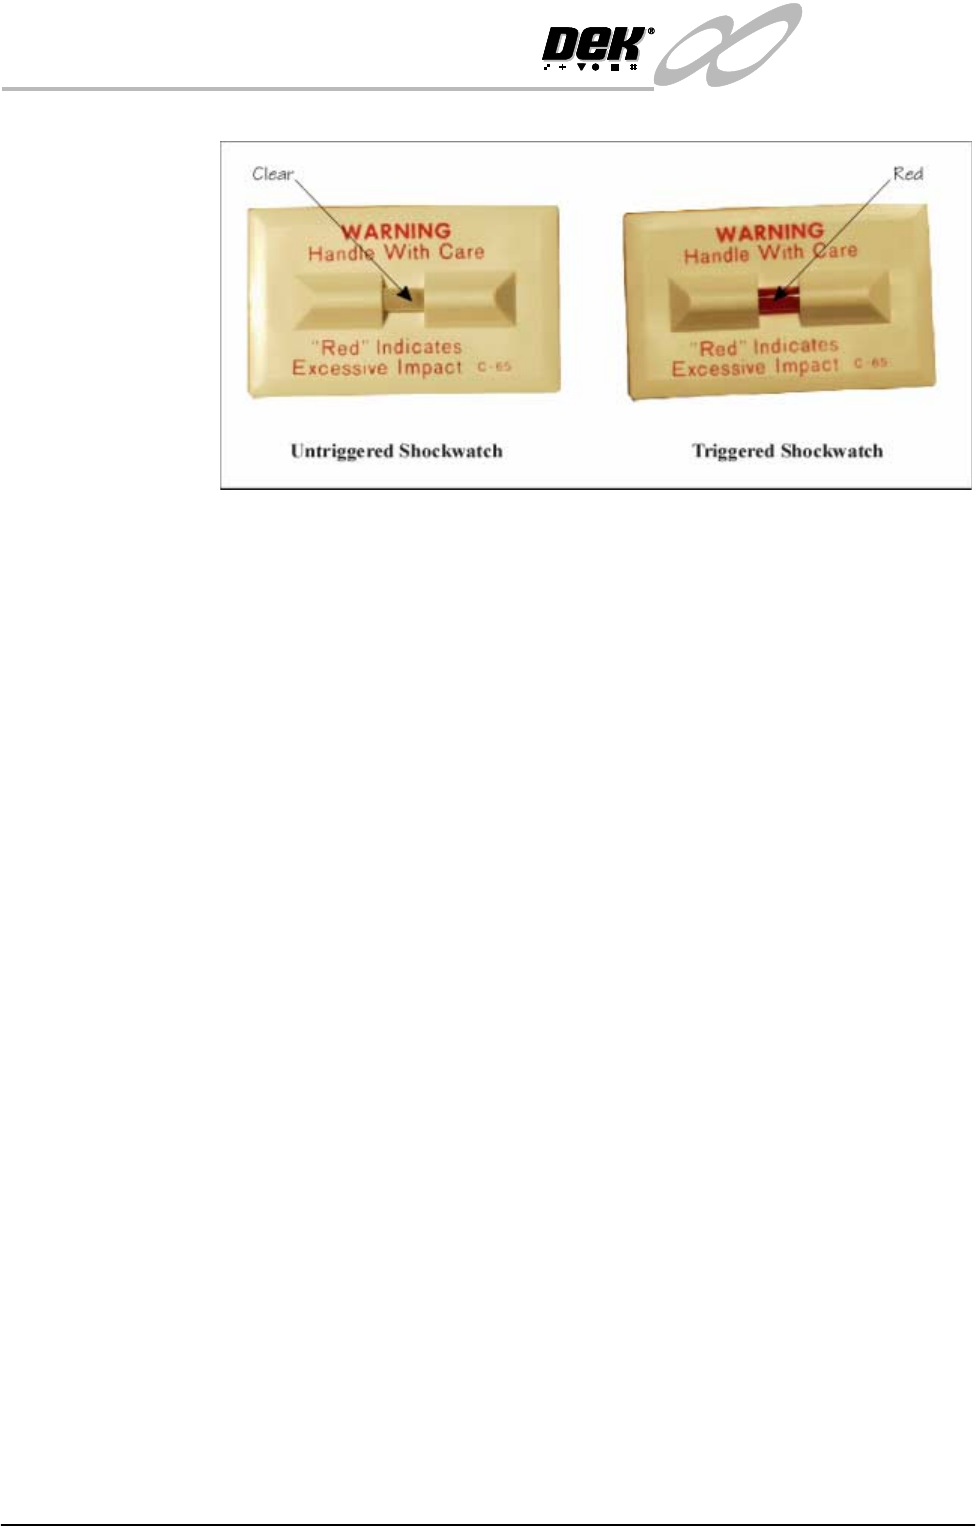
Check if the shock watches have been triggered, the indicator shows red, ('Drop
N Tell' Shockwatch figure refers).
Figure 31-12 Shock Watch Locations
Camera Shock
Watch
If the camera shock watch has triggered, ensure that the camera is secure and
level on the camera mount (refer to the Camera and Vision System Module
Chapter).
Machine PC Shock
Watch
If the machine PC shock watch has triggered, visually inspect the inside of the
PC and ensure that the cards are seated correctly.
Machine Controller
Shock Watch
If the machine controller shock watch has triggered, visually inspect the machine
controller to ensure that the cards are seated correctly.
Chase Shock Watch If the chase shock watch has triggered, visually inspect the chase is level to the
table.
Machine PC Machine Controller
Camera
Chase
NOTE
Shock Watches (4 positions)
shown circled
INFINITY
EX
TRANSPORTATION
PRE INSTALLATION CHECKS
31.46 Technical Reference Manual Chapter Issue 3 Jan 04
Figure 31-13 Drop N Tell Shockwatch
Shock Watch
Replacement
On completion of corrective action, replace any triggered shock watches.
NOTE
The machine should be fitted with four untriggered shock watches at all times.
Preparations 1. Ensure machine mains isolator is OFF.
2. Connect the pneumatic supply to the connection on the external services
panel.
NOTE
Do not connect electrical supply to the machine until the electrical services
available have been verified.
3. Ensure the machine transformer is tapped to the nearest selectable voltage
within the following limits:
• 100V, 110V, and 120V ±5%
• 200V, 210V, 220V, 230V and 240V ±2.5%
NOTE
In the event that local electrical services necessitate reconfiguration, refer
to Power Supply and Distribution chapter.
The machine is able to handle ±10V variations without overloading, but
some degradation in speed may be experienced if the supply remains at -10V
or more from the tapped voltage.
4. Check that the E Stop loop is connected, either to the external machines, in
which case these machines must be powered up and operational in order for
the loop to be closed, or if the external E Stop loop is not required the dummy
plugs supplied with the machine must be connected.
5. Check that all circuit breakers are in the ON position.
6. Ensure that all access covers and removable panels are closed and are in
place.
7. Ensure that the E Stop button is in the fully out position. To check this, push
the E Stop button until it latches. Twist the button clockwise to release it.
8. Check that all of the cables for the monitor are connected.
INFINITY
EX
TRANSPORTATION
PRE INSTALLATION CHECKS
Chapter Issue 3 Jan 04 Technical Reference Manual 31.47
Machine Levelling The machine must be installed at the correct height and levelled before opera-
tion.
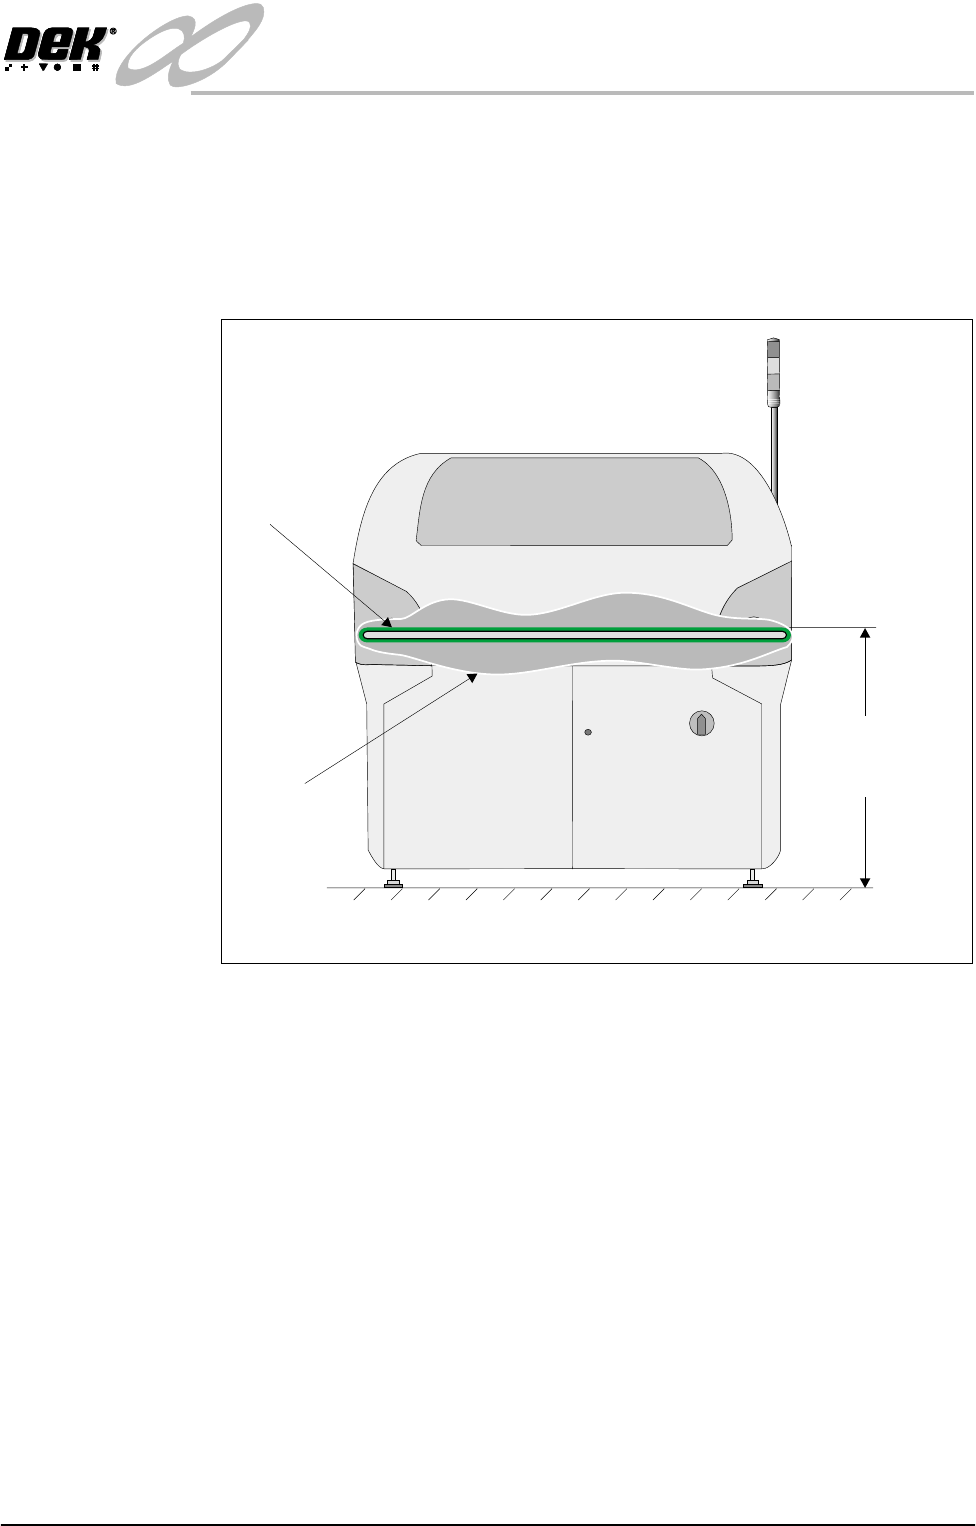
Machine Height The height of the machine is governed by the external machines that it is to be
connected to and ranges from 840mm to 980mm (depending if the feet exten-
sions are fitted). The height is measured from the floor to the top of the transport
belts. Adjust the four feet to achieve the desired height.
Figure 31-14 Machine Height
Initial Levelling When the correct height of the machine has been achieved, the four feet should
now be adjusted for correct level.
Place an Engineering level on the tooling base plate facing Left (L) - Right (R)
or Back (B) - Front (F).
By carefully adjusting each of the four feet individually, level the machine so
that in each direction, Left (L) - Right (R) and Back (B) - Front (F), 0.004” per
foot (0.32mm/metre) is achieved. Lock the feet using the lock-nuts on the
adjusters.
Check that the height has not been disturbed. Repeat until the correct height and
level are achieved.
Transport
Belt
Cutaway
Section
Height to Topof
TransportBelts
840 mm to 980 mm
View on Front of Machine