instruction-manual-product-monitoring-data-acquisition-monitouch-V9-hardware-en.pdf - 第80页
3 2. Specifications of Components 3-15 Names and Specifications of Components USB-A (Master Port) This connector is used to connect a printer, USB flash drive, barcode reader , keyboard, mouse, or USB hub. The USB-A port…
3-14 2. Specifications of Components
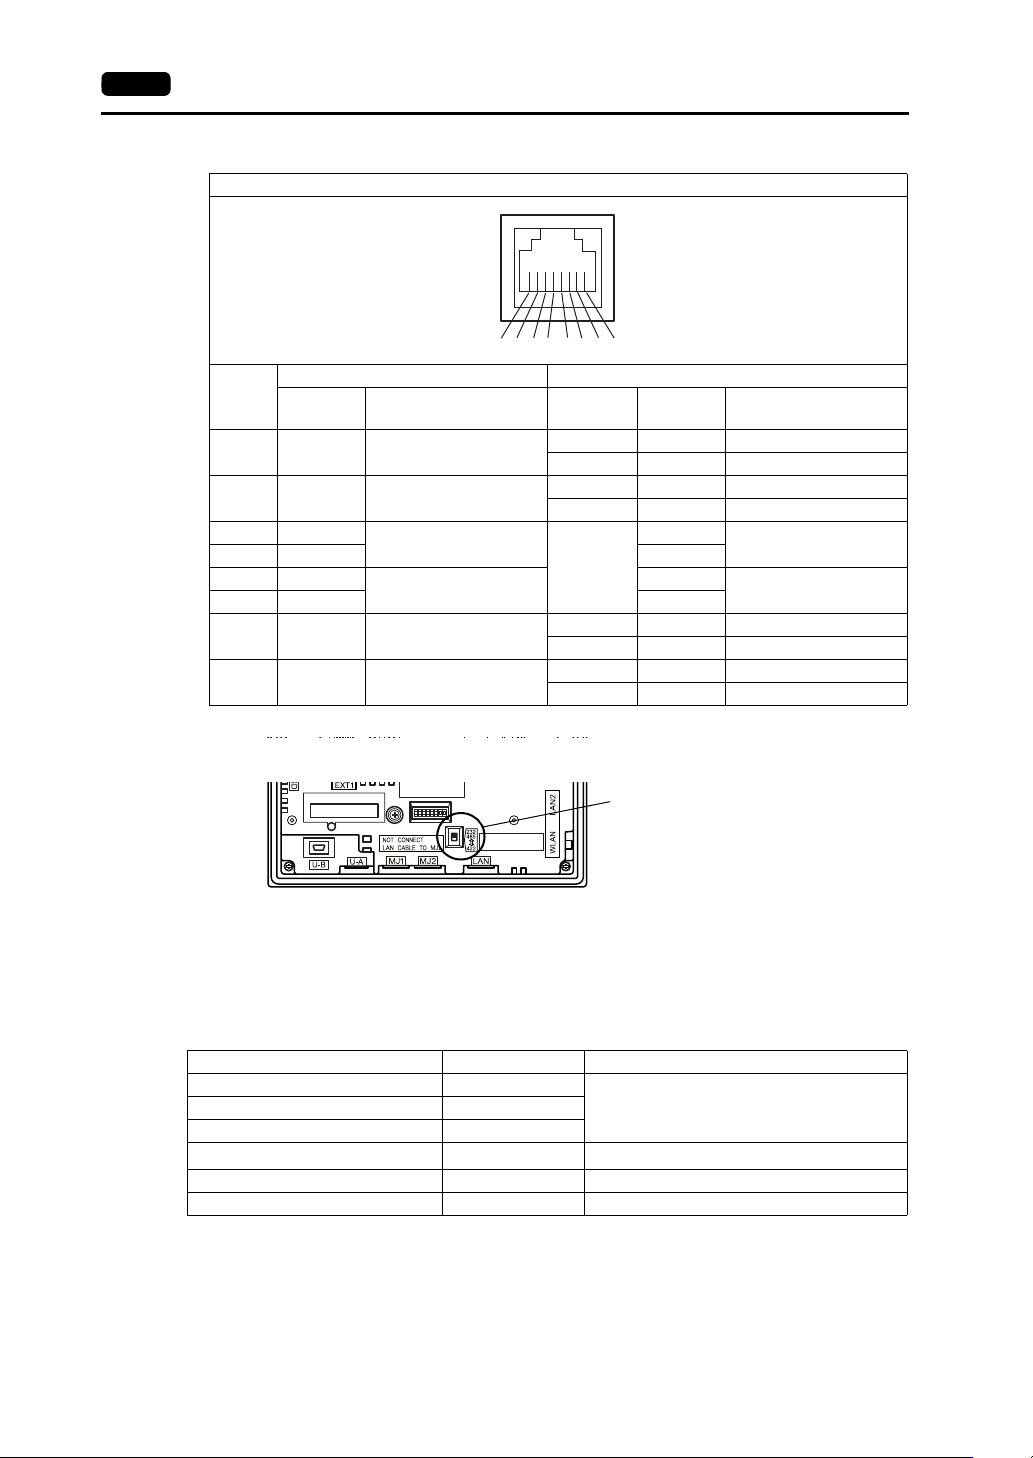
V907xiW, V9060iTD series
*1 The MJ2 sliding switch is on the rear side of the V907xiW, V9060iTD.
*2 When the mounting angle is 15 to 60, or 120 to 135, the +5 V external power supply at MJ1/MJ2 of the V9
series unit is impossible.
*3 Allowable current for the +5 V external power supply at MJ1/MJ2 of the V9 series unit
For MJ1 and MJ2, the maximum allowable current is 150 mA in total (only when the mounting angle is 60 to
120).
Applications
*1 The ladder transfer function cannot be used simultaneously with 1:n communication (multi-drop) or multi-link
communication.
MJ1/2
Pin No.
MJ1 MJ2
Signal Description
Sliding
Switch
*1
Signal Description
1 +SD/RD RS-485 + data
Up +SD/RD RS-485 + data
Down +SD RS-422 + send data
2 -SD/RD RS-485 - data
Up -SD/RD RS-485 - data
Down -SD RS-422 - send data
3+5V
Externally supplied
+5 V
*2
*3
-
+5V
Externally supplied
+5 V
*2
*3
4+5V +5V
5SG
Signal ground
SG
Signal ground
6SG SG
7 RD RS-232C receive data
Up RD RS-232C receive data
Down +RD RS-422 + receive data
8 SD RS-232C send data
Up SD RS-232C send data
Down -RD RS-422 - receive data
8 76 5 43 21
Rear view
Sliding switch (Upon delivery: Up)
Up: RS-232C, RS-485 (2-wire connection)
Down: RS-422 (4-wire connection)
Example: V907xiW
Application V-SFT-6 Setting Refer to
PLC/temperature controller connection Required
V9 Series Connection ManualBarcode reader connection Required
Multi-link/Multi-link2 communication Required
Ladder transfer function
*1
Required V9 Series Reference Manual 2
Screen program transfer Not required V9 Series Operation Manual
Printer connection Required V9 Series Reference Manual 1
3
2. Specifications of Components 3-15
Names and Specifications of Components
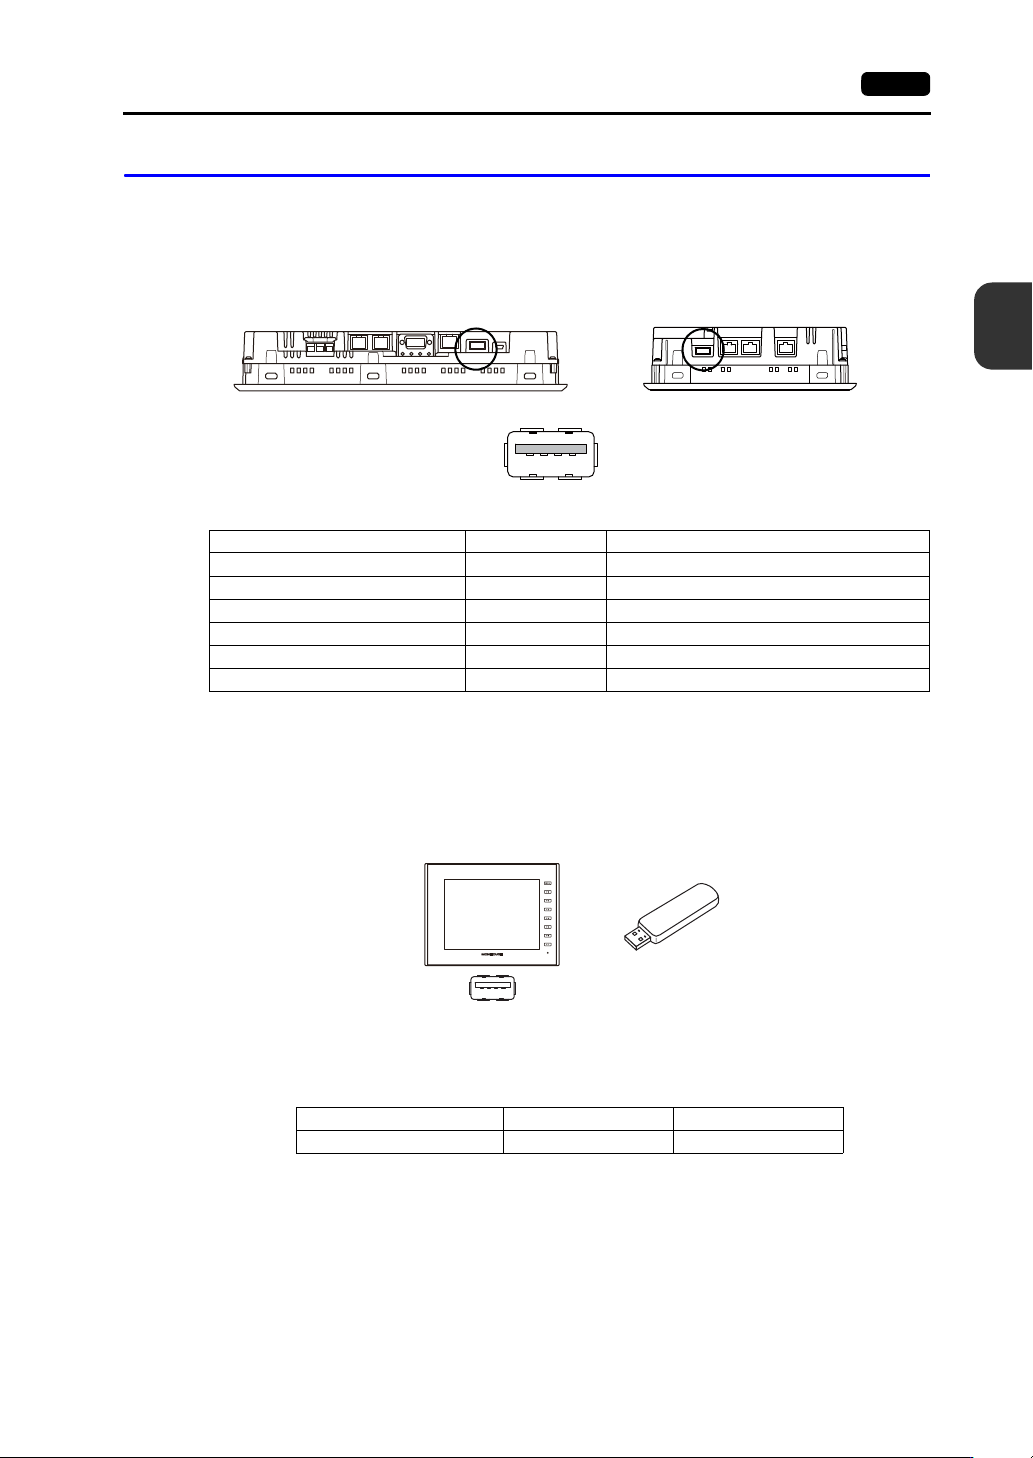
USB-A (Master Port)
This connector is used to connect a printer, USB flash drive, barcode reader, keyboard, mouse, or
USB hub. The USB-A port of the V9 unit complies with USB version 2.0.
Applications
USB Flash Drives
A USB flash drive can be connected to the V9 series unit to perform operations including screen
program transfers or saving of log data.
Connection Example
USB Flash Drive Specifications
The type of USB flash drives that can be used with the V9 series are shown below.
V-SFT-6 Setting
Required settings vary according to the application.
For more information, refer to V9 Series Reference Manual 2.
Bottom view Bottom view
V9100 V907xiW
Enlarged view
Application V-SFT-6 Setting Refer to
Printer connection Required V9 Series Reference Manual 1
USB flash drive connection Required See page 3-15.
Barcode reader connection Required V9 Series Connection Manual 3
Keyboard/numeric keypad connection Required See page 3-16.
Mouse connection Not required See page 3-17.
USB hub connection Not required See page 3-18.
Storage Capacity File System
USB flash drive 32 GB max. FAT, FAT32
USB-A
V9
USB flash drive
3-16 2. Specifications of Components
Notes on Handling a USB Flash Drive
1. When removing the USB flash drive, select [Storage Removal] in the system menu, or press the
[Storage Removal] switch.
2. Do not turn off power to the unit when the USB flash drive is being accessed.
3. Make a backup copy of the USB flash drive at regular intervals.
4. If a disk error occurs and data read/write operations are disabled, execute ScanDisk on Windows
and try to restore the disk.
If the disk cannot be restored, format the device. Note that formatting will completely erase all
stored data. (For information on executing ScanDisk on Windows, refer to the relevant Windows
manual.)
5. USB flash drives have a limited number of write cycles. Consequently, frequent writing at short
intervals may shorten the service life of USB flash drives. When using a USB flash drive to save
logging/alarm data, take the logging time/monitoring intervals into consideration. Also, avoid
repeated writing using the CYCLE macro command.
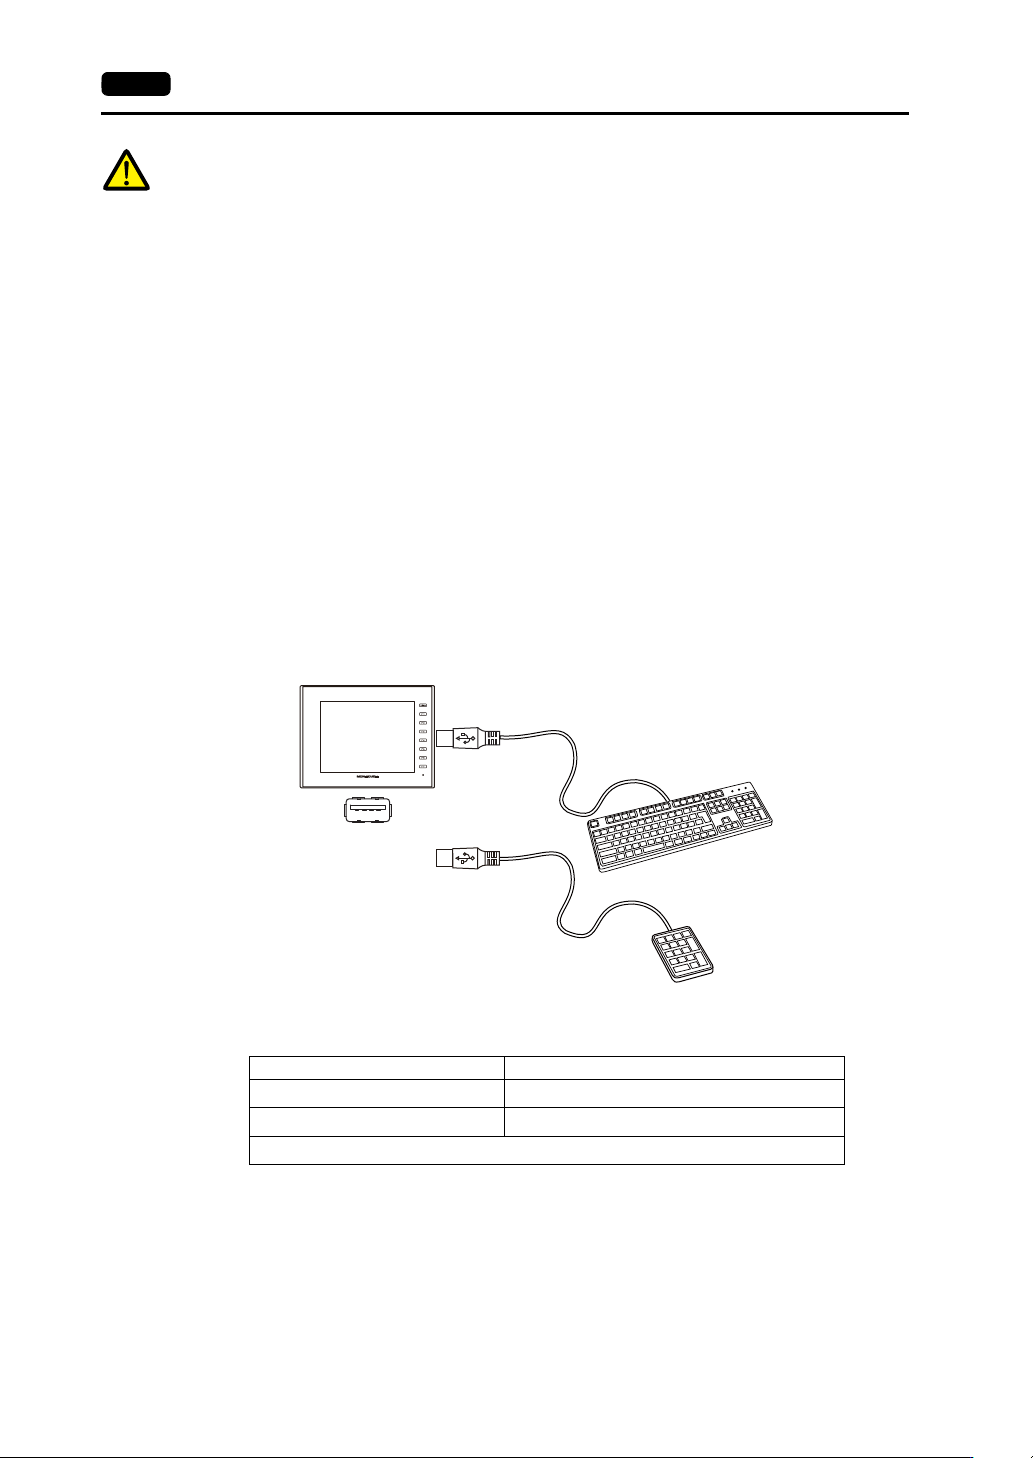
Keyboard and Numeric Keypad
Numeric values and characters can be entered by connecting a keyboard or numeric keypad to the V9
series unit.
Connection Example
Compatible Keyboards
V-SFT-6 Setting
An [Entry] icon must be registered on the screen where the keyboard is to be used.
In addition, setting of the numerical data or character display parts of [Entry Target] selected under
[Function] is required.
For details, refer to the V9 Series Reference Manual 1.
Type Description
Japanese keyboard 106 keyboard, 109 keyboard, etc.
US standard keyboard 101 keyboard, 104 keyboard, etc.
Numeric keypad
USB-A
V9
Keyboard
or
Numeric keypad