instruction-manual-product-monitoring-data-acquisition-monitouch-V9-hardware-en.pdf - 第94页
3 2. Specifications of Components 3-29 Names and Specifications of Components Audio Output Connector (AUDIO) (V910xiW/Standard Models Only) This terminal is used for audio output. * An extern al speaker with a built-in a…
3-28 2. Specifications of Components
Notes on SD Card Handling
1. The SD card access LED flashes red when the SD card is being accessed. Do not remove the SD
card while the LED is flashing. Doing so may destroy data on the SD card.
2. When removing the SD card, check that the SD card access LED has turned off, then select
[Storage Removal] in the system menu, or press the [Storage Removal] switch.
3. Do not turn off power to the unit when the SD card is being accessed.
4. Make a backup copy of the SD card at regular intervals.
5. If a disk error occurs and data read/write operations are disabled, execute ScanDisk on Windows
and try to restore the disk.
If the disk cannot be restored, format the device. Note that formatting will completely erase all
stored data. (For information on executing ScanDisk on Windows, refer to the relevant Windows
manual.)
6. SD cards have a limited number of write cycles. Consequently, frequent writing at short intervals
may shorten the service life of SD cards. When using an SD card to save logging/alarm data, take
the logging time/monitoring intervals into consideration. Also, avoid repeated writing using the
CYCLE macro command.
3
2. Specifications of Components 3-29
Names and Specifications of Components
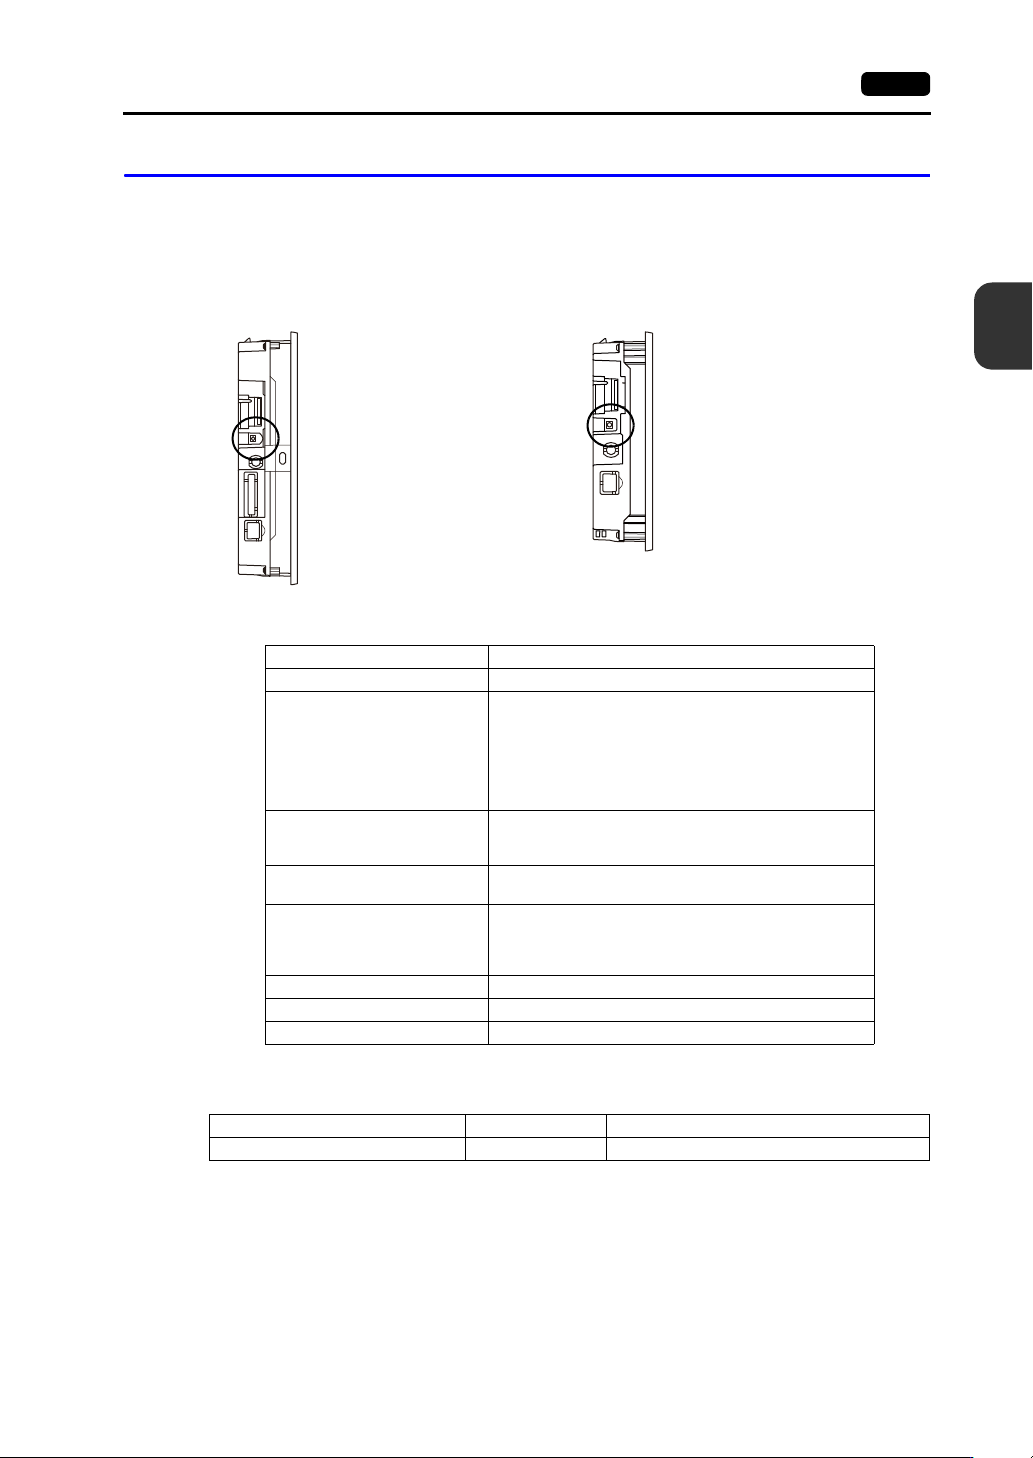
Audio Output Connector (AUDIO) (V910xiW/Standard Models Only)
This terminal is used for audio output.
* An external speaker with a built-in amplifier is required to play audio.
The specifications of playable audio are as shown below.
Applications
Side view Side view
V9100iS V9080iS
Item Specification
Playable Files WAV (PCM)
Sampling Frequency
8 kHz
16 kHz
32 kHz
44.1 kHz
48 kHz
96 kHz
192 kHz
Quantization Bit
8 bits
16 bits
24 bits
Audio Source
Monaural
Stereo
Volume Control
8 levels
(Macros can vary the volume from 21 dB to 0 dB in 3 dB
steps.)
Default: 6 dB
External Connection Terminal 3.5 mm stereo mini jack
Max. Output Voltage 2.1 Vrms (0 dB)
Connected Amplifier Input impedance of 1 K or more
Application V-SFT-6 Setting Refer to
Playing audio Required V9 Series Reference Manual 2
3-30 2. Specifications of Components
DIP Switches (DIPSW)
V9150, V9120, V9100, V910xiW, V9080 Series
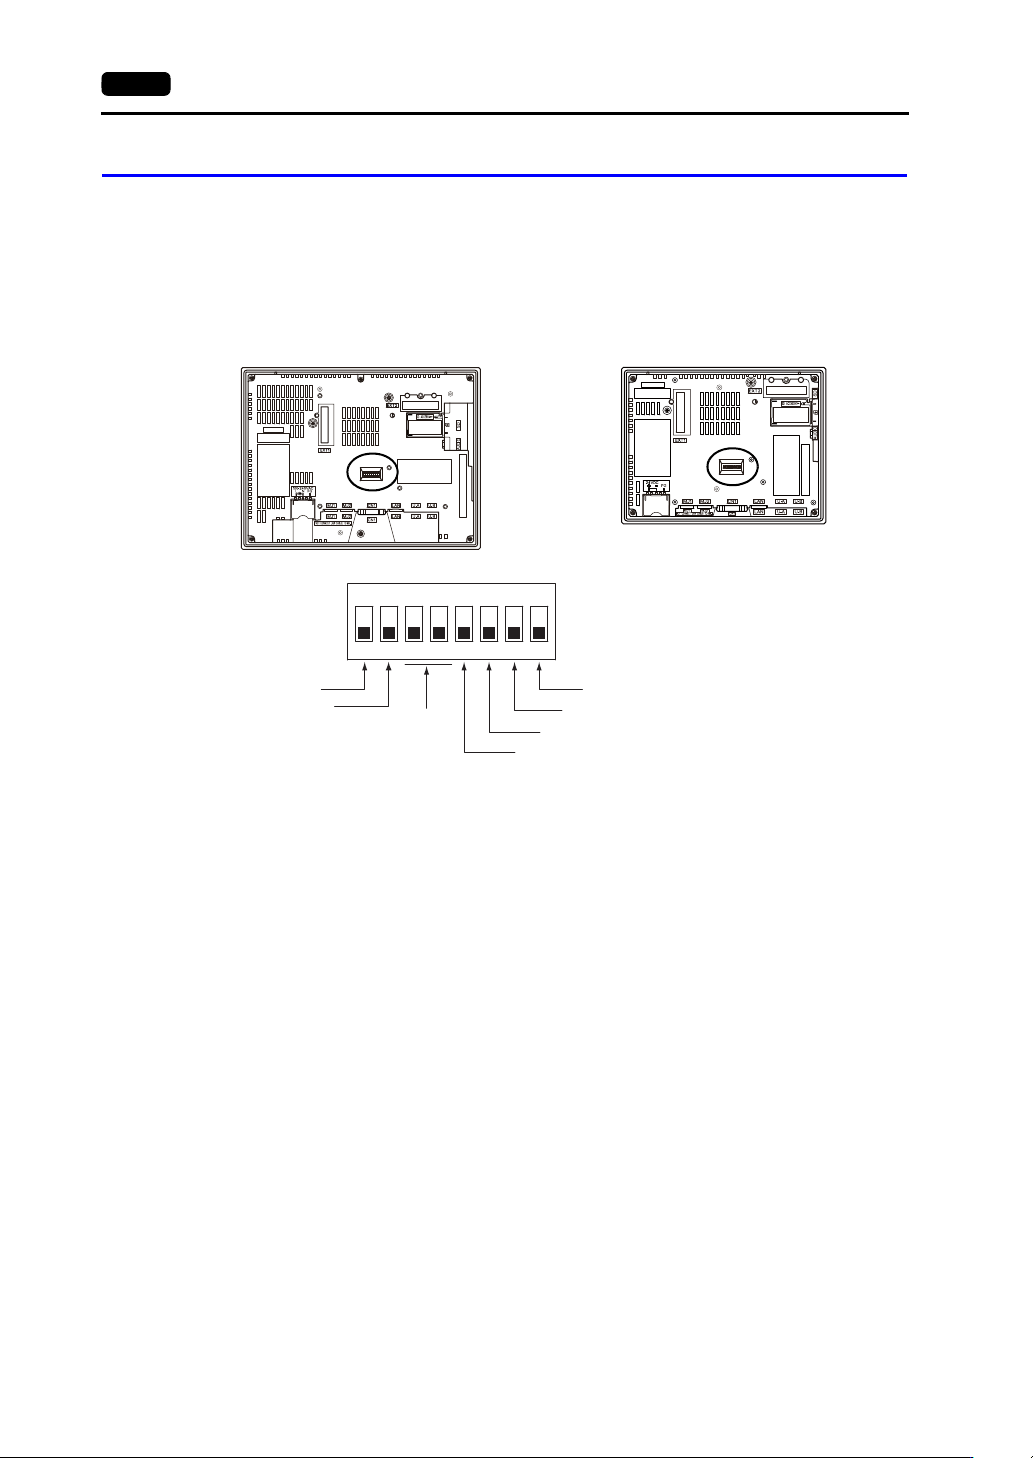
The V9 series unit is equipped with DIP switches 1 to 8. Turn OFF power to the unit before changing
any DIP switches.
Upon delivery, all DIP switches are set to OFF.
* Only for V910xiW
DIPSW1 (Storage Automatic Upload)
Set DIPSW1 to ON to automatically upload screen programs from a storage device such as an SD
card or USB flash drive.
Procedure
1. Preparation of storage
Use the V-SFT-6 editor to load a screen program onto a storage device.
(For the loading procedure, refer to the V9 Series Reference Manual 2.)
2. Connection of storage
Turn OFF power to the V9 series unit and connect the storage device (insert an SD card or
connect a USB flash drive to the USB-A port).
3. DIP switch settings
Slide DIPSW1 upward to the ON position.
4. Automatic upload start
Turn ON power to the V9 series unit. The screen program is automatically loaded into the flash
memory of the V9 series unit.
* When not using automatic upload, always set DIPSW1 to OFF.
Rear view Rear view
V9100 V9080
ON
12345678
CN1: +RD/-RD terminating resistance at pins 1 and 2
MJ1 (modular jack 1): terminal resistance
MJ2 (modular jack 2): terminal resistance
Not used
CN1: +SD/-SD terminating resistance at pins 3 and 4
Storage
automatic upload
Display of touch
switch test screen
*