00197088-03_AI_Barcode_SICK620_SX12_X-S_TX_DE_EN.pdf - 第103页
3 Installation 3.8 Running and Connecting the Cable Assembly Instructions / Montageanleitung SIPLACE TX-Series, X-Series S, SX1/SX2 V2 Option PCB Barcode / LP-Barcode (Lector 620) 05/2019 103 Fig.54: Switch cabling Fig.…
3 Installation
3.8 Running and Connecting the Cable
102 Assembly Instructions / Montageanleitung SIPLACE TX-Series, X-Series S, SX1/SX2 V2
Option PCB Barcode / LP-Barcode (Lector 620) 05/2019
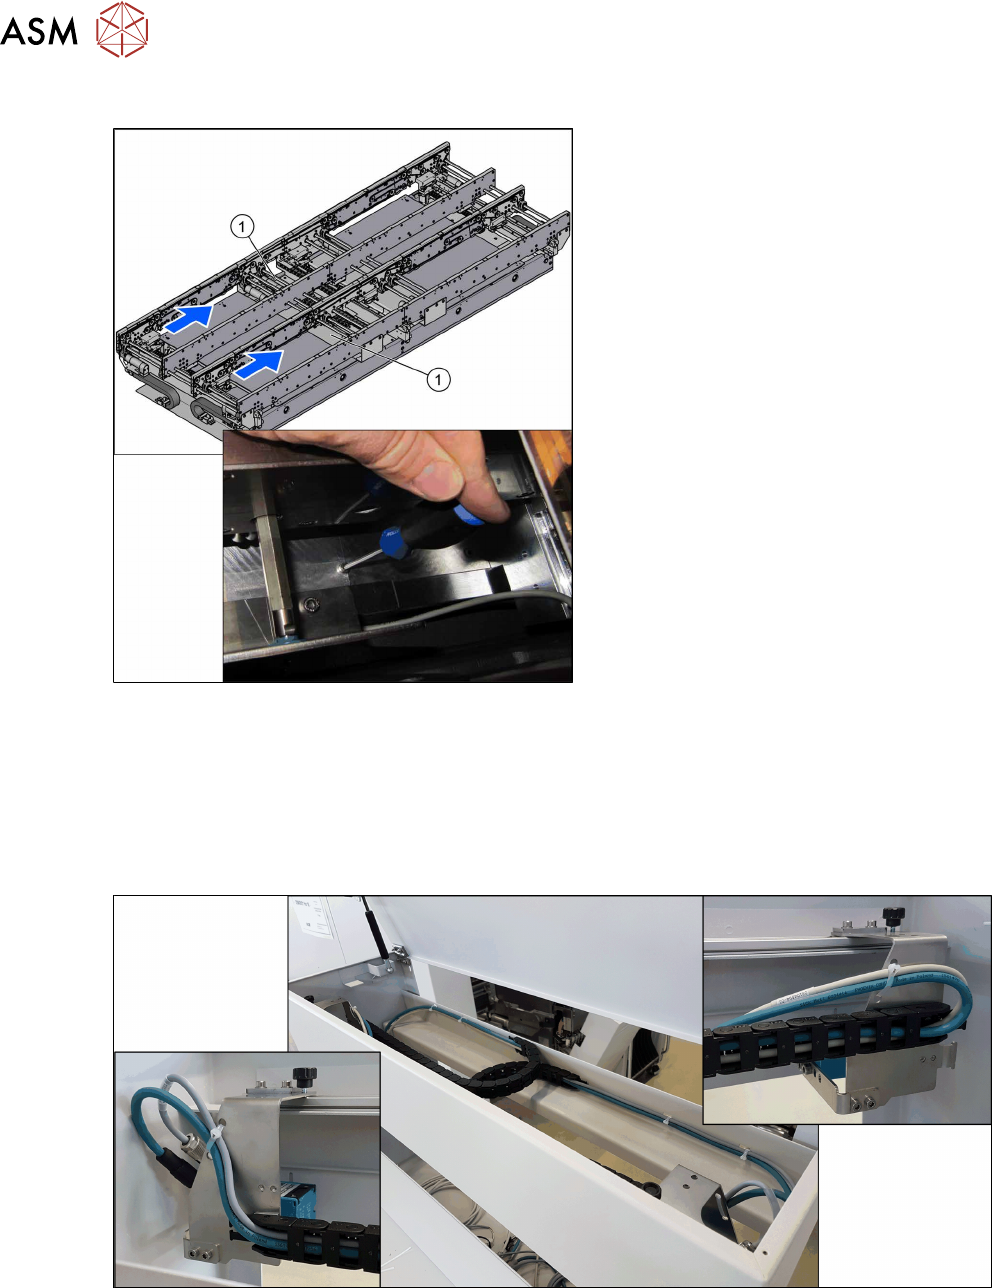
Removing the covers
Fig.52: Removing the covers
► Loosen the screws of the covers(1) on
top of the conveyor control units in the
input area and remove the covers.
Cable routing
Assembly kits:
●
Electric mounting 2D PCB Barcode X-Series S SC [03104886-xx]
●
A dual conveyor requires "Electric mounting 2D Barcode X-Series S DC[00166666‑xx]" in ad-
dition
Fig.53: Overview of cable routing
3 Installation
3.8 Running and Connecting the Cable
Assembly Instructions / Montageanleitung SIPLACE TX-Series, X-Series S, SX1/SX2 V2
Option PCB Barcode / LP-Barcode (Lector 620) 05/2019
103
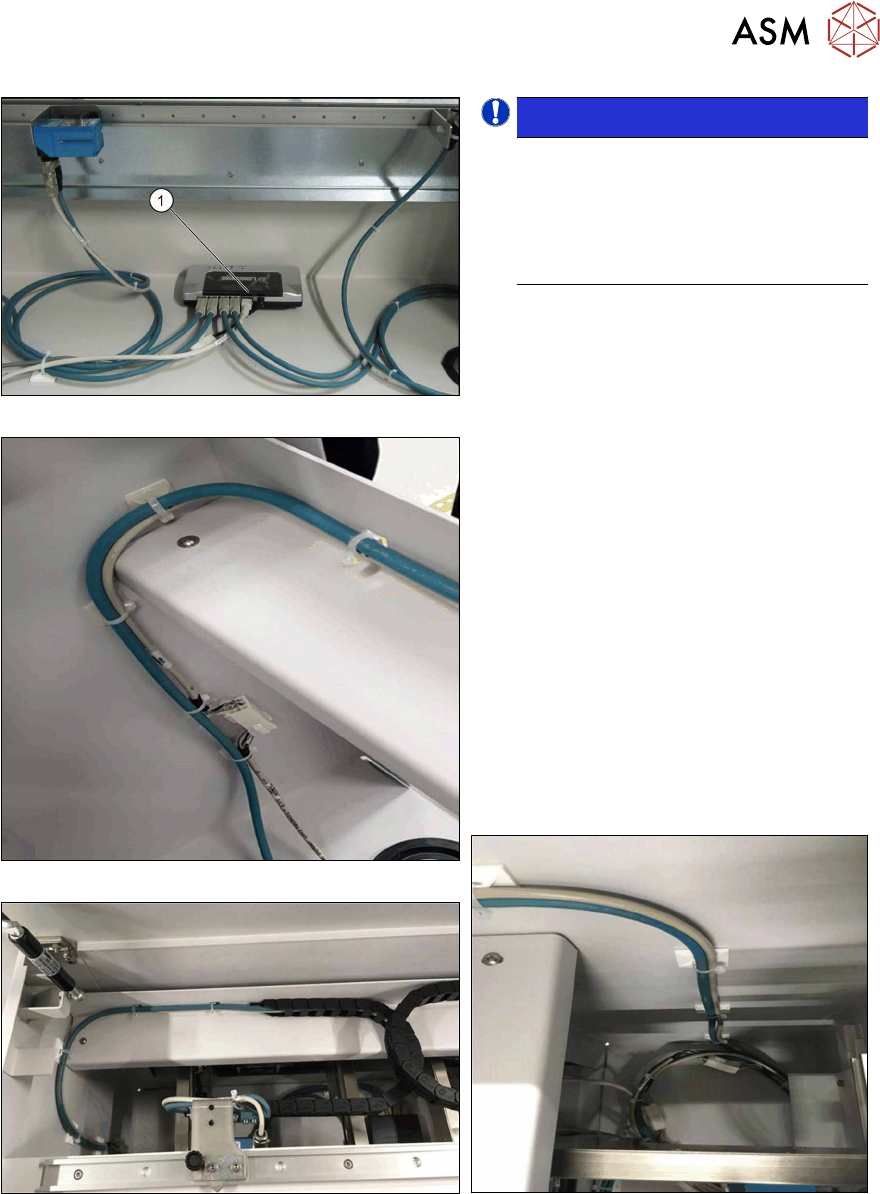
Fig.54: Switch cabling
Fig.55: Cable routing, on left
Fig.56: Cable routing, at top
NOTICE!
LAN cable
The LAN cable is only mandatory for
the configuration of the PCB barcode
scanner. For the operation and func-
tions of the PCB barcode scanners the
LAN cable is not absolutely necessary.
.
► Connect the LAN cable to the switch (1).
► Connect the power supply cable
(DC5V) [03104923‑xx] to the switch
and to the cable [03104892‑xx].
The cable [03104892‑xx] is among the
cables for the upper PCB barcode
reader.
► Make sure that the cables have enough
play. In contrast to the top PCB bar-
code readers, the cables for the bottom
PCB barcode readers are not run
through a trailing chain.
► Use the Klettostar fastener to fasten
the switch to the bottom of the input
conveyor extension.
► In case of unnecessary cable length,
place the cables at the bottom of the in-
put conveyor extension.
Fig.57: Cable routing, on right
3 Installation
3.8 Running and Connecting the Cable
104 Assembly Instructions / Montageanleitung SIPLACE TX-Series, X-Series S, SX1/SX2 V2
Option PCB Barcode / LP-Barcode (Lector 620) 05/2019
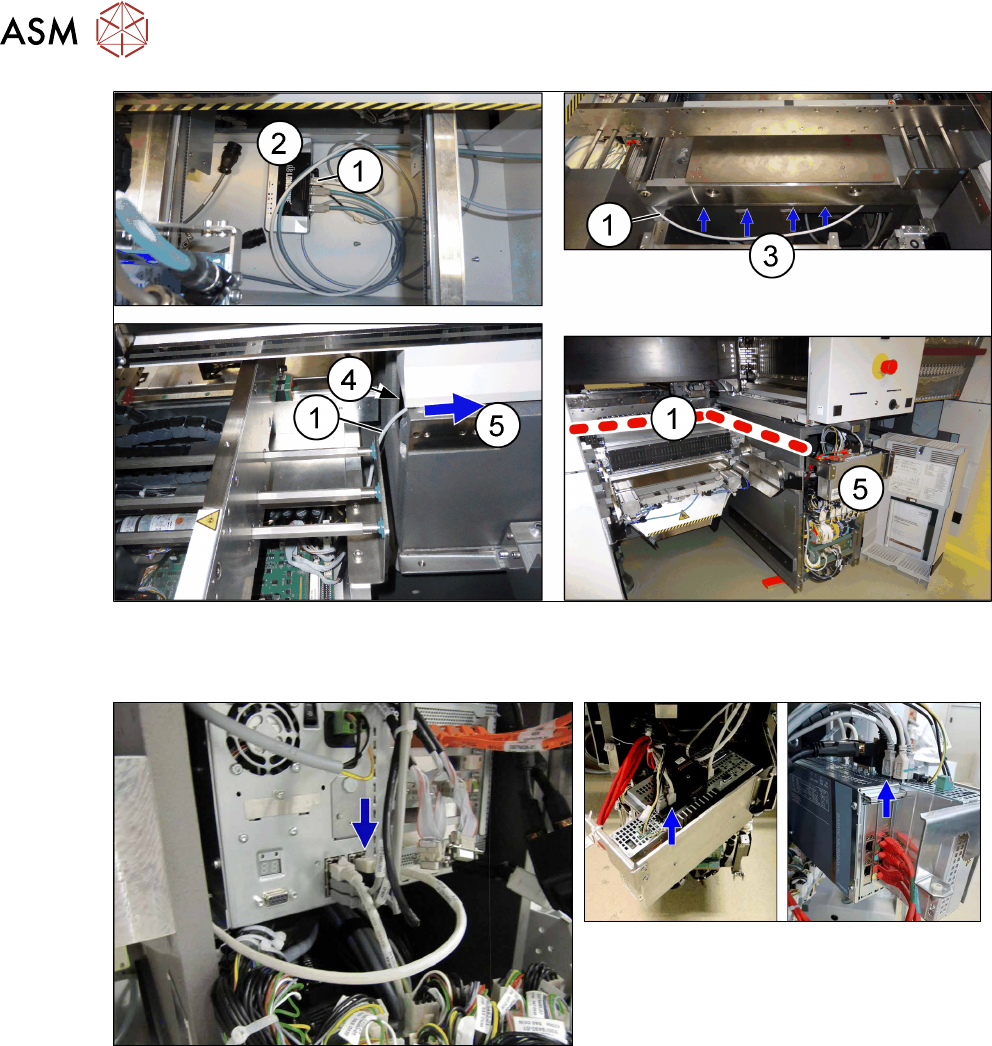
Fig.58: Cable routing
► Run the LAN cable(1) from the switch(2) all the way under the conveyor (3), through the
opening(4) to the BoxPC(5).
Fig.59: BoxPC 827C (SIPLACE X-Series S to Gxxxx)
Fig.60: BoxPC 427D (SIPLACE X-Series S from
Hxxxx)
► Connect the LAN cable to the BoxPC.