00197088-03_AI_Barcode_SICK620_SX12_X-S_TX_DE_EN.pdf - 第92页
3 Installation 3.3 Mounting the 2D PCB Barcode Scanner at the Top 92 Assembly Instructions / Montageanleitung SIPLACE TX-Series, X-Series S, SX1/SX2 V2 Option PCB Barcode / LP-Barcode (Lector 620) 05/2019 Fig.22: Top ga…
3 Installation
3.2 Installing the Lock and Gas Pressure Shock Absorber on the Hand Guard
Assembly Instructions / Montageanleitung SIPLACE TX-Series, X-Series S, SX1/SX2 V2
Option PCB Barcode / LP-Barcode (Lector 620) 05/2019
91
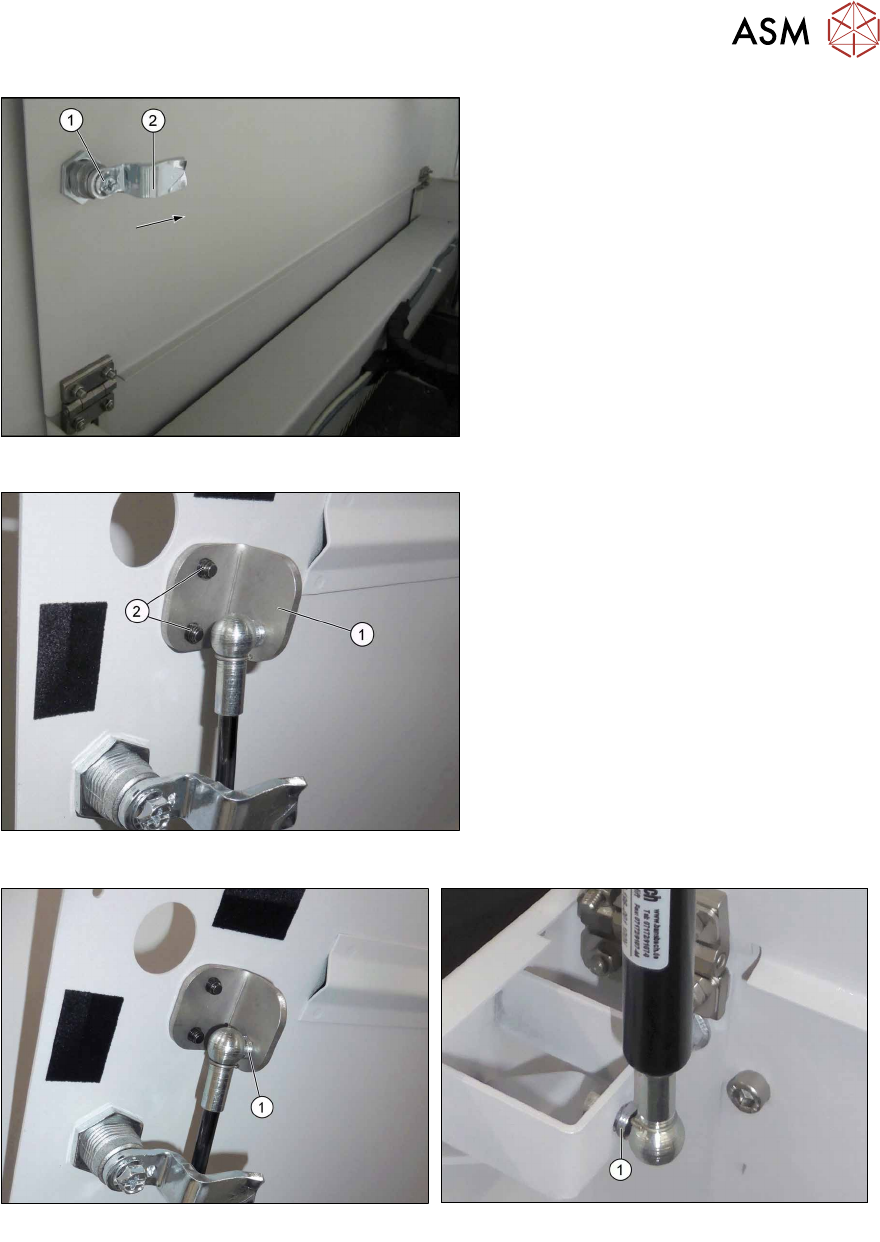
Fig.18: Latch on lock
► Insert the latch (2).
► Insert the screw (1) and tighten it.
► Use Loctite 241 or 243 to secure the
screws.
Fig.19: Retaining bracket
► Fit the retaining bracket for the X-
Series S (1) to the flap on the cover,
using the two M5x16 screws (2).
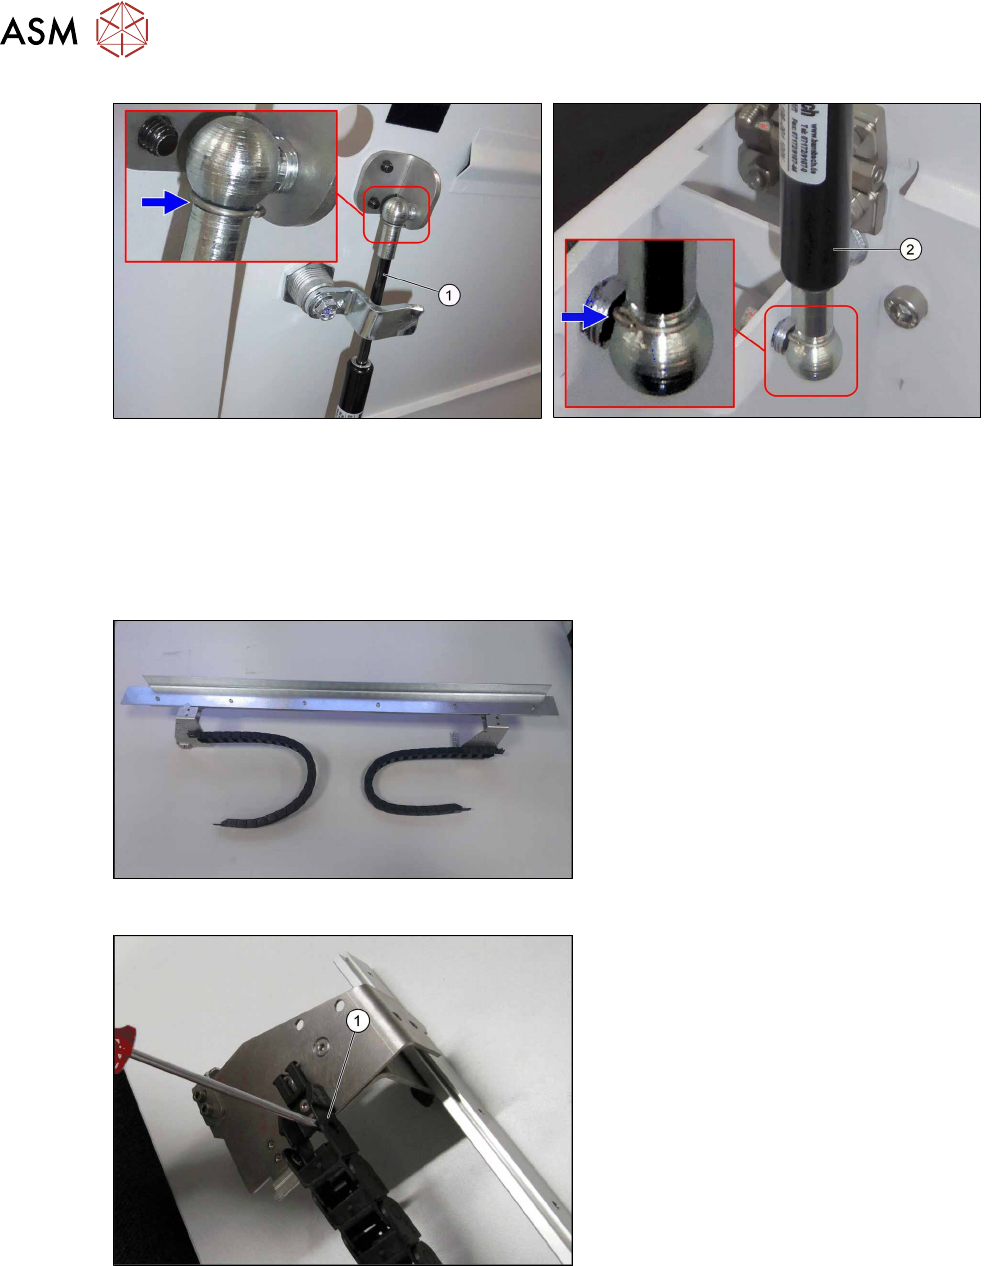
Fig.20: Top ball head
Fig.21: Bottom ball head
► Fit both ball heads°(1) at the top and at the bottom respectively.
3 Installation
3.3 Mounting the 2D PCB Barcode Scanner at the Top
92 Assembly Instructions / Montageanleitung SIPLACE TX-Series, X-Series S, SX1/SX2 V2
Option PCB Barcode / LP-Barcode (Lector 620) 05/2019
Fig.22: Top gas pressure shock absorber
Fig.23: Bottom gas pressure shock absorber
► Insert the top gas pressure shock absorber (1) at the top and secure it with a safety split pin.
► Insert the top gas pressure shock absorber (2) at the bottom and secure it with a safety split
pin.
3.3 Mounting the 2D PCB Barcode Scanner at the Top
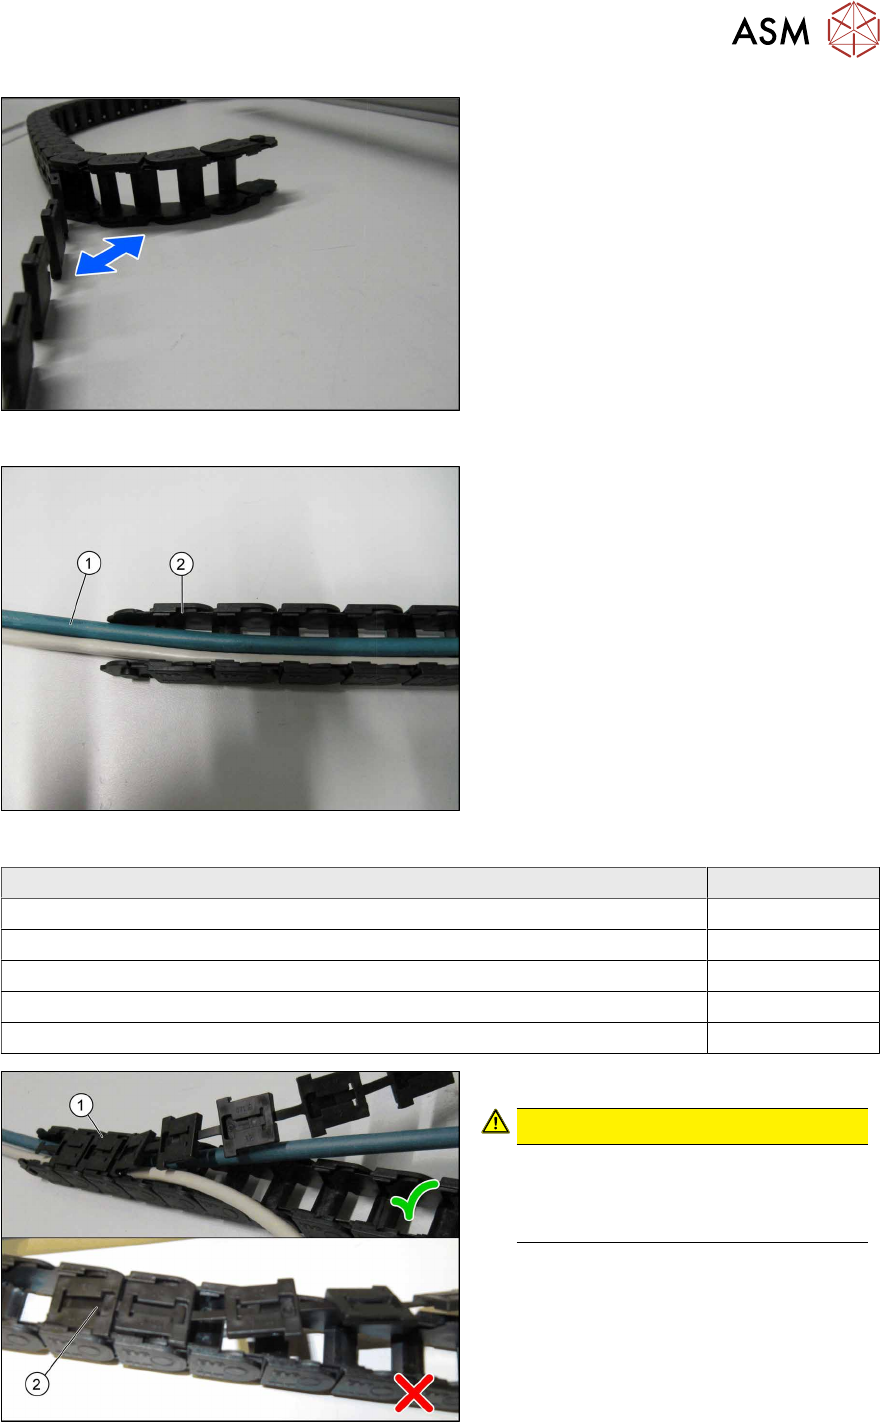
Fig.24: Assembly kit
Assembly kit 2D PCB barcode top SIPLACE
X-Series S [00519996‑xx]
Fig.25: Disassembling the trailing chain
► Take the trailing chain(1) off the
holder.
► Remove the final link of the trailing
chain at both ends.
3 Installation
3.3 Mounting the 2D PCB Barcode Scanner at the Top
Assembly Instructions / Montageanleitung SIPLACE TX-Series, X-Series S, SX1/SX2 V2
Option PCB Barcode / LP-Barcode (Lector 620) 05/2019
93
Fig.26: Opening the trailing chain
► Open the trailing chain.
Fig.27: Cable in the trailing chain
► Mark both ends of each cable for clear
assignment later on.
► Assign the cables to the respective
mounting location (also see the table
below).
► Place the cable (1) into the trailing
chain (2).
Cable Item no.
Cable PCB barcode reader Lector-620 lane 2 bottom 03104893-xx
Cable PCB barcode reader Lector-620 lane 2 top 03104894-xx
Cable with connector 2 m SSL-2J04-G02ME 03104896-xx
Cable: Extension PCB barcode reader lane 2 bottom 03112228-xx
Cable: Extension PCB barcode reader lane 2 top 03112229-xx
Fig.28: Closing the trailing chain
► Close the trailing chain (1).
CAUTION!
Check for the correct orientation(1)
when engaging the connections. Do
not unintentionally turn the connec-
tions(2).
.