00197088-03_AI_Barcode_SICK620_SX12_X-S_TX_DE_EN.pdf - 第105页
3 Installation 3.8 Running and Connecting the Cable Assembly Instructions / Montageanleitung SIPLACE TX-Series, X-Series S, SX1/SX2 V2 Option PCB Barcode / LP-Barcode (Lector 620) 05/2019 105 Fig.61: Overview of connect…
3 Installation
3.8 Running and Connecting the Cable
104 Assembly Instructions / Montageanleitung SIPLACE TX-Series, X-Series S, SX1/SX2 V2
Option PCB Barcode / LP-Barcode (Lector 620) 05/2019
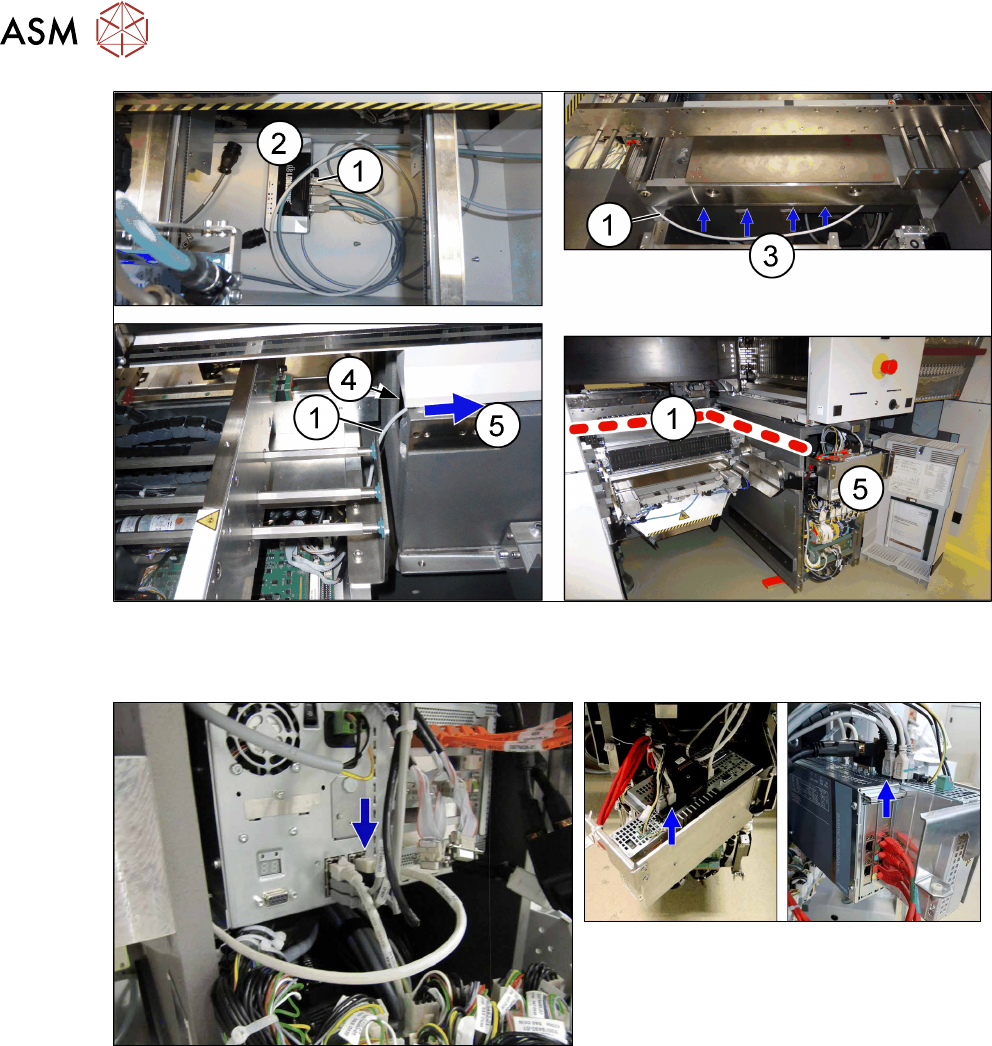
Fig.58: Cable routing
► Run the LAN cable(1) from the switch(2) all the way under the conveyor (3), through the
opening(4) to the BoxPC(5).
Fig.59: BoxPC 827C (SIPLACE X-Series S to Gxxxx)
Fig.60: BoxPC 427D (SIPLACE X-Series S from
Hxxxx)
► Connect the LAN cable to the BoxPC.
3 Installation
3.8 Running and Connecting the Cable
Assembly Instructions / Montageanleitung SIPLACE TX-Series, X-Series S, SX1/SX2 V2
Option PCB Barcode / LP-Barcode (Lector 620) 05/2019
105
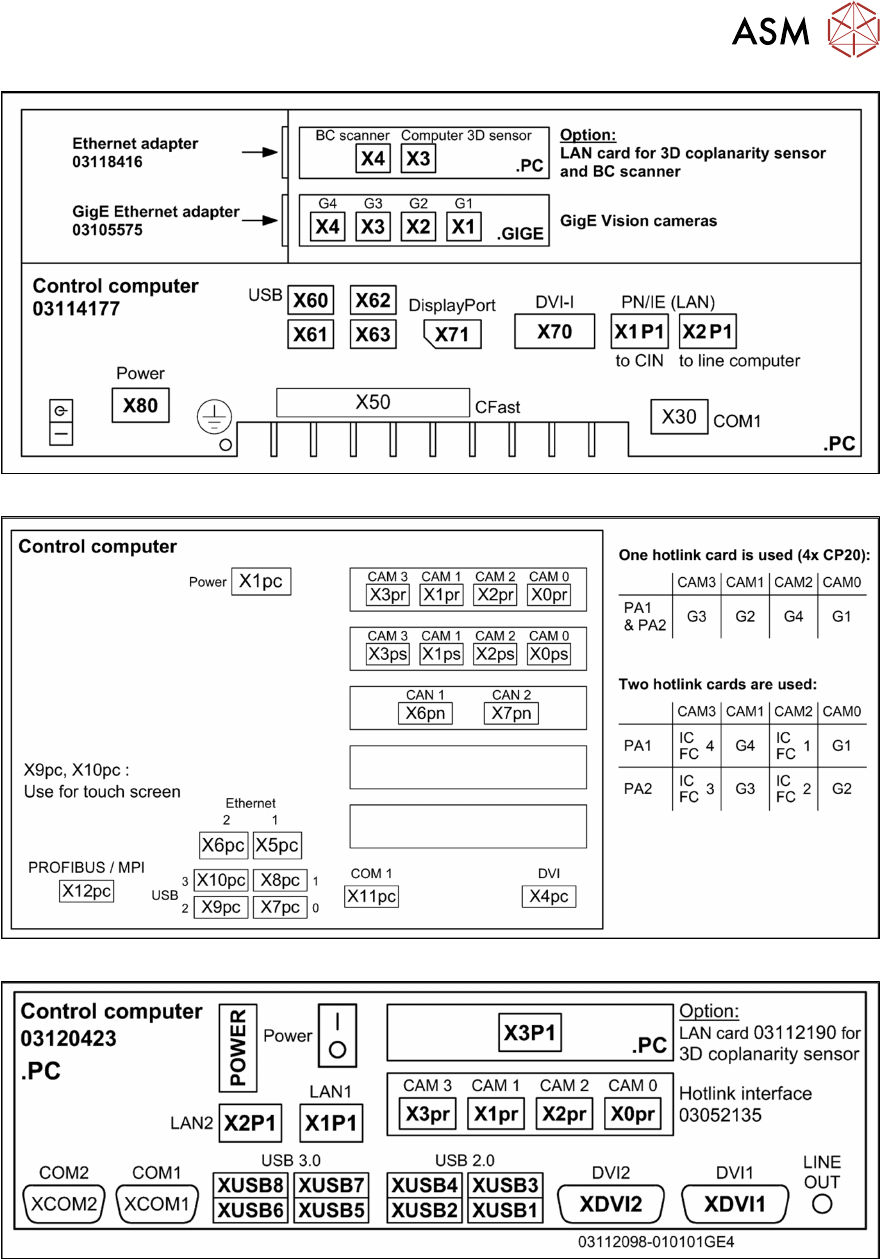
Fig.61: Overview of connections for BoxPC 427D
Fig.62: Overview of connections for BoxPC 627x/827x
Fig.63: Connections BoxPC ABP402-A CPU1020E 2xPCI SSD (iBase) [03120423-xx] (from Nxxxx onwards)
The BoxPC ABP402-A is fitted from approx. 2019 onwards.
3 Installation
3.8 Running and Connecting the Cable
106 Assembly Instructions / Montageanleitung SIPLACE TX-Series, X-Series S, SX1/SX2 V2
Option PCB Barcode / LP-Barcode (Lector 620) 05/2019
All other cables should be run to the con-
veyor control unit of the corresponding lane.
To do so, proceed as follows:
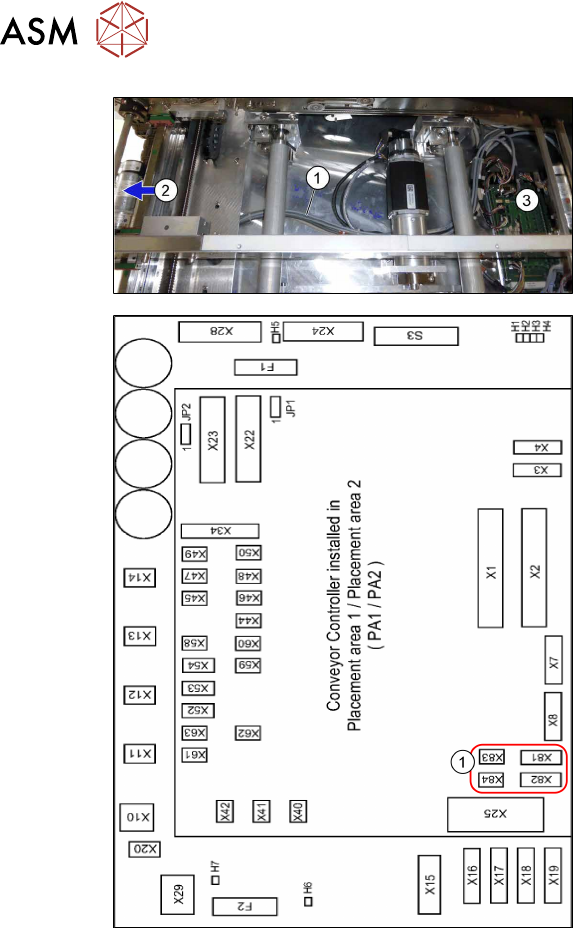
► Run the cables(1) from the input con-
veyor lane(2) to the conveyor con-
trol(3).
► Use cable ties to fix the cables to the
available cable bundles.
Fig.64: Conveyor control
1. Connectors for PCB barcode scanners
– Lane 1 / Single Conveyor:
PCB Barcode Scanner b 1 Lane
Bottom X81+83
PCB Barcode Scanner b 2 Lane
Top X82+84
– Lane 2 (Dual Conveyor only)
PCB Barcode Scanner b3 Lane Bot-
tom X81+83
PCB Barcode Scanner b4 Lane Top
X82+84
See also:
–
5.3.3 "Conveyor control TSP420
[03087642-xx]" [}125]
– 5.1 "Circuit Diagrams" [}113]
► Connect the cables to the connectors
X81 to X84(1).
► Repeat these steps for the second con-
veyor lane if required.