00197088-03_AI_Barcode_SICK620_SX12_X-S_TX_DE_EN.pdf - 第94页
3 Installation 3.3 Mounting the 2D PCB Barcode Scanner at the Top 94 Assembly Instructions / Montageanleitung SIPLACE TX-Series, X-Series S, SX1/SX2 V2 Option PCB Barcode / LP-Barcode (Lector 620) 05/2019 Fig.29: Assemb…
3 Installation
3.3 Mounting the 2D PCB Barcode Scanner at the Top
Assembly Instructions / Montageanleitung SIPLACE TX-Series, X-Series S, SX1/SX2 V2
Option PCB Barcode / LP-Barcode (Lector 620) 05/2019
93
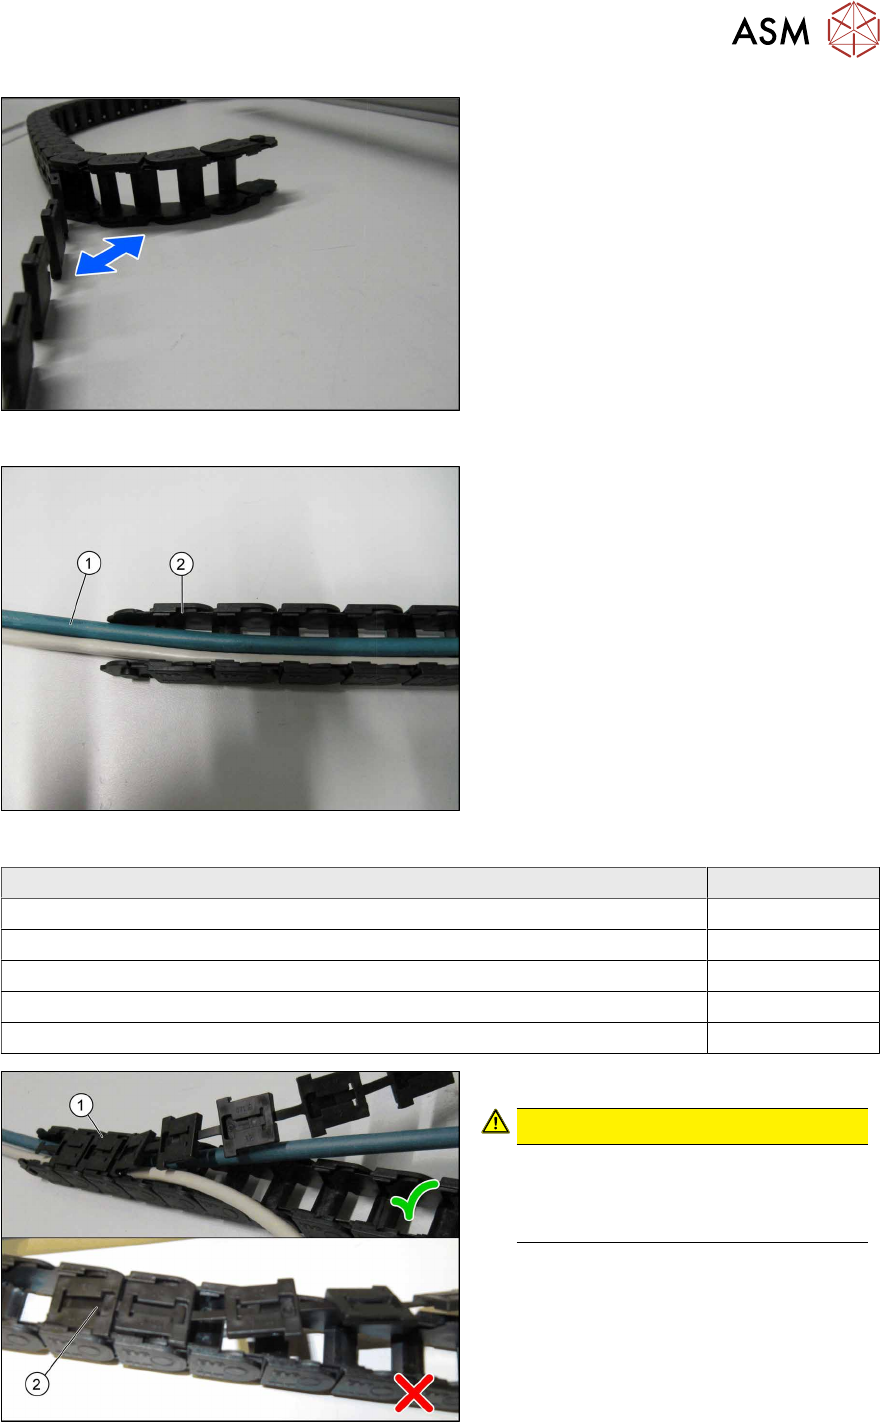
Fig.26: Opening the trailing chain
► Open the trailing chain.
Fig.27: Cable in the trailing chain
► Mark both ends of each cable for clear
assignment later on.
► Assign the cables to the respective
mounting location (also see the table
below).
► Place the cable (1) into the trailing
chain (2).
Cable Item no.
Cable PCB barcode reader Lector-620 lane 2 bottom 03104893-xx
Cable PCB barcode reader Lector-620 lane 2 top 03104894-xx
Cable with connector 2 m SSL-2J04-G02ME 03104896-xx
Cable: Extension PCB barcode reader lane 2 bottom 03112228-xx
Cable: Extension PCB barcode reader lane 2 top 03112229-xx
Fig.28: Closing the trailing chain
► Close the trailing chain (1).
CAUTION!
Check for the correct orientation(1)
when engaging the connections. Do
not unintentionally turn the connec-
tions(2).
.
3 Installation
3.3 Mounting the 2D PCB Barcode Scanner at the Top
94 Assembly Instructions / Montageanleitung SIPLACE TX-Series, X-Series S, SX1/SX2 V2
Option PCB Barcode / LP-Barcode (Lector 620) 05/2019
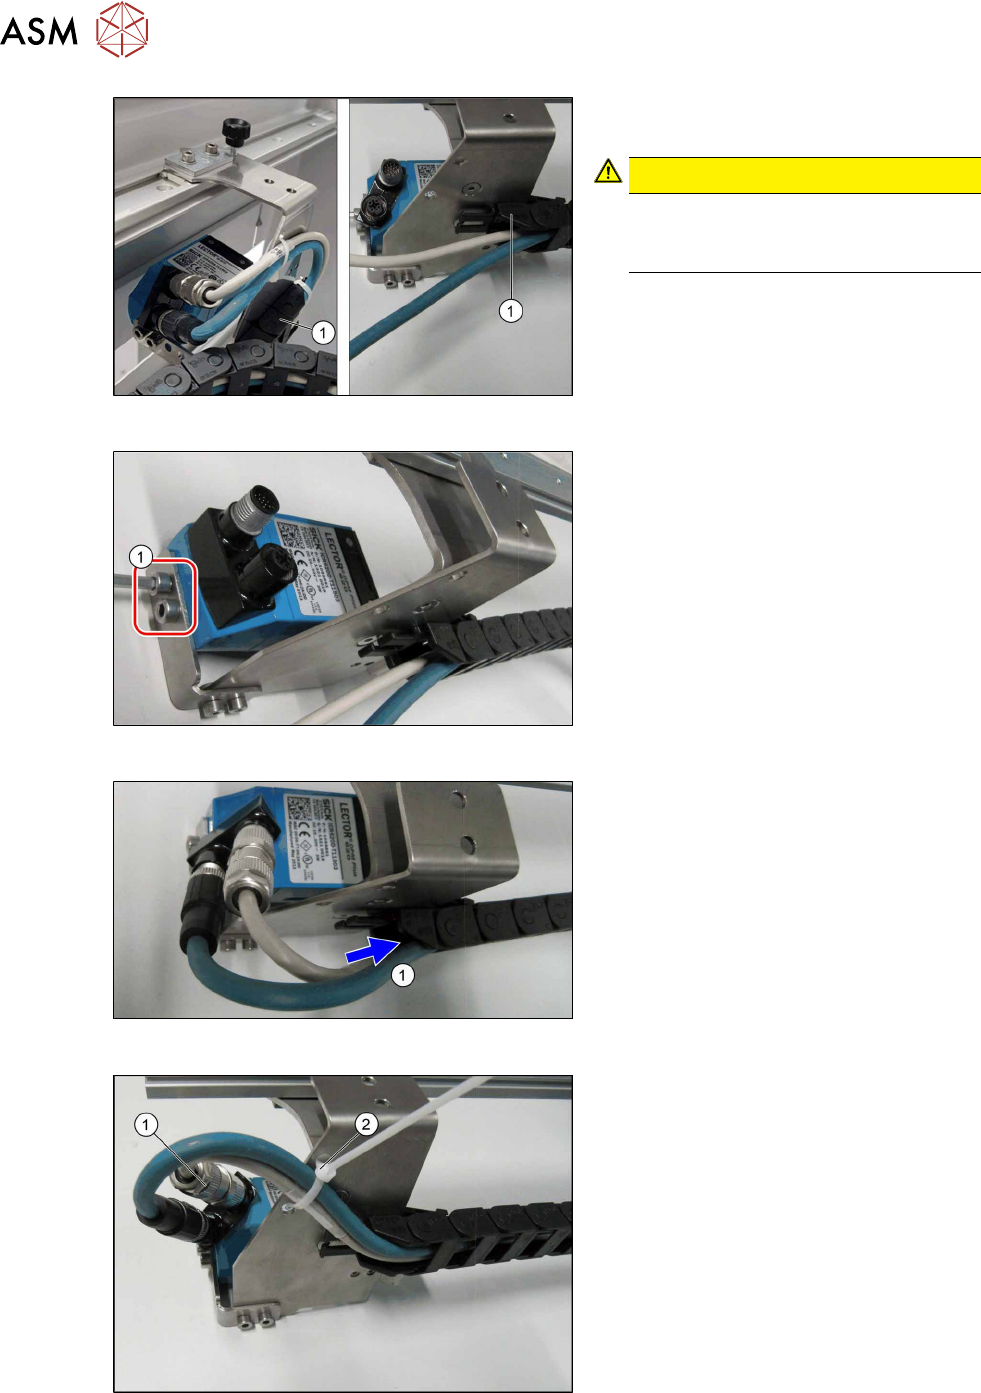
Fig.29: Assembling the trailing chain
► Fit the trailing chain (1) back onto the
retaining bracket.
CAUTION!
Incorrect assembly
During assembly, make sure that the
trailing chain is rolled out inwards.
.
Fig.30: Mounting the PCB barcode reader
► Fasten the PCB barcode reader with
the two screws(1). Make sure that the
window faces downwards.
Fig.31: Cables
► Push the cables into the trailing
chain(1), making sure that they do not
bend.
Fig.32: Connecting the cables
► Connect the cables to the flexible con-
nectors on the PCB barcode reader(1).
► Secure the cables with a cable tie(2).
3 Installation
3.4 Mounting the 2D PCB Barcode Scanner at the Bottom
Assembly Instructions / Montageanleitung SIPLACE TX-Series, X-Series S, SX1/SX2 V2
Option PCB Barcode / LP-Barcode (Lector 620) 05/2019
95
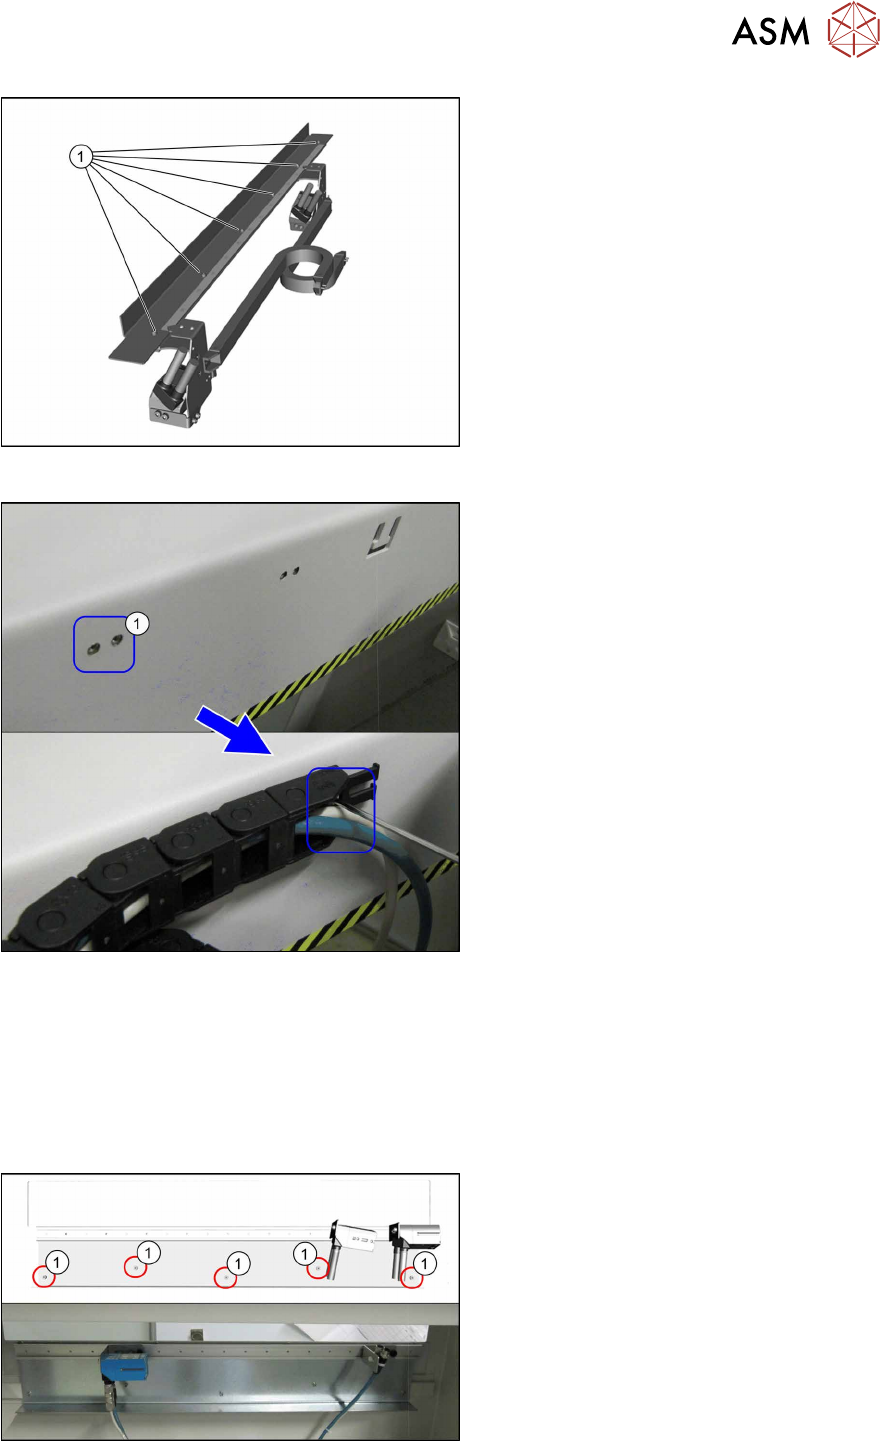
Fig.33: Top PCB barcode reader assembly
► Use the six screws of type DIN 7984-
M4 x 6-A2-70 [03127570‑xx](1) to
mount the whole assembly in the hand
guard.
Fig.34: Fastening the trailing chain
► Attach the other end of the trailing
chain on the opposite side of the hand
guard at position(1). To do so, use the
M3x8 countersunk screws.
3.4 Mounting the 2D PCB Barcode Scanner at the Bottom
► Mounting the bottom 2D PCB barcode scanner assembly is identical to mounting the top 2D
PCB barcode scanner assembly (see section 3.3 "Mounting the 2D PCB Barcode Scanner at
the Top" [}92]).
Leave the assembly plate on the assembly kit when fitting the bottom PCB barcode scanner.
Fig.35: Mounting the PCB barcode scanner assembly at the
bottom
► Use the five M4x6 screws (1) to fix the
assembly to the hand guard.