00197088-03_AI_Barcode_SICK620_SX12_X-S_TX_DE_EN.pdf - 第90页
3 Installation 3.2 Installing the Lock and Gas Pressure Shock Absorber on the Hand Guard 90 Assembly Instructions / Montageanleitung SIPLACE TX-Series, X-Series S, SX1/SX2 V2 Option PCB Barcode / LP-Barcode (Lector 620) …

3 Installation
3.1 Performing Preparatory Work
Assembly Instructions / Montageanleitung SIPLACE TX-Series, X-Series S, SX1/SX2 V2
Option PCB Barcode / LP-Barcode (Lector 620) 05/2019
89
3 Installation
The PCB barcode scanner requires the following work to be performed:
●
A lockable flap must be retrofitted for using the PCB barcode scanner in the input conveyor.
●
Each PCB barcode scanner is fitted to a bracket, which is fixed to a rail on the inside of the in-
put conveyor.
This work described in the following chapters.
NOTICE
Description example
This manual describes the retrofitting process for a dual conveyor on a SIPLACE X-Series
S machine. The installation is the same on other machines. Any relevant differences will be
mentioned explicitly.
3.1 Performing Preparatory Work
Input Conveyor Extension
► If not already present, install the input conveyor extension. Refer to the appropriate assembly
instructions:
– SIPLACE SX1/SX2: "Input Conveyor Extension" [00198356‑xx]
– SIPLACE X-Series S: "Input and Output Conveyor Extension" [00197089‑xx]
– SIPLACE TX-Series S: "Input and Output Conveyor Extension" [00198141‑xx]
NOTICE
You might need to move the line in order to fit the input conveyor extension.
Preparing the Installation of the PCB Barcode Scanner
► Move the conveyor rails into a position which allows you best access for work.
► Switch off the machine, disconnect it from the power supply and secure it to prevent
unauthorized reactivation.
1.2 "Preparatory work..." [}76]
3 Installation
3.2 Installing the Lock and Gas Pressure Shock Absorber on the Hand Guard
90 Assembly Instructions / Montageanleitung SIPLACE TX-Series, X-Series S, SX1/SX2 V2
Option PCB Barcode / LP-Barcode (Lector 620) 05/2019
3.2 Installing the Lock and Gas Pressure Shock Absorber on
the Hand Guard
In order to use the PCB barcode reader, the input conveyor cover must be converted to a flap.
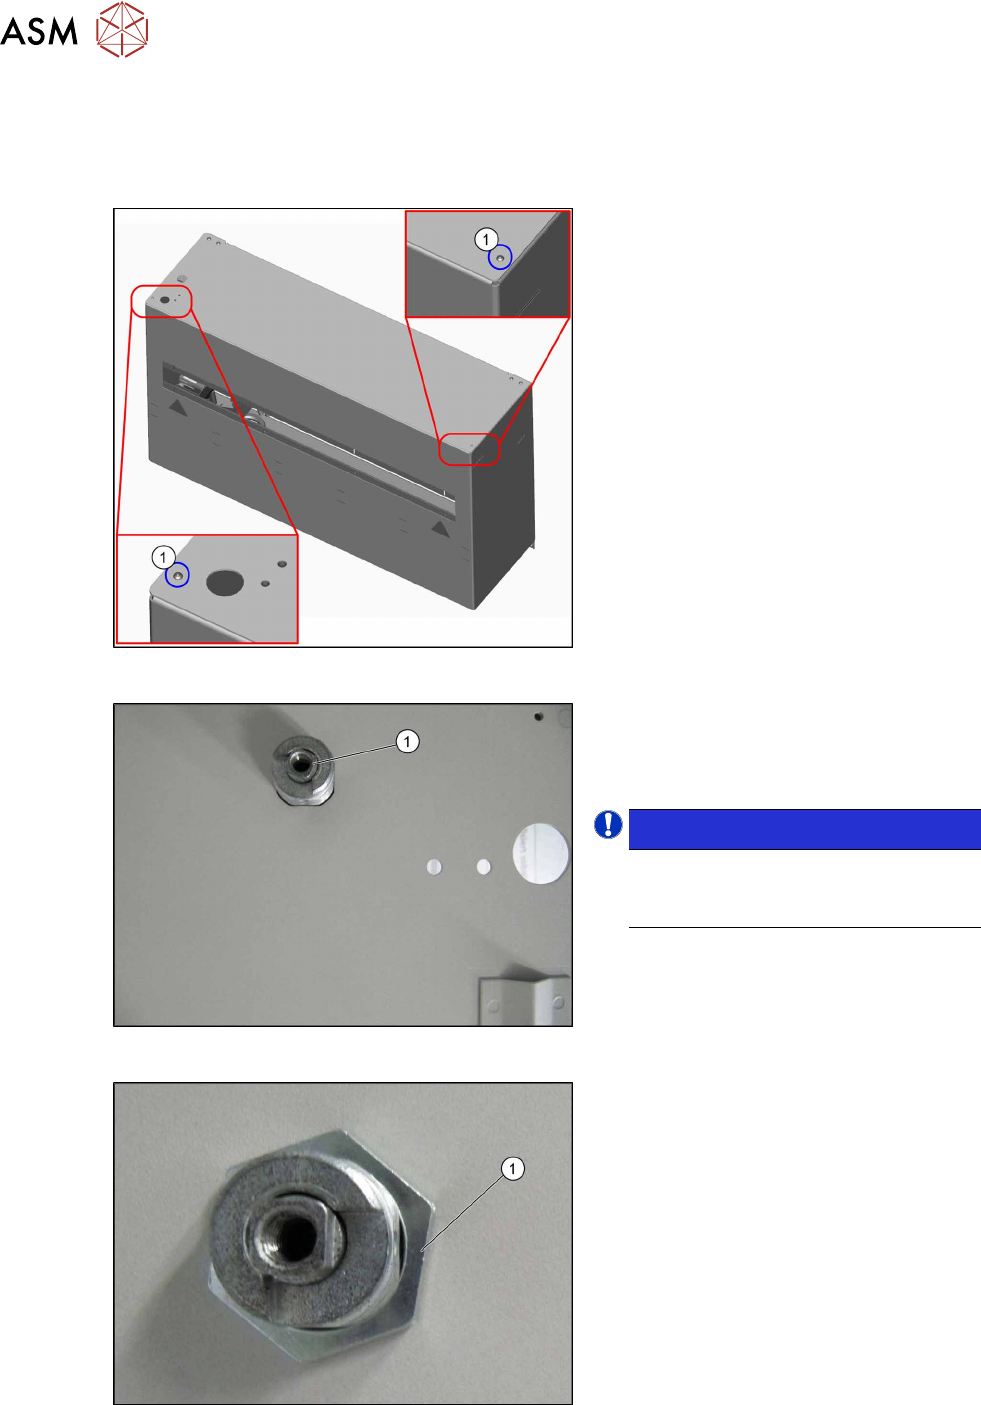
Fig.15: Removing the top cover
► Remove both screws(1) that fasten the
top cover on the hand guard belt exten-
sion.
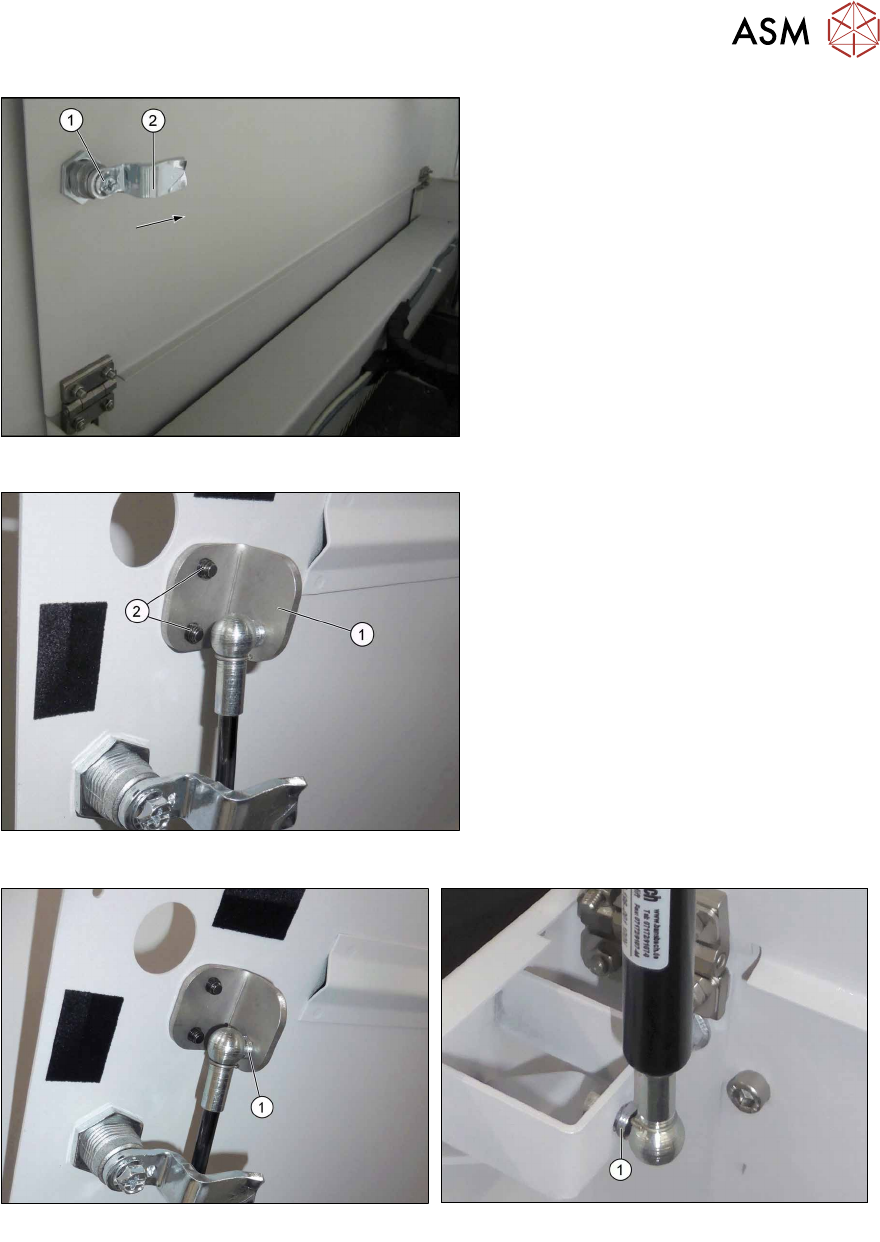
Fig.16: Padlock
► Insert the lock (1). Observe the orienta-
tion of the lock. The lock must be fitted
in such a manner that it can lock the
flap.
NOTICE!
Loss of parts:
Keep an eye on the spring in the
thread. The spring can be easily lost.
.
Fig.17: Nut on lock
► Fit the nut (1).
3 Installation
3.2 Installing the Lock and Gas Pressure Shock Absorber on the Hand Guard
Assembly Instructions / Montageanleitung SIPLACE TX-Series, X-Series S, SX1/SX2 V2
Option PCB Barcode / LP-Barcode (Lector 620) 05/2019
91
Fig.18: Latch on lock
► Insert the latch (2).
► Insert the screw (1) and tighten it.
► Use Loctite 241 or 243 to secure the
screws.
Fig.19: Retaining bracket
► Fit the retaining bracket for the X-
Series S (1) to the flap on the cover,
using the two M5x16 screws (2).
Fig.20: Top ball head
Fig.21: Bottom ball head
► Fit both ball heads°(1) at the top and at the bottom respectively.