00194845-0302_MM_D1_D2_EN.pdf - 第24页
4 Weekly maintenance jobs SIPLA CE D1 / D2 02/2010 EN E dition 24 4

SIPLACE D1 / D2 4 Weekly maintenance jobs
02/2010 EN Edition
23
4
4
You will need the following tools and consumables for the weekly maintenance jobs: 4
– Vacuum cleaner (with appropriate nozzle)
–Waste bin
–Brush
–Scissors
– Lint-free cloths
– Ethyl alcohol
– Set of cleaned ceramic nozzles or new nozzles
– Filter mat 230x360 for the air filter box, if required.
4
There must be no PCBs in the machine during the following maintenance steps. 4
: Press the Stop button.
: Open the protective cover.
4
To move the gantry, take hold of the C&P head handle and push gently and carefully. 4
4
: Push the gantry over the component feeder table. This will stop it outside your working area.
4
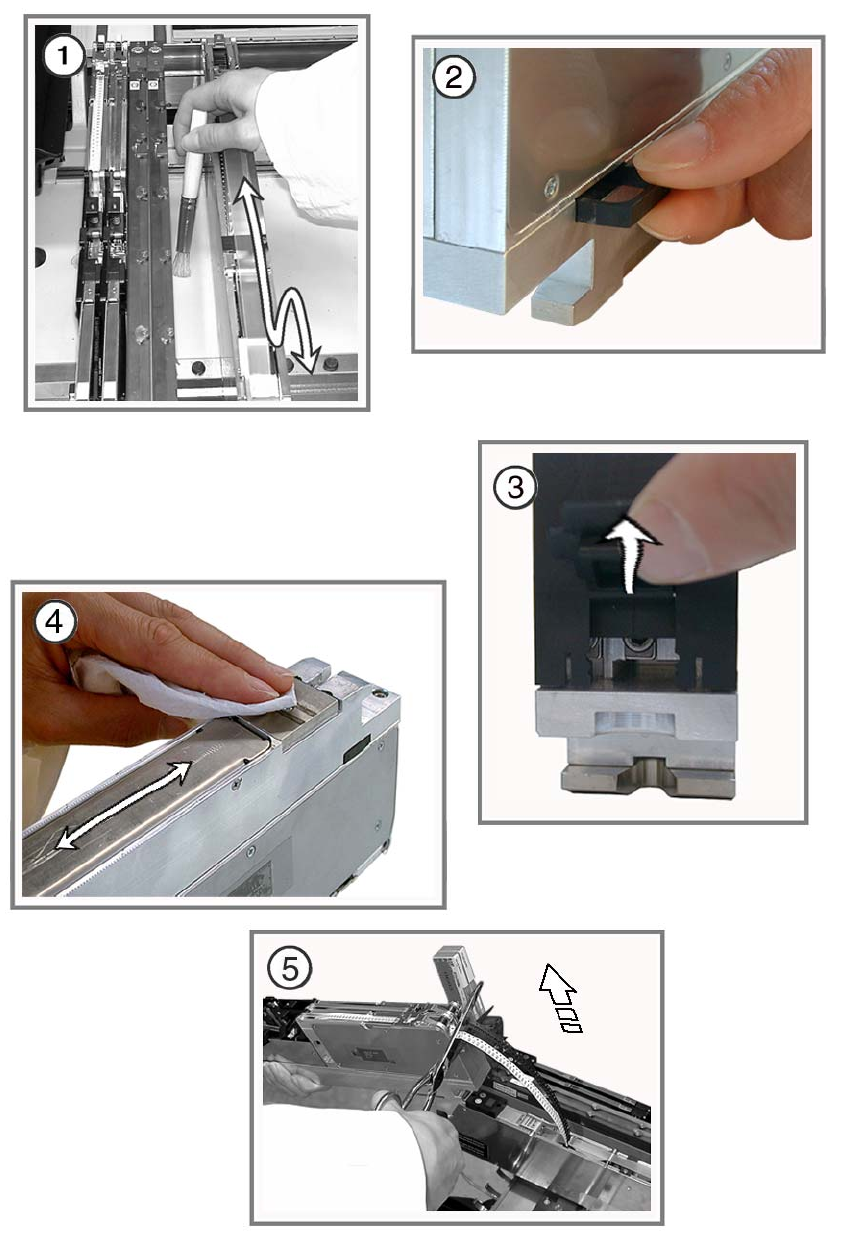
Vacuum PCB conveyor 4
a Use the vacuum cleaner to remove all loose components on and around the PCB conveyor.
Loose components on the PCB conveyor and in the sonar sensor unit could cause faults. 4
4
4
Clean the X/Y scales (if required) 4
4
Only use soft cloths to clean the scale rods. Do not apply too much pressure. 4
4
s Clean the incremental scales of the Y and X axes, if required using a lint-free soft cloth moist-
ened with ethyl alcohol.
4
Dirty scale rods lead to counting errors on the X and Y axes, and thus result in machine stop-
pages. 4
4
4
4 Weekly maintenance jobs SIPLACE D1 / D2
02/2010 EN Edition
24
4

SIPLACE D1 / D2 4 Weekly maintenance jobs
02/2010 EN Edition
25
Empty the component drawer or flap of the 8 mm S feeder 4
: Unplug the 8 mm S feeder and lift it off the changeover table.
4
a Remove loose components from the changeover table with a brush or using the vacuum
cleaner.
4
s Empty the component drawer of the 2x8 mm S feeder (if present).
4
d Open the flap of the 3x8 mm S feeder (if present) and remove the components.
4
f Wipe the base of the feeder to remove any dirt.
4
g Cut off the used tape so that it is flush with the feeder.
4
: Return the feeder modules to their original (correct) locations.
4
Make sure that the feeder is seated firmly on the changeover table and is inserted at the right po-
sition. 4
4
4
4
: Close the protective cover.
: Repeat these tasks in every placement area.
4
4
4
4