00194845-0302_MM_D1_D2_EN.pdf - 第34页
6 2-monthly maintenance jobs SIPLA CE D1 / D2 02/2010 EN E dition 34 6 2-monthly maintenance jobs 6

SIPLACE D1 / D2 5 Monthly maintenance jobs
02/2010 EN Edition
33
For SIPLACE D1 only:
Clean the IC and FC camera 5
There is a risk of cutting your finger along the edges of the mirror. 5
To protect your hands, wear laboratory gloves and avoid touching the edges. 5
5
The laboratory gloves are also essential for effective cleaning (fingerprints). 5
5
a Carefully pull the top part of the IC camera up and off.
s Clean the tilted glass plate with a lens cloth.
5
: Insert the top part of the IC camera.
When you insert the top part of the IC camera, make sure that it lies flat against the bottom part
and does not move.
5
d Remove the top part of the FC camera in the same way.
f Clean the tilted glass plate with a lens cloth.
5
: Insert it once more.
5
For SIPLACE D1 only:
Clean the coplanarity module (if present) 5
: Use lens cleaning cloth to clean the lenses of the coplanarity module.
5
5
: Switch the placement machine on at the main switch.
: Dock the component trolley in the placement machine.
5
5
5
5
5
6 2-monthly maintenance jobs SIPLACE D1 / D2
02/2010 EN Edition
34
6 2-monthly maintenance jobs
6

SIPLACE D1 / D2 6 2-monthly maintenance jobs
02/2010 EN Edition
35
6
You will need the following tools, equipment and consumables for the 2-monthly maintenance: 6
– Vacuum cleaner
– Condensate catch tray
– Short-bristled brush
– Phillips screwdriver
– Whetstone
–Scissors
– Lint-free cloths
– ISOFLEX TOPAS NCA52 grease
–WD40
– Filter insert, 5 microm. for series 112, if required
– New silencer for the Collect&Place head DLM2, if required.
6
6
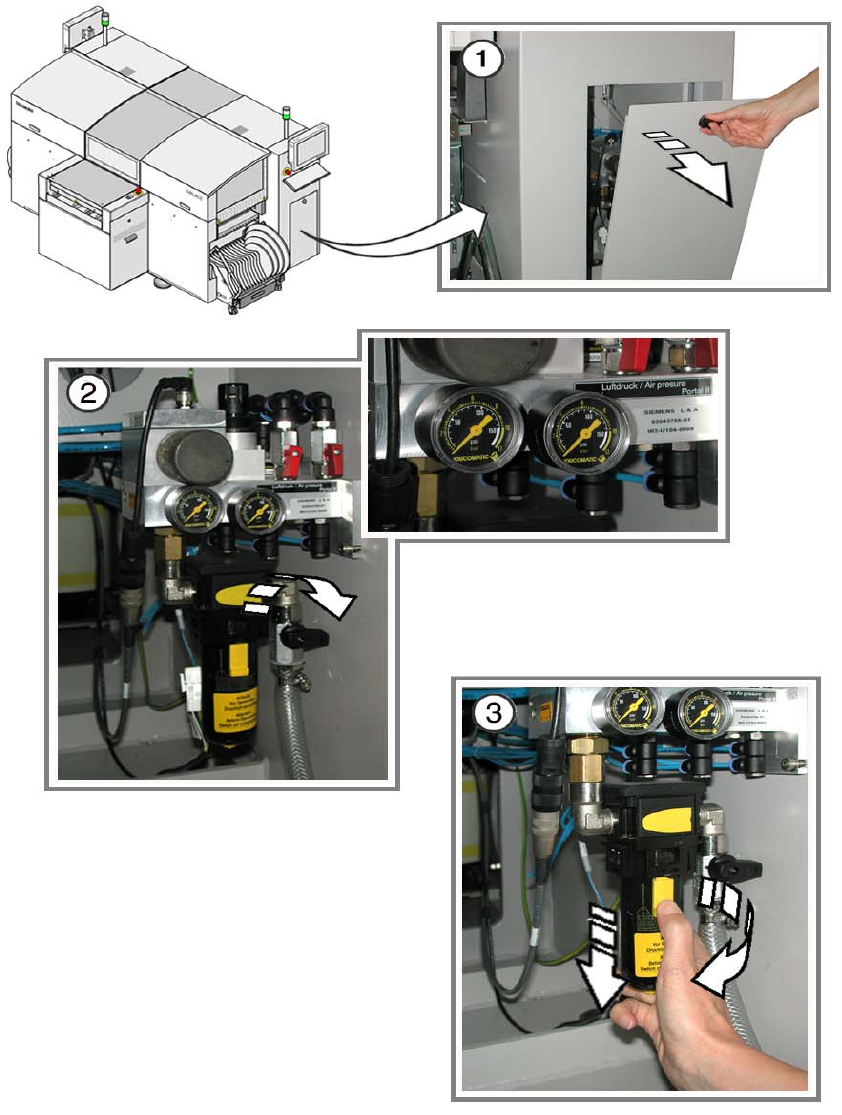
Inspect or replace the filter cartridge 6
a Open the door to the compressed air supply.
6
s Turn the main compressed air valve clockwise into the horizontal position to close it.
: As soon as both manometers read 0, switch the placement machine off at the main switch.
6
d Remove the cover flap by pulling the yellow cap release down and turning the cover flap coun-
ter-clockwise (bayonet fitting).
6
6
6