00198377-01_SM_JTF-ML2_en.pdf - 第117页
4 Conveyor Mechanics 4.8 Replacing the Toothed Belt Service Manual SIPLACE JTF-ML2 08/2017 117 Installation ► Follow the removal instructions in reverse order for installation. Also observe the following in- structions: …
4 Conveyor Mechanics
4.8 Replacing the Toothed Belt
116 Service Manual SIPLACE JTF-ML2 08/2017
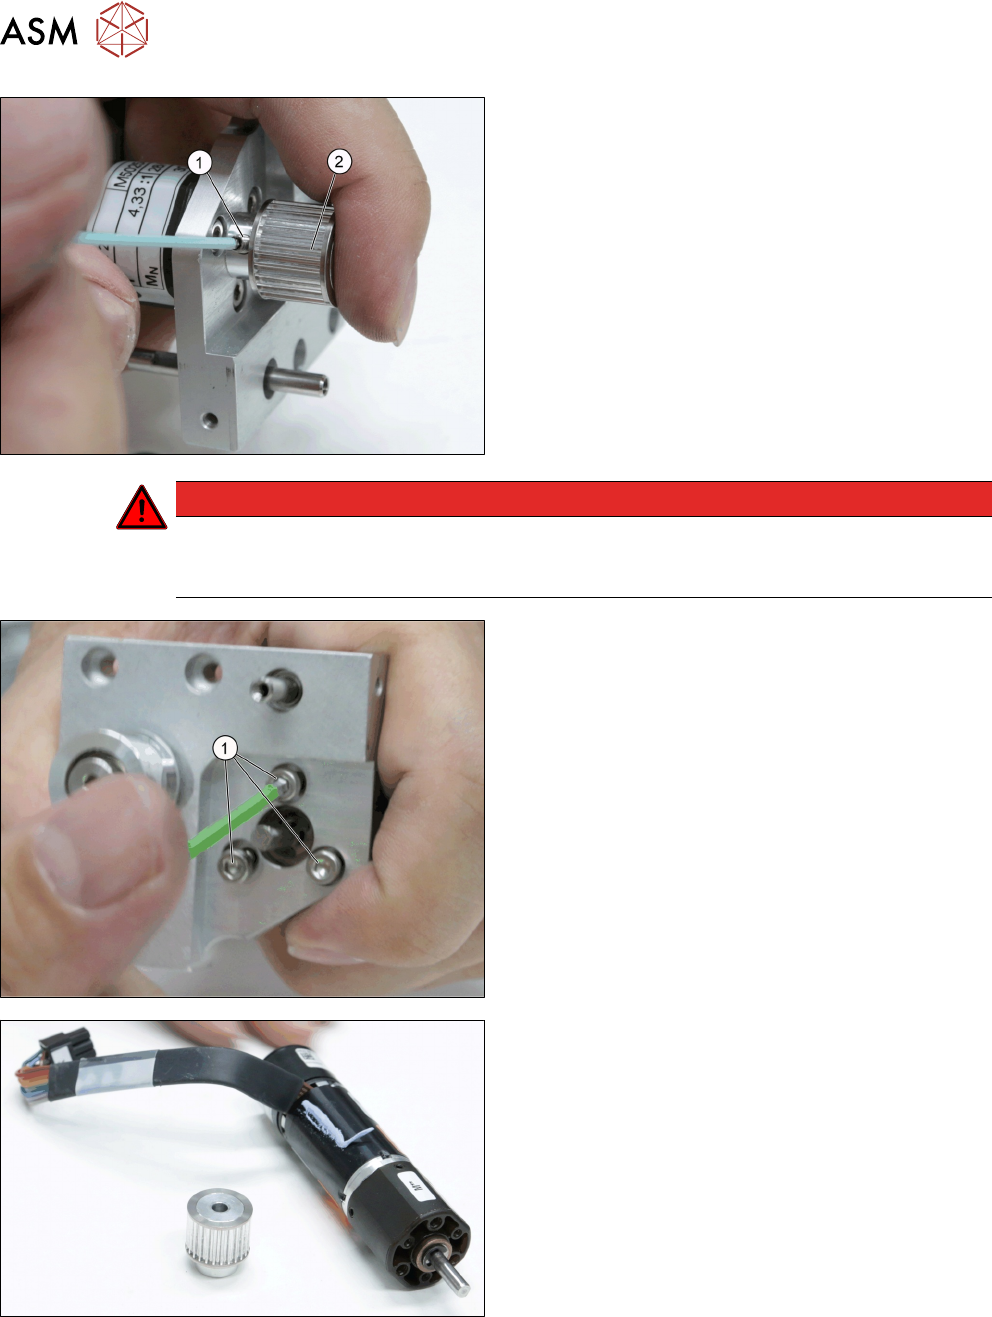
► Remove the screw DIN EN ISO 4026 - M3 x 4-
A2-21H [03025540-xx] (1) from the Conveyor
drive pulley S2MZ26 [03127981-xx] (2).
► Remove the Conveyor drive pulley S2MZ26
[03127981-xx] (1).
DANGER
Rubbing
Make sure there is sufficient gap between the pulley and the mounting when assembling to
prevent rubbing when the motor is in motion.
► Remove the three screws ISO 4762 - M 3 x 6-
A2-70 [03042541-xx] (1) from the Motor Assem-
bly, BLDCmotor w/ encoder,gearbox [03146371-
xx].
► Remove the motor Assembly, BLDCmotor w/ en-
coder,gearbox [03146371-xx].
4 Conveyor Mechanics
4.8 Replacing the Toothed Belt
Service Manual SIPLACE JTF-ML2 08/2017 117
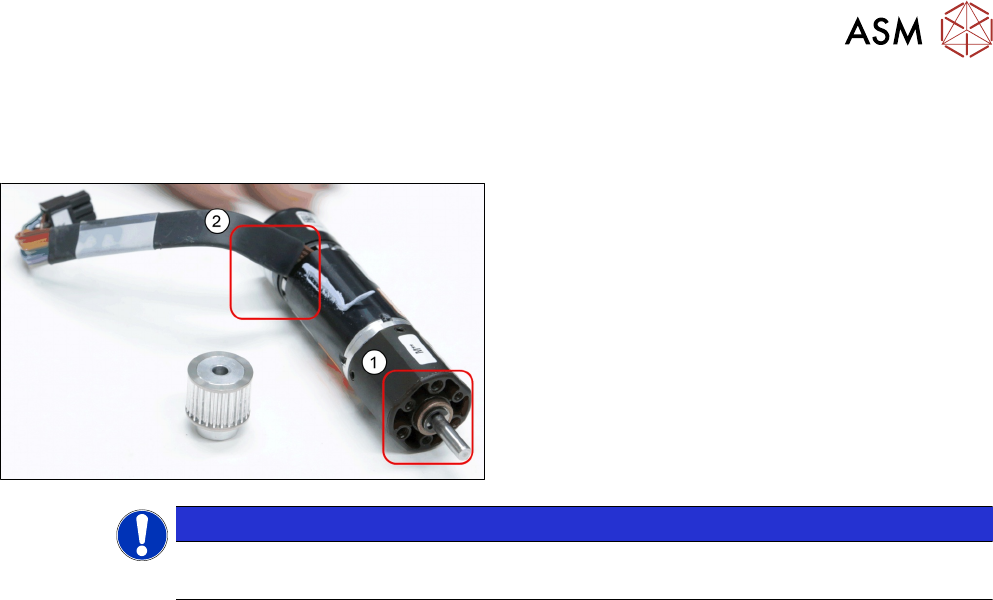
Installation
► Follow the removal instructions in reverse order for installation. Also observe the following in-
structions:
► Please consider the correct angle of the cable (2)
during reassembling as well as the correct screw
holes (1).
NOTICE
Heat transer interface sheet
Push tight when assembling back.
4 Conveyor Mechanics
4.8 Replacing the Toothed Belt
118 Service Manual SIPLACE JTF-ML2 08/2017
4.8.3 Replacing the Single Disk flexible Coupling
Parts, Equipment and Tools
●
Standard tools
●
Single disk flexible coupling 4x4 [03146598-xx]
Removal
► Remove the conveyor (See Removing SIPLACE JTF-ML2 Conveyor from Machine).
► Follow the instructions to get to Conveyor driver unit [03132255--xx] parts ( See 4.8 "Repla-
cing the Toothed Belt" [}108]).
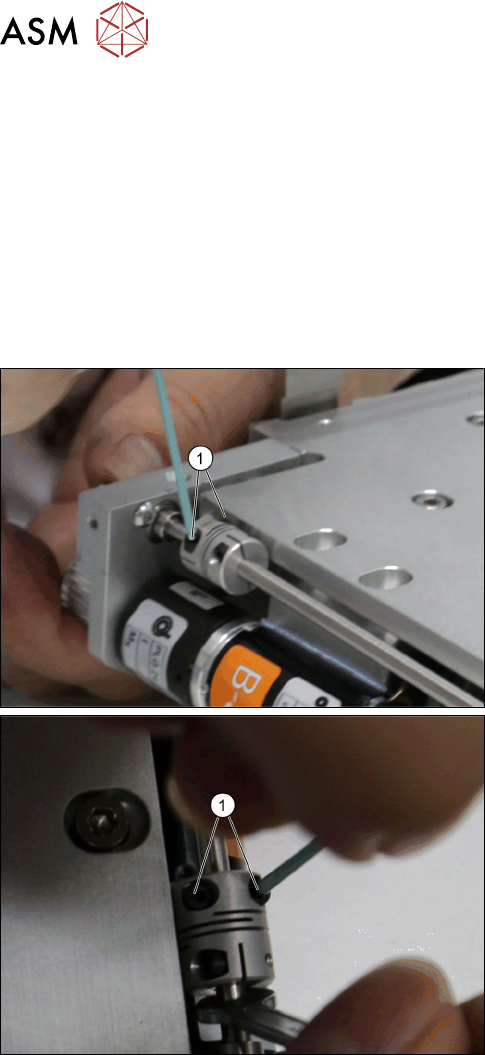
► Loosen the four screws of the Single Disk flexible
Coupling 4x4 [03146598-xx] (1).