00198377-01_SM_JTF-ML2_en.pdf - 第31页
2 General Tasks 2.1 Hardware Tasks Service Manual SIPLACE JTF-ML2 08/2017 31 Fig.17: Mounting the Transport 5 ► (1) Insert the conveyor. Make sure that it fits cor- rectly into the conveyor pivot. ► (2) Swing the transp…
2 General Tasks
2.1 Hardware Tasks
30 Service Manual SIPLACE JTF-ML2 08/2017
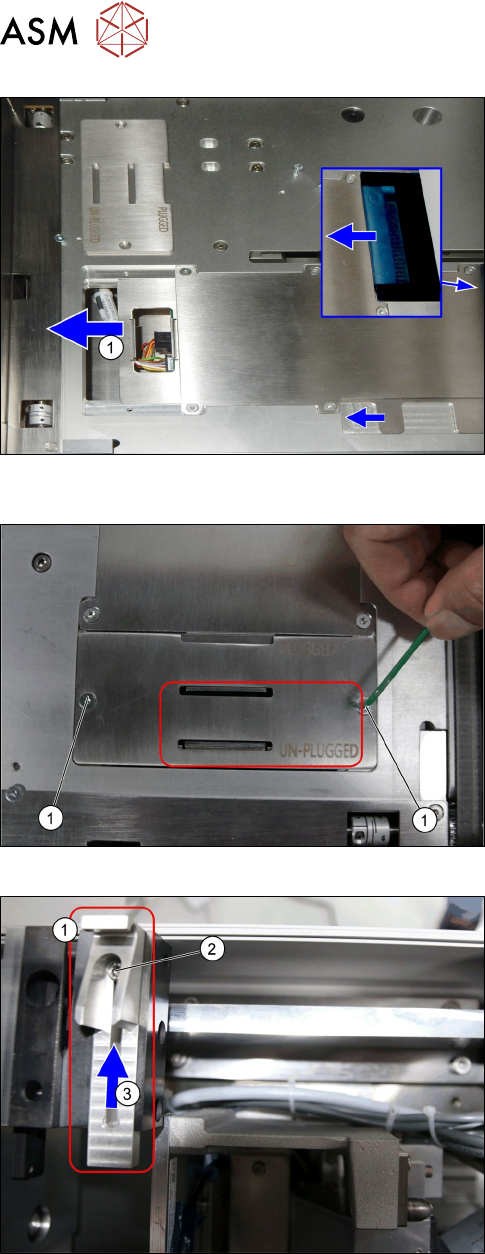
Fig.14: Mounting the Transport 2
► Push the plate(1) until end position to the left.
Fig.15:
Mounting the Transport 3
► Put back the plate with the screws.
Fig.16: Mounting the Transport 4
► Loosen the screw(2) at conveyor pivot(1).
► (3) Push the conveyor pivot until end position to-
wards the tower.
2 General Tasks
2.1 Hardware Tasks
Service Manual SIPLACE JTF-ML2 08/2017 31
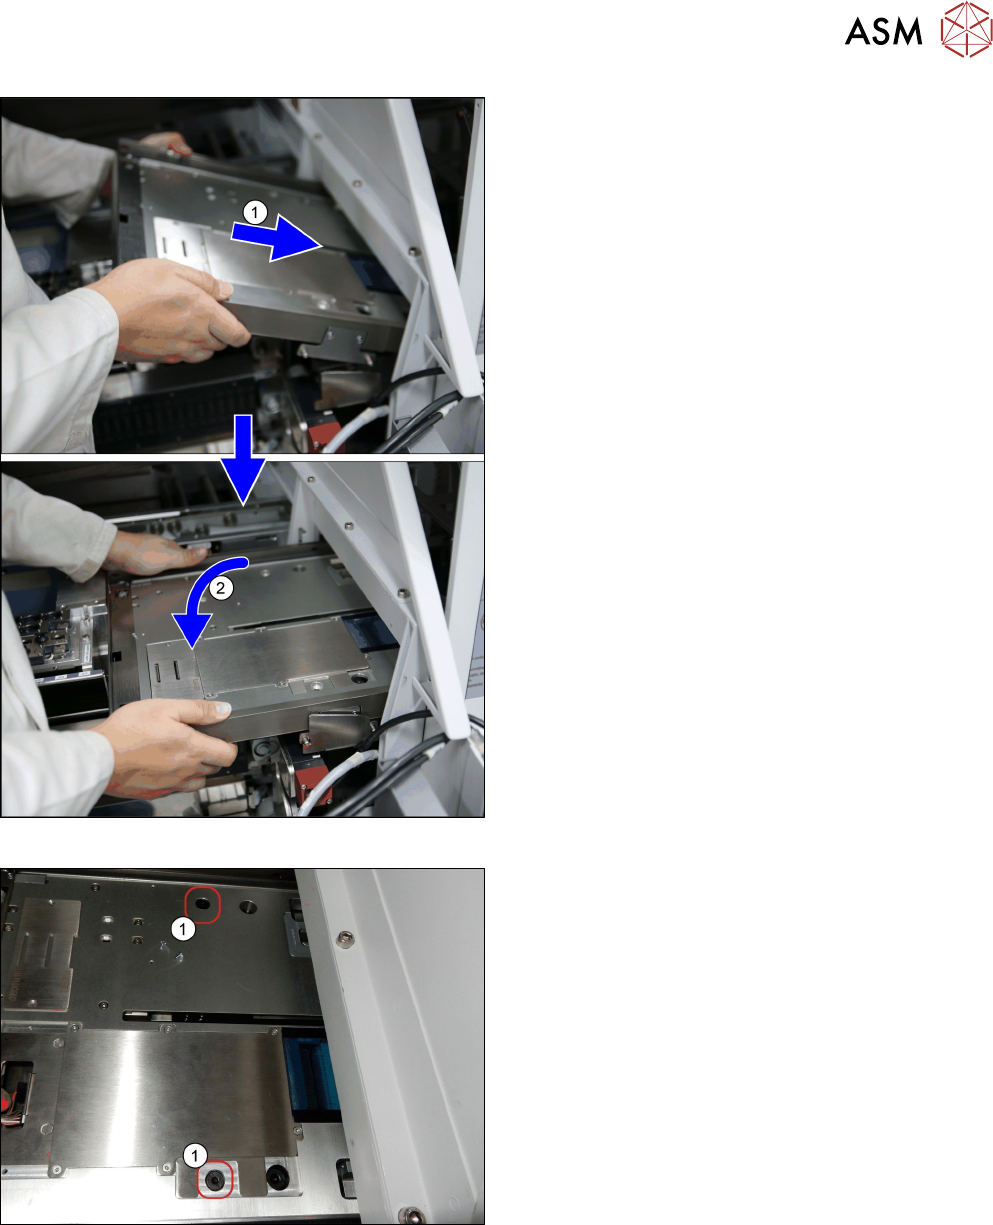
Fig.17: Mounting the Transport 5
► (1) Insert the conveyor. Make sure that it fits cor-
rectly into the conveyor pivot.
► (2) Swing the transport down onto the SIPLACE
JTF-ML2 adapter.
Fig.18: Mounting the Transport 6
► Fasten the transport with two screws(1)
(ISO7379 - 8x16-12.9) on the SIPLACE JTF-
ML2 adapter.
2 General Tasks
2.2 Software Tasks
32 Service Manual SIPLACE JTF-ML2 08/2017
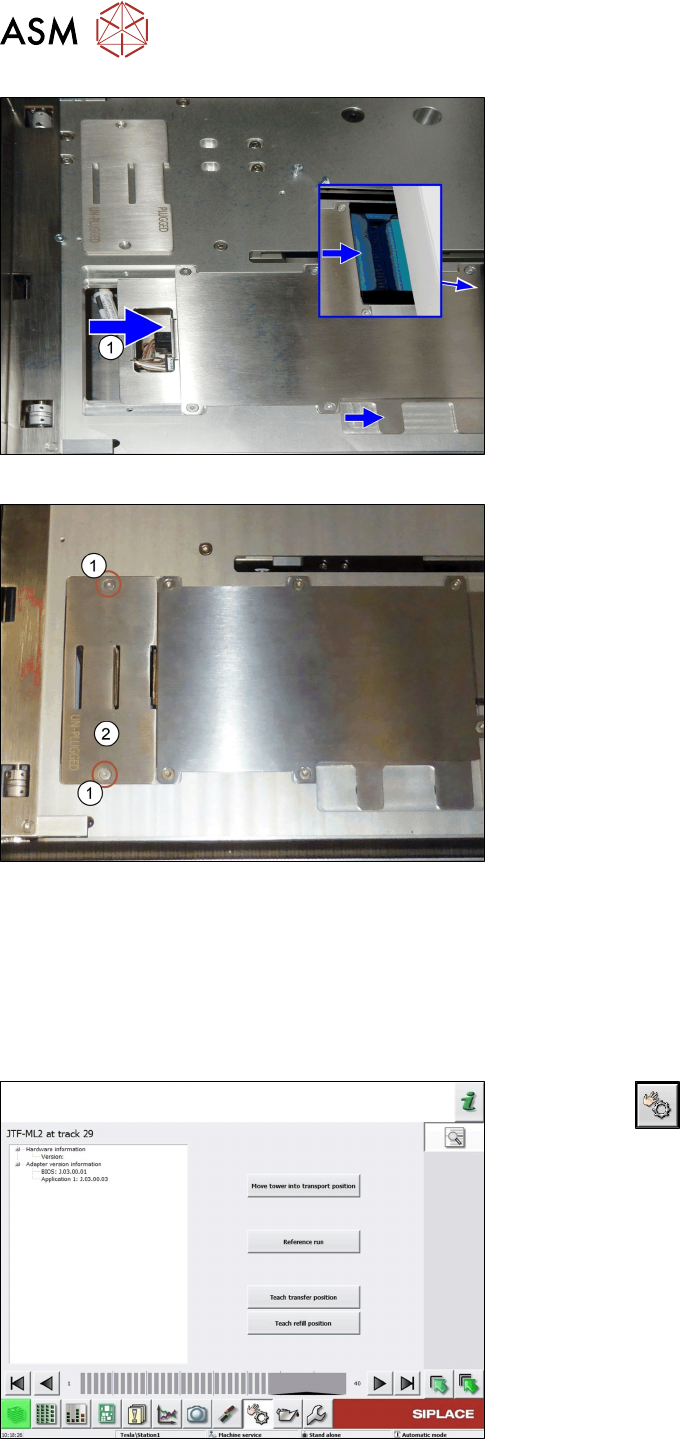
Fig.19: Mounting the Transport 7
► Push the plate(1) until end position to the right.
Fig.20: Mounting the Transport 8
► Fit the cover(2) using two screws(1).
2.2 Software Tasks
2.2.1 Teach Transfer Position
Whenever the tower or the conveyor of the SIPLACE JTF-ML2 has been mounted to the machine,
the teach transfer position has to be taught again.
Fig.21: Teach transfer position 1
► Click the button.
► Select the button location 1.
► Select track 29.
► Select the button Details….
► Select the button Teach transfer position.