00198377-01_SM_JTF-ML2_en.pdf - 第141页
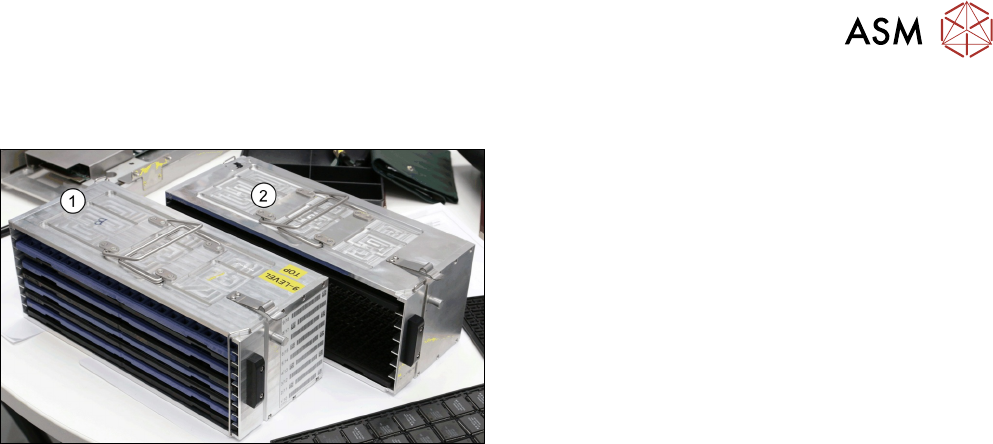
6 Magazine 5.11 Replacing Slot Sensor w/ Connector Service Manual SIPLACE JTF-ML2 08/2017 141 6 Magazine 1. JTF-ML2 cassette 9 [03147148-xx] 2. JTF-ML2 cassette 7 [03147147-xx] The following steps work for the two types …
5 Electrics
5.11 Replacing Slot Sensor w/ Connector
140 Service Manual SIPLACE JTF-ML2 08/2017
Installation
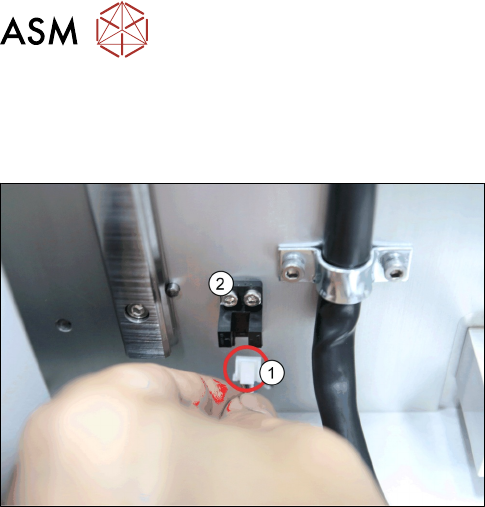
► Follow the removal instructions in reverse order for installation. Also observe the following in-
structions:
► Reconnect the connector (1) to the slot sensor w/
connector [03145975-xx] (2) as shown in the pic-
ture.
6 Magazine
5.11 Replacing Slot Sensor w/ Connector
Service Manual SIPLACE JTF-ML2 08/2017 141
6 Magazine
1. JTF-ML2 cassette 9 [03147148-xx]
2. JTF-ML2 cassette 7 [03147147-xx]
The following steps work for the two types of cassette accordingly.
6 Magazine
6.1 Pushing Trays into and Removing from the Cassette
142 Service Manual SIPLACE JTF-ML2 08/2017
6.1 Pushing Trays into and Removing from the Cassette
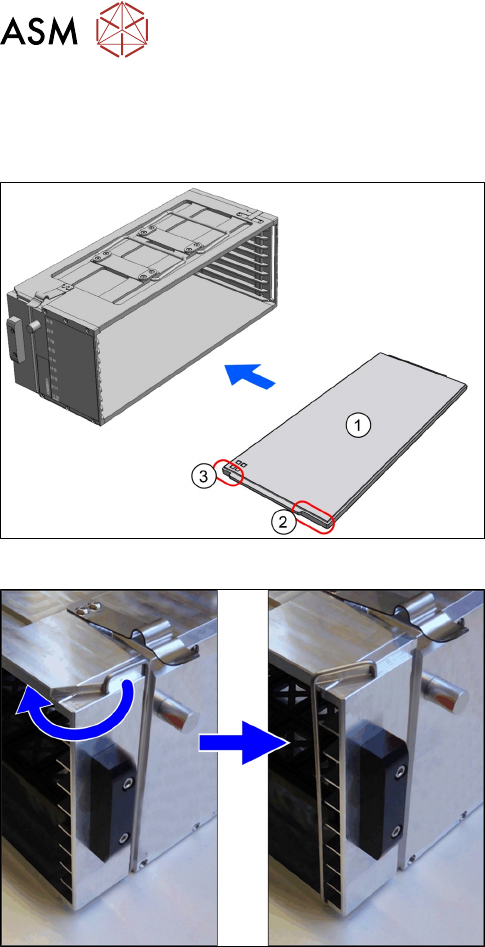
Pushing Trays into the Cassette
Fig.28: Loading cassette
1. Cassette
2. Spring on the cassette
The spring must point to the right.
3. Tray
4. Orientation of the tray
The side with the long recess is pushed into the
cassette first.
► Place the cassette down on a stable surface.
► Observe the orientation. The spring (2) must
point to the right.
► Observe the direction of loading(3) for the
trays(4).
► Push the trays into the cassette.
Fig.29: Transportation Lock
► Secure the waffle pack trays with the transporta-
tion locks on both sides.
► Ensure the direction lock is active.
► On the host system, link the components / tray code to the slot number of the cassette.
Removing the trays from the cassette
► Place the cassette down on a stabile surface.
► Unlock the transportation locks.
► Pull the trays out of the slots.