KE-2030使用说明书.pdf - 第531页
7 − 37 (3) Actions taken af ter you click t he <DONE> button − W hen you click the <DONE> but ton, the " Threshold - Initialize" dialog box appears on the screen, then the system init ializes the ba…
7 − 36
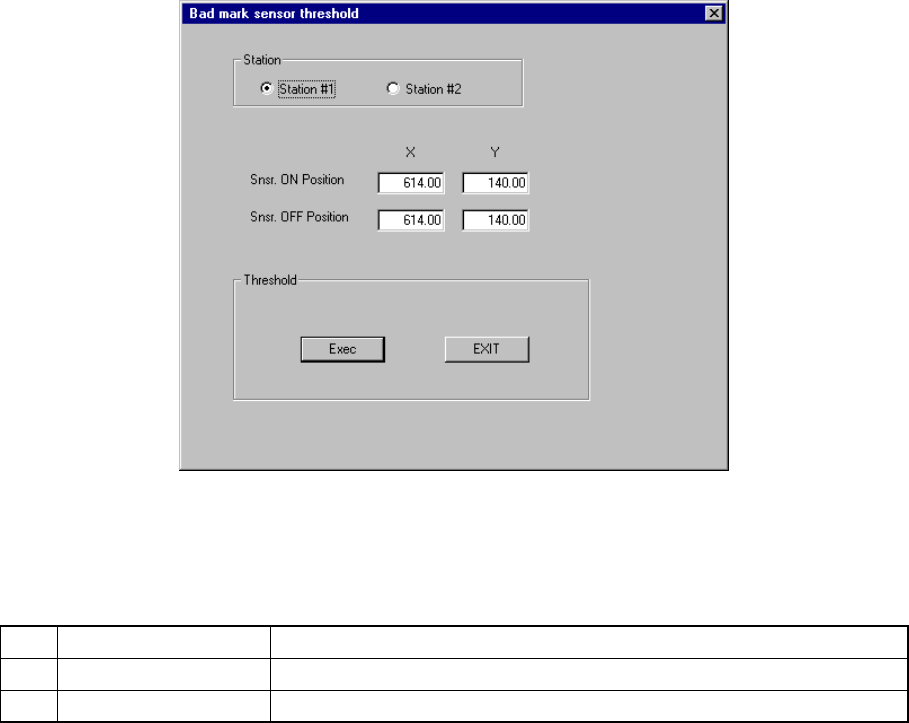
7-2-2-12 Bad mark sensor teaching
When you select the setting item "Bad mark sensor teaching", the "Bad mark
sensor teaching" dialog box appears on the screen as shown in Figure 7.2.2.12.1.
Figure 7.2.2.12.1 "Bad mark sensor teaching" dialog box
(1) Setting items
No. Item Description
1 Snsr. ON Position Sets the sensor turning ON position.
2 Snsr. OFF Position Sets the sensor turning OFF position.
(2) How to set
− Enter the X- and Y-coordinates separately directly from a keyboard.
− Use the HOD to teach the coordinates with a camera.
In this case, both X and Y values are loaded at the same time regardless of
the input focus position.

7 − 37
(3) Actions taken after you click the <DONE> button
− When you click the <DONE> button, the "Threshold - Initialize" dialog box
appears on the screen, then the system initializes the bad mark sensor.
Next, the "Threshold - Execution" dialog box appears on the screen which
indicates the system automatically performs the teaching operation.
Figure 7.2.2.12.2 "Threshold - Initialize" dialog box
Figure 7.2.2.12.3 "Threshold - Execution" dialog box
7.2.3 Disp (Display)
This command allows you to select whether to display the tool bar/status bar on the
screen or not.
7 − 38
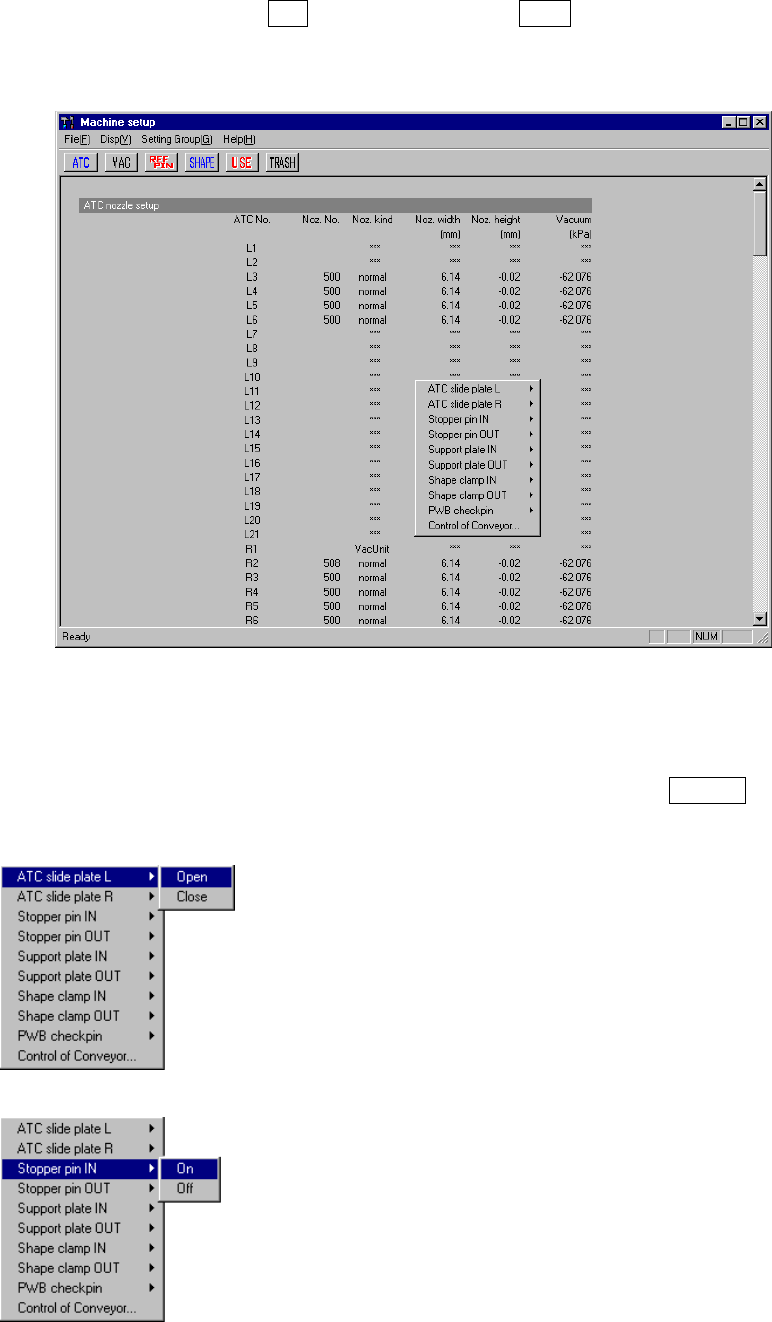
7.3 Mechanical Setup
If you have to drive a mechanical device while setting the menu items on the Machine
Setup menu, display the pop-up menu for mechanical devices. Press the right button
of the trackball, or press the F10 key while holding the Shift key. A pop-up menu
shown in Figure 7.3.1 starts up.
Figure 7.3.1 Machine setup pop-up menu
When you select each menu item on the pop-up menu above, the corresponding
extended menu appears as shown below. Select a desired item on this extended
menu with a trackball, or select it with the cursor keys, then press the ENTER key to
drive the corresponding mechanical device.
◇
◇◇
◇ATC slide plate
The same extended menu appears on the screen when
you select either of the menu items: "ATC slide plate 1"
and "ATC slide plate 2".
◇
◇◇
◇Stopper pin
The same extended menu appears on the screen when
you select either of the menu items: " 1" and "Stopper
pin 2".