CP-7[732-742]-series Mechanical Reference(2.9E).pdf - 第70页
Pallet Loading 1. Push the fork of the PCU (containing the replacement pallet) into the machine and clamp it using the [Stage1 Clamp] command. Caution: Exercise extreme care when using the PCU to move a fully loaded pall…
4. Changing Pallets
Point
The PCU (Pallet Change Unit) enables batch changes of feeder pallets.
Procedure
Pallet unloading
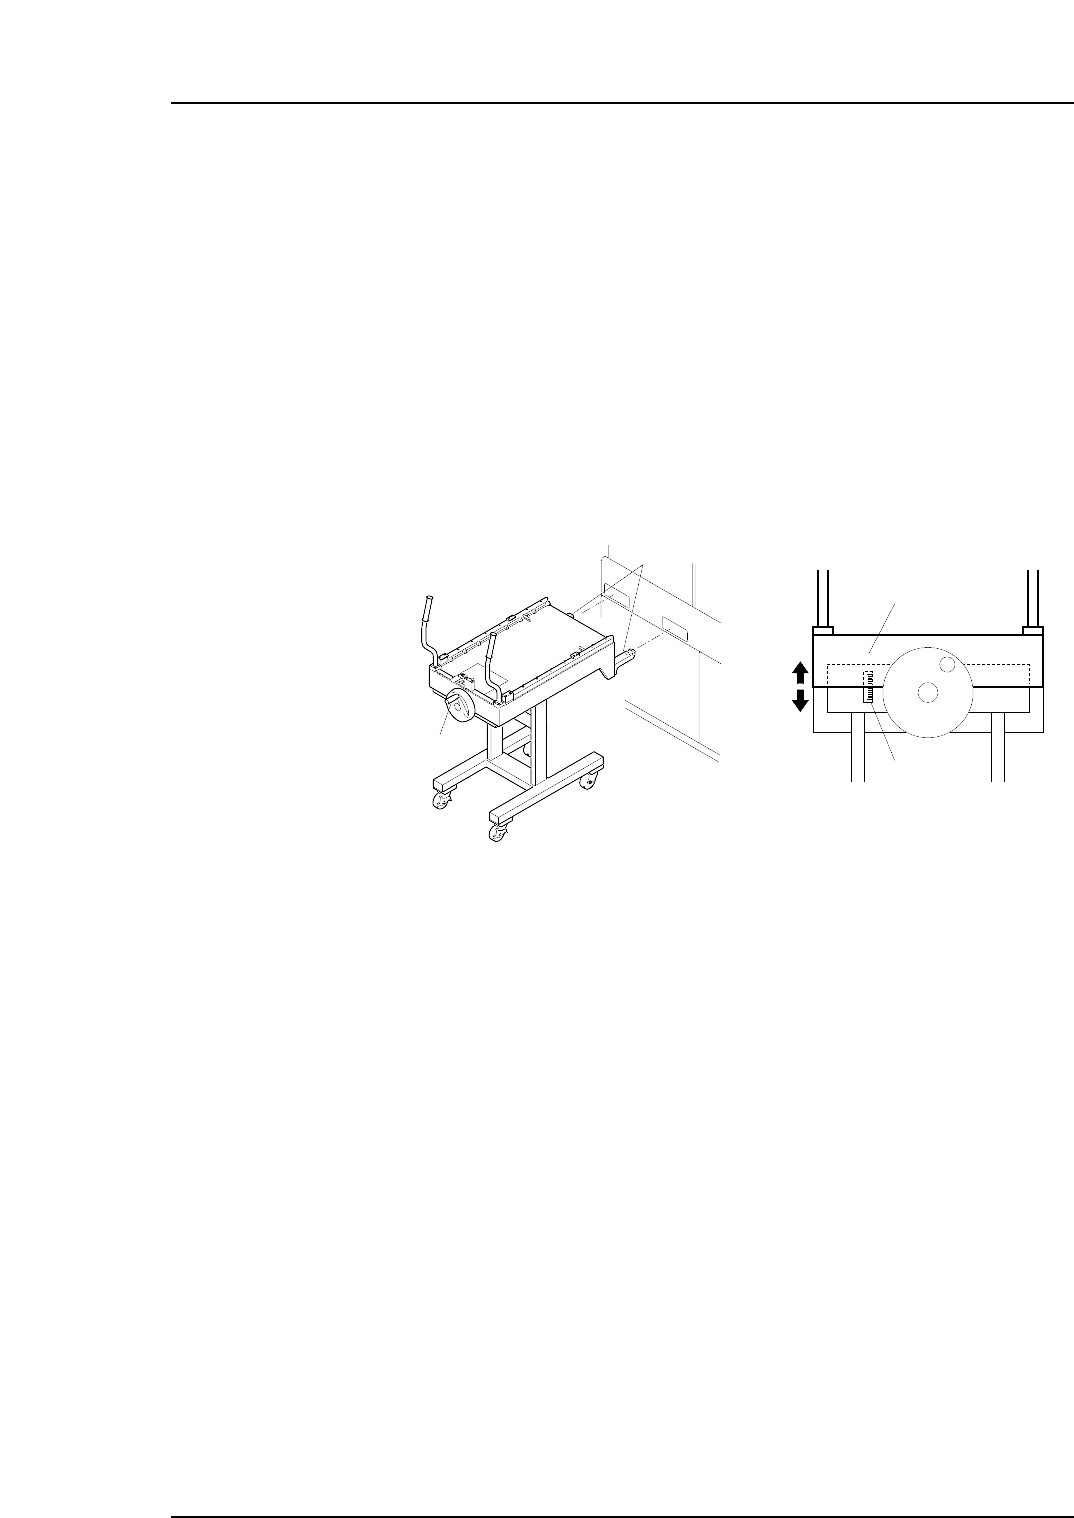
1. Align the height of the PCU forks (at the end of the PCU) with the fork slots on the
machine. Turn the handle and raise the upper section of the PCU.
Note: Use the guide seal at the side of the handle as a reference when adjusting the height
of the forks. Adjust so that the lower surface of the plate falls within plus or minus 10
mm of the standard value.
2. Push the PCU to insert the forks into the machine, then clamp it with the [Stage1
Clamp] command.
Note: The following explanation describes the D1-axis (stage 1) pallet change.
3. Close the rear door and select the [Stage1 Start] command, then press START. The
D-axis pallet moves to the change position and is unclamped.
4. Open the rear door and pull the pallet out of the machine and onto the PCU.
Caution:
1. Remove the pallet slowly.
2. To avoid damage to the door stoppers, the door should be opened and closed with
care.
5. Select the [Stage1 Unclamp] touch-panel command, then slowly retract the loaded
PCU.
Caution: Exercise extreme care when using the PCU to move a fully loaded pallet. A
dropped pallet may result in serious injury or damage to the machine.
C7SM2008a
Handle
Forks
Plate
Guide seal
Part 2 Chapter 4 Changing Pallets
Edition 2.0 2-4-1 CP-7 series Mechanical Reference

Pallet Loading
1. Push the fork of the PCU (containing the replacement pallet) into the machine and
clamp it using the [Stage1 Clamp] command.
Caution: Exercise extreme care when using the PCU to move a fully loaded pallet. A
dropped pallet may result in serious injury or damage to the machine.
2. Push a pallet onto the machine’s D-axis.
3. Close the rear door and clamp the pallet at the D-axis.
Caution:
1. To avoid damage to the door stoppers, the door should be opened and closed with
care.
2. If the rear door is closed as the pallet is being changed, the clamp will be activated
even though the pallet is not present.
4. Select the [Stage1 Set] command.
5. Select the [Stage1 Unclamp] command, then slowly retract the PCU. This
completes the pallet change.
Part 2 Chapter 4 Changing Pallets
Edition 2.0 2-4-2 CP-7 series Mechanical Reference
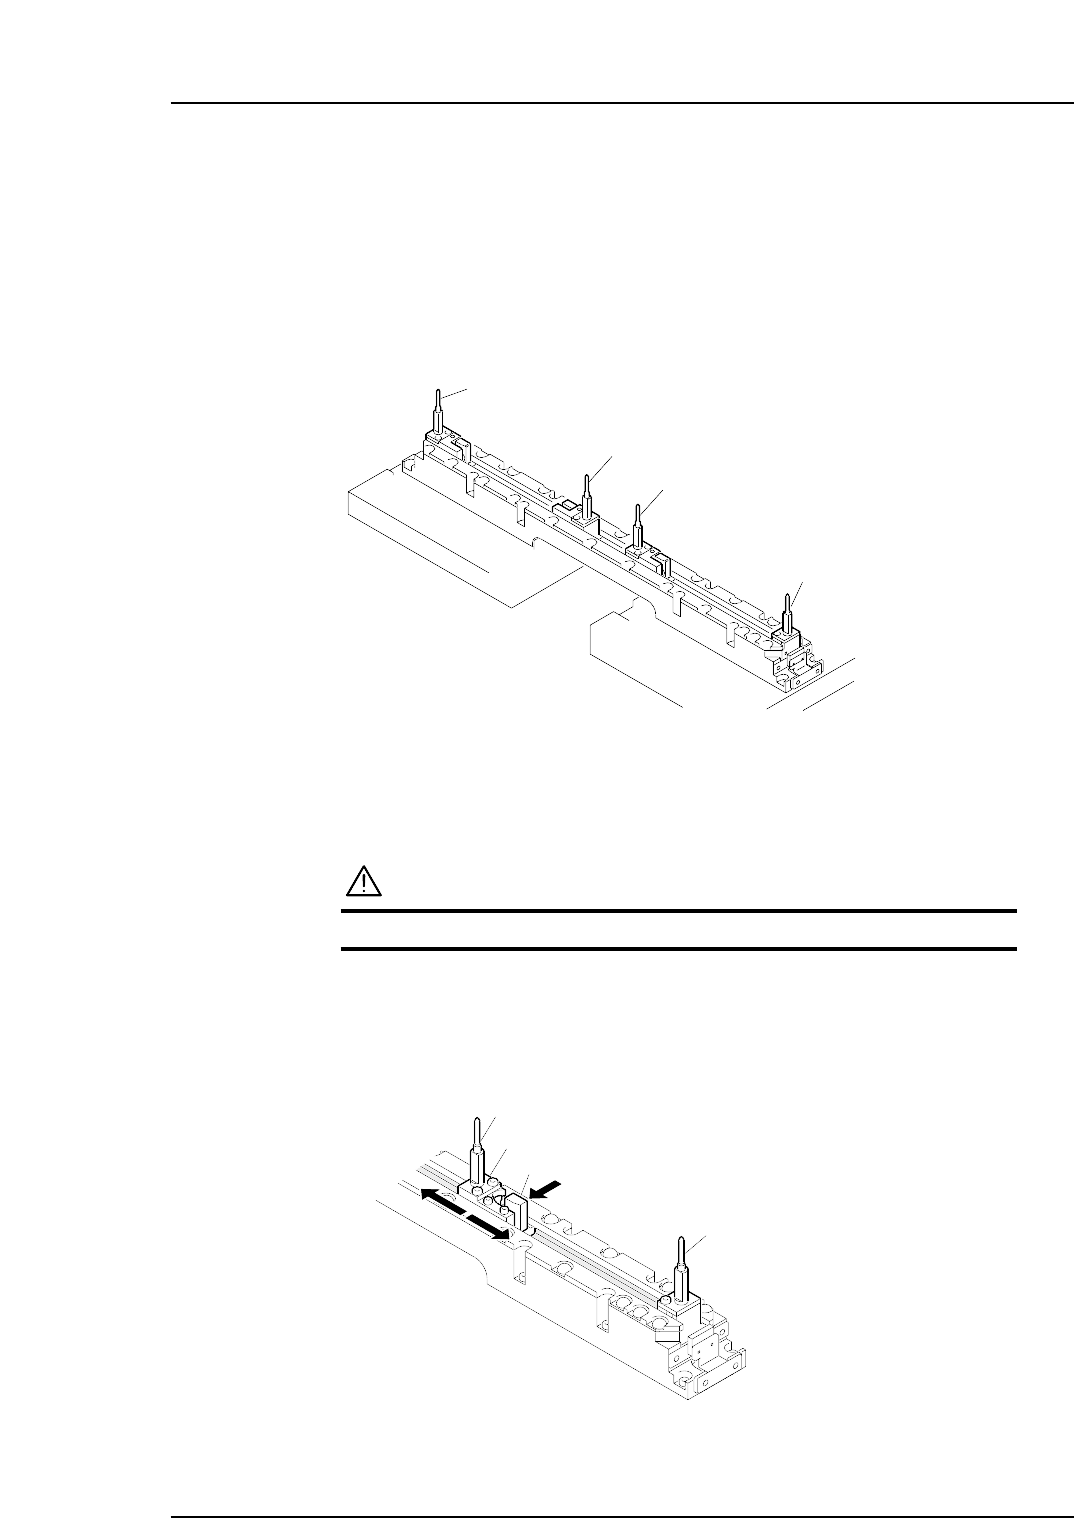
5. Setting the Panel Positioning Pins
<CP-742ME/CP-742E>
Point
When using pin reference panels, set the positioning pins so that they match the size of
the panel to be loaded. The pins to be set are listed below.
*: Do not change the position of the panel 1 reference pin.
Procedure
WARNING
Turn the main power off before performing this procedure.
First, push the panel 1 movable pin holder’s lock lever in the direction of the arrow
and move the pin holder so that it matches the panel’s pin pitch. Then,
considering the distance between panel 1 and panel 2, decide the positions for the
panel 2 reference pin and panel 2 movable pin.
Pin holder
Lock lever
Panel 1 reference pin
Panel 1 movable pin
C7SM2014E
C7SM2013E
Panel 1 movable pin
Panel 1 reference pin *
Panel 2 reference pin
Panel 2 movable pin
Part 2 Chapter 5 Setting the Panel Positioning Pins
Edition 2.2 2-5-1 CP-7 series Mechanical Reference