CP-7[732-742]-series Mechanical Reference(2.9E).pdf - 第77页
1.2 Cleaning the W aste T ape Duct (Every 8 Hours) Point After being cut by the cutter, waste tape is carried through a duct along the route shown in the figure below. Should the duct become clogged, the clogged waste ta…
1. Cleaning
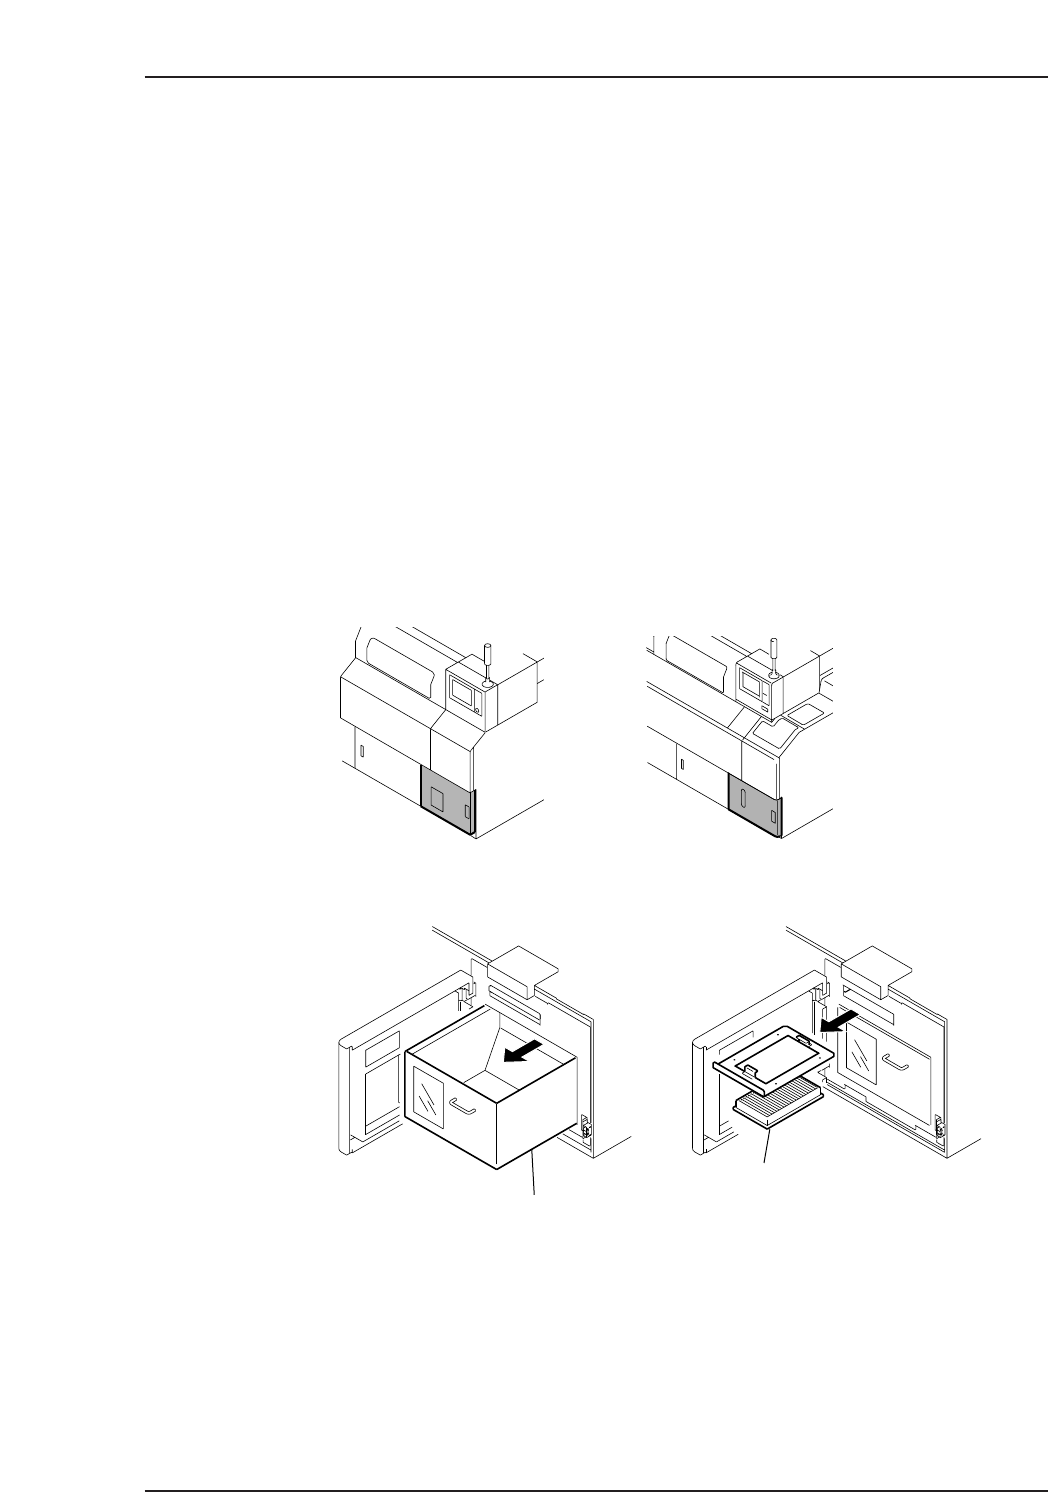
1.1 Emptying the Waste Tape Box and Cleaning
the Filter (Every 8 Hours)
Point
Waste tape which has been cut by the cutter is carried through a duct to the waste tape
box. This box should be emptied after every 8 hours of operation.
Procedure
Open the door, remove the waste tape box and empty the contents.
When emptying the waste tape box, also check the filter immediately above it. If the
filter is soiled, clean it with a vacuum cleaner.
Note: When cleaning is complete, ensure that the waste tape box and filter are inserted all the
way back to their original positions. Furthermore, ensure that the door is properly closed.
C7SM3006a
Waste tape box
Filter
<CP-732E>
<CP-742ME / 742E>
Part 3 Chapter 1 Cleaning
Edition 2.9 3-1-1 CP-7 series Mechanical Reference
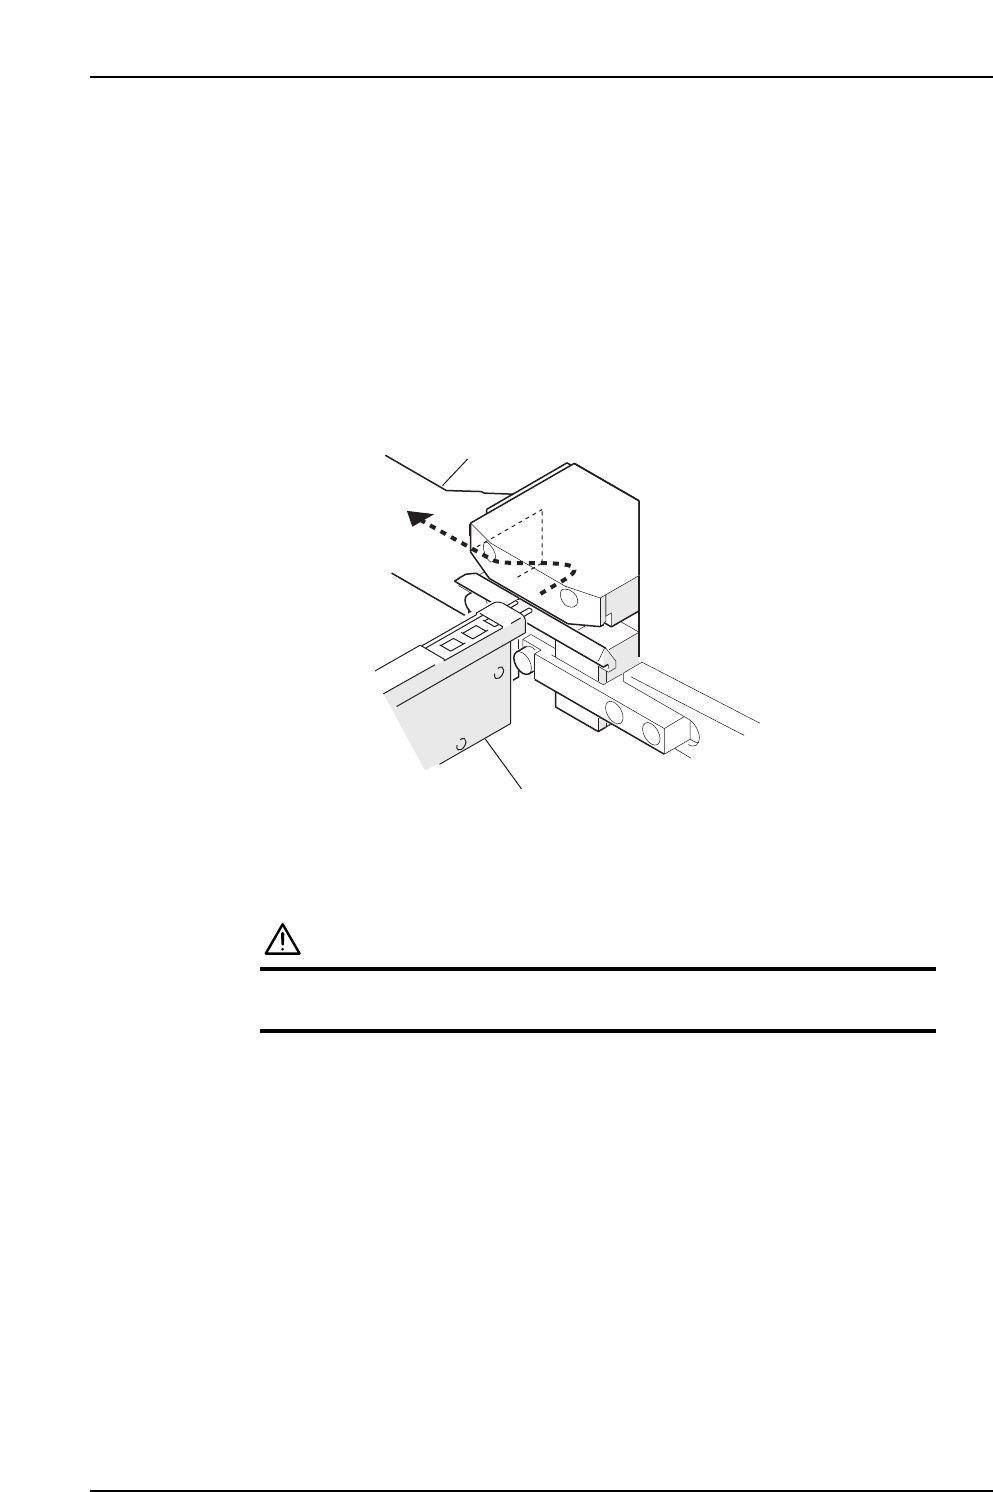
1.2 Cleaning the Waste Tape Duct
(Every 8 Hours)
Point
After being cut by the cutter, waste tape is carried through a duct along the route shown
in the figure below. Should the duct become clogged, the clogged waste tape may
interfere with tape being fed from the feeder, resulting in tape feed problems and part
pick-up errors.
If a tape feed problem occurs during automatic operation, inspect and clean the duct.
Procedure
WARNING
Be sure to turn the main power off before performing this
procedure.
The duct should be cleaned using a vacuum cleaner (do not use an air blower).
Duct
Feeder
C7SM3001a
Part 3 Chapter 1 Cleaning
Edition 2.9 3-1-2 CP-7 series Mechanical Reference
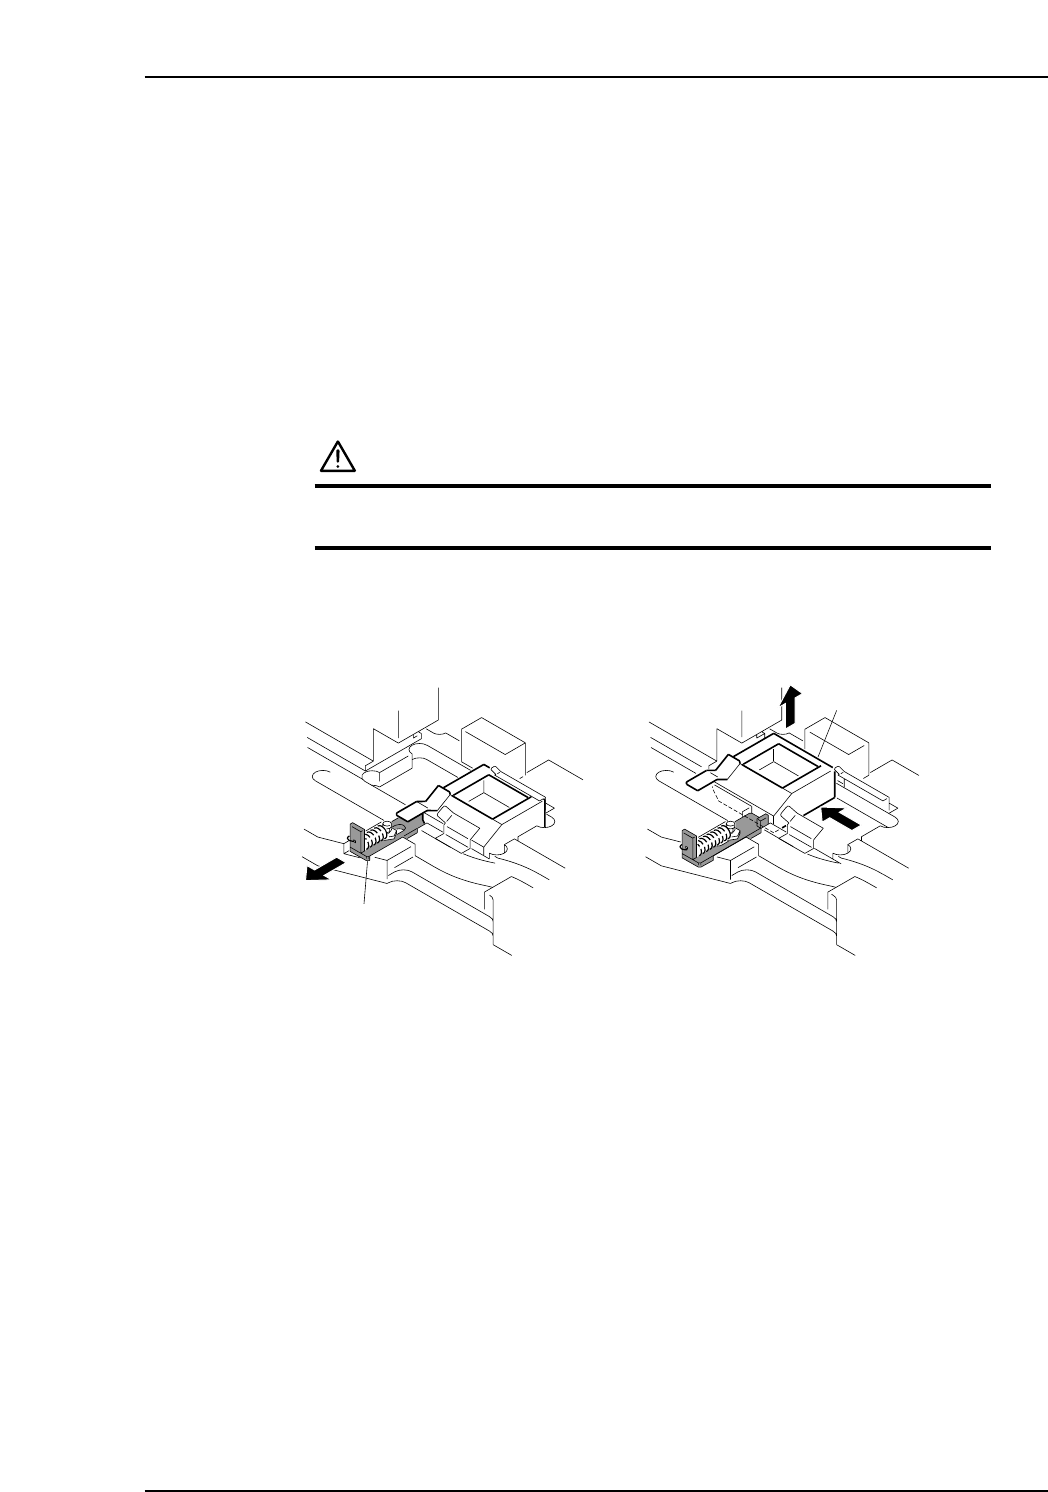
1.3 Emptying the Reject Parts Box
(Every 8 Hours)
Point
Parts which have been rejected during vision processing are discarded to a reject parts
box. After every 8 hours of operation, this box should be removed from the machine and
emptied.
Procedure
WARNING
Be sure to turn the main power off before performing this
procedure.
Pull the lever forward then slide the reject parts box sideways and throw away the
rejected parts collected.
When returning the reject parts box to its position, make sure that the cushion sheet
exists at the bottom of the box.
C7SM3007
Lever
Reject parts box
Part 3 Chapter 1 Cleaning
Edition 2.9 3-1-3 CP-7 series Mechanical Reference