00196351-04_UM_ACT_de_en.pdf - 第141页
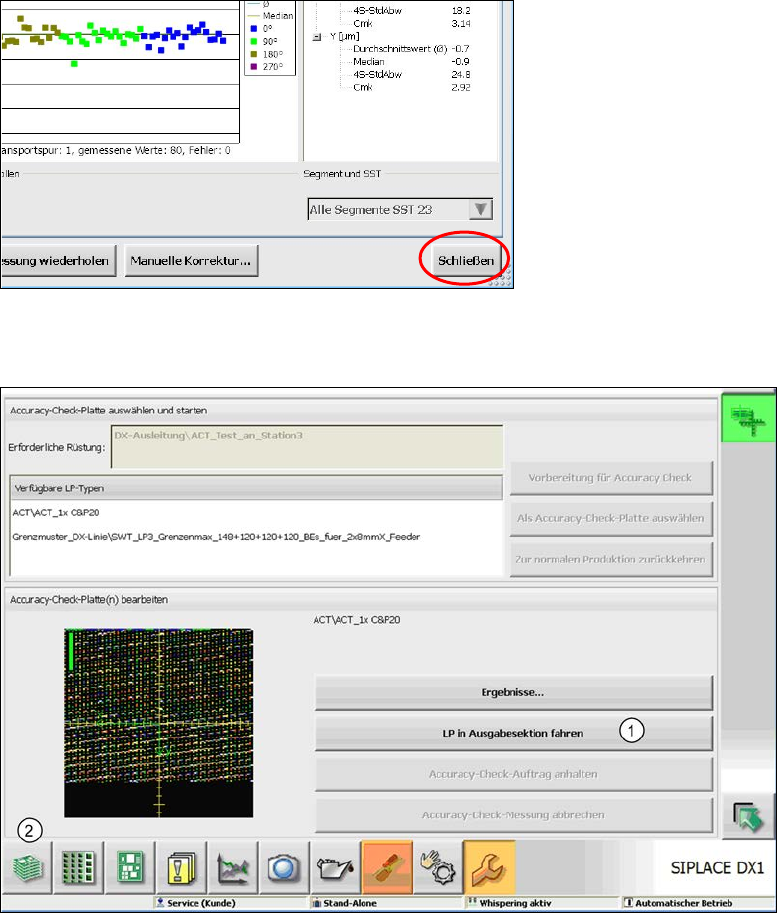
ACT - Accurac y Check T ool / User Manual 07/2014 Edit ion 67 4.2.6 Finishing the A CT – Returning to P roduction 4.2.6.1 Fi nishing (e. g. under Station Software 70x) ► Click the S chließen (Close ) button i n the m eas…
ACT - Accuracy Check Tool / User Manual 07/2014 Edition
66
4.2.5.3 Saving the Report under Station Software 703.xx and Higher
► Click the Save results button (
see Figure 4-44).
The report will be saved in PDF format.
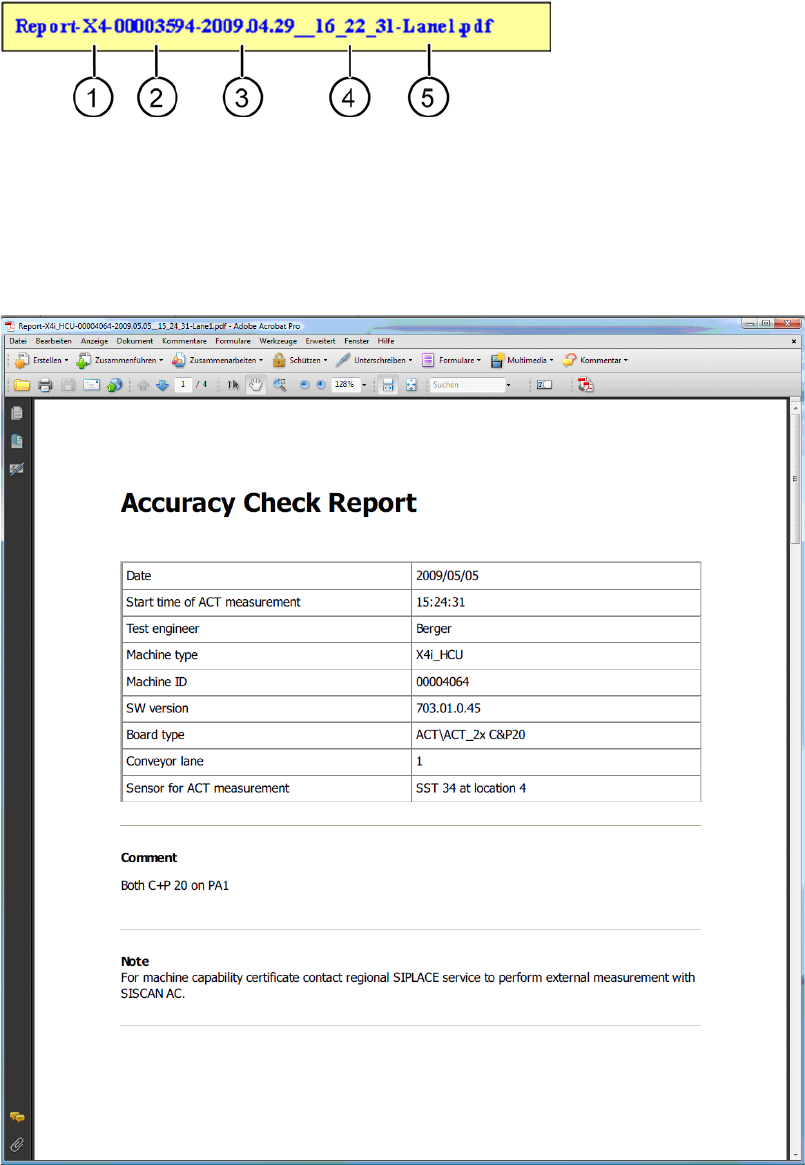
The file name for the report is made up as follows:
Key:
(1) Machine type (4) Time
(2) MID (5) Measured lane
(3) Date
Figure 4-46: Accuracy Check Report
ACT - Accuracy Check Tool / User Manual 07/2014 Edition
67
4.2.6 Finishing the ACT – Returning to Production
4.2.6.1 Finishing (e.g. under Station Software 70x)
► Click the Schließen (Close) button in the measurement results view to close it.
Figure 4-47: Closing measurement results view
► Load the board into the output section (1).
Figure 4-48: Loading board into the output section
► Click on the button to the left at the bottom (2) to return to the main view of the GUI.

ACT - Accuracy Check Tool / User Manual 07/2014 Edition
68
In the station main view you will now see the board highlighted in red in the output section,
from where you can remove it.
► Remove the board from the output section.
► If it is not possible to remove the board, because it is a machine of the SX- or DX-series that is
positioned in the middle of a line of several machines, then click on the red board.
Figure 4-49: State after ACT
► Select the Leiterplatte abbrechen (Cancel board) option in the next window.
► Select the sub-function An letzter Station der Linie entnehmen (Remove from last station of
the line).
► Click OK to confirm.
Figure 4-50: Removing board from the last station of the line
► Press Start.