00198150-02_SM_TX_en.pdf - 第199页
8 Placement Heads and Stationary Cameras 8.1 Fast Head Exchange Service Manual SIPLACE TX Series 06/2017 199 8.1.3 Completing the FHE in the Software ► Switch on the machine. After being switched on again the machine iss…
8 Placement Heads and Stationary Cameras
8.1 Fast Head Exchange
198 Service Manual SIPLACE TX Series 06/2017
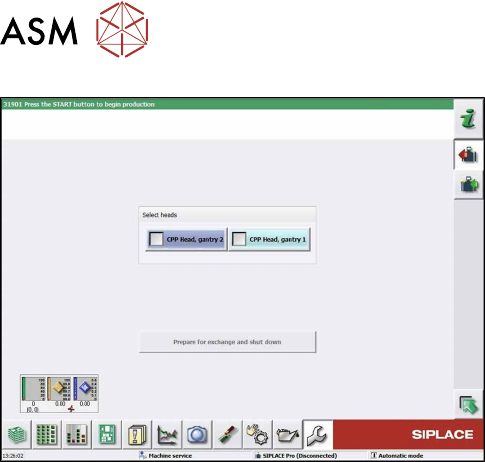
Fig.266: Fast head exchange
► Highlight the heads to be replaced.
► Click on Prepare for exchange and shut down.
The following actions will be carried out automatically:
●
The current nozzles will be returned and calibra-
tion nozzles will be picked up, if present.
●
A nozzle and height reference run will be carried
out.
●
The machine will be shut down.
In a next step you can dismantle the heads.
8.1.2 Removing and Installing the Placement Head
► For actually removing and installing the placement head hardware, proceed as described in
the relevant chapter.
Replacing the SIPLACE C&P20 P/M2 Head [}202]
Replacing the SIPLACE CPP/M Head [}206]
See also
2 Replacing the SIPLACE C&P20 P/M2 Head [}202]
2 Replacing the SIPLACE CPP/M Head [}206]
8 Placement Heads and Stationary Cameras
8.1 Fast Head Exchange
Service Manual SIPLACE TX Series 06/2017 199
8.1.3 Completing the FHE in the Software
► Switch on the machine.
After being switched on again the machine issues the message Changed heads detected and ex-
pects a calibration.
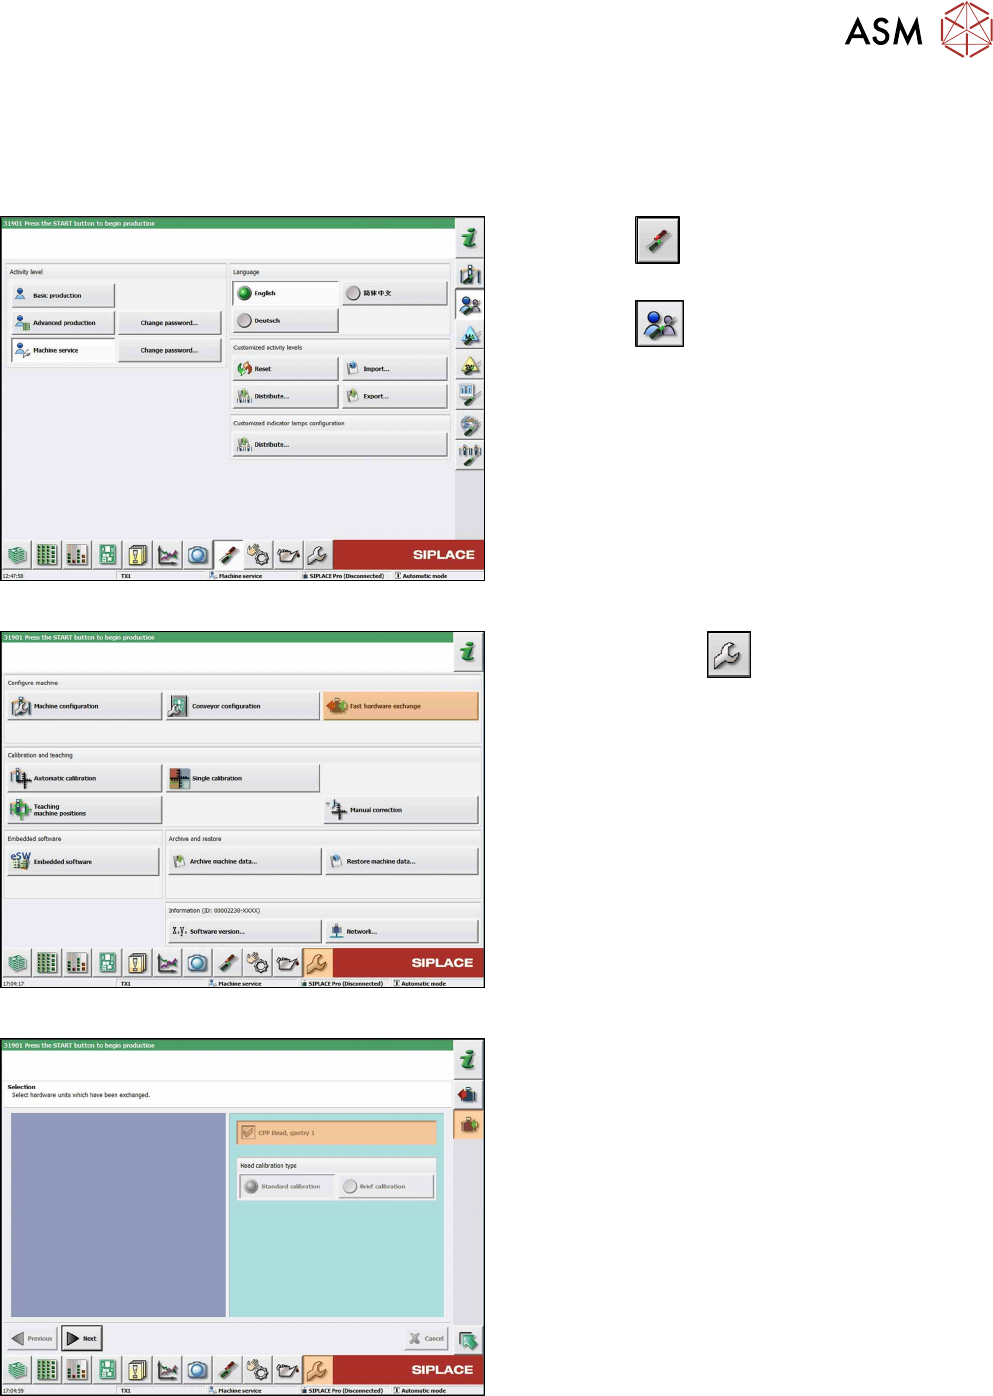
Fig.267: Select operator level
► Click the
button to enter the Settings
menu.
► Click the
button to open the Check and set
user settings menu.
► Switch to operator level Machine service or bet-
ter.
Fig.268: Service menu
► Click on Service
button.
► Click the Fast hardware exchange button.
Fig.269: Choosing heads
The heads detected by the software are marked and
grayed out.
► If necessary, you can select further heads here.
► Click on the Continue button.

8 Placement Heads and Stationary Cameras
8.1 Fast Head Exchange
200 Service Manual SIPLACE TX Series 06/2017
NOTICE
Nozzles
In the event of repairs, it is not possible to simply return the nozzles from a defective head
to the nozzle changer, in order to achieve a defined state. After the head exchange the soft-
ware stores the nozzle configuration of the defective head and the nozzle changer. You can
then refill the garages to restore the same level as before the head failure.
If the newly fitted head is equipped with calibration nozzles, these will automatically be re-
jected after the calibration. Depending on the job the required nozzles can the be picked up
and the production can be started.
Fig.270: Refilling nozzle changer
► Refill the nozzle changer garages of the nozzle
changer with the relevant nozzles.
NOTICE!
You can skip refilling the garages. In this case
you have to refill the nozzle changer before the
start of the production.
In the columns "Nozzle" and "Location -
Magazine Carrier/Magazine/Garage" you see
the nozzles that were present on the removed
head and that are now missing in the nozzle
changer.
If the garage has been refilled, confirm this in the
"Confirm" column.
.
► Click on the Continue button.
Fig.271: Starting calibration
The default configuration for calibration is displayed.
Click on the Start button to start head calibration.
In the event that there is no or incorrect EPROM data
(star and Z zero point correction), an error message
will appear.
► Provide the necessary calibration tools and click
on "Start".
ð The calibration will be started. The nozzles
will be rejected.