00198150-02_SM_TX_en.pdf - 第256页
11 Cutter 11.4 Replacing the Metal Buffer/Spacer Distance Piece 256 Service Manual SIPLACE TX Series 06/2017 Removal ► Switch off the machine, disconnect it from the power supply and secure it to prevent unauthorized rea…
11 Cutter
11.4 Replacing the Metal Buffer/Spacer Distance Piece
Service Manual SIPLACE TX Series 06/2017 255
11.4 Replacing the Metal Buffer/Spacer Distance Piece
Parts, equipment and tools
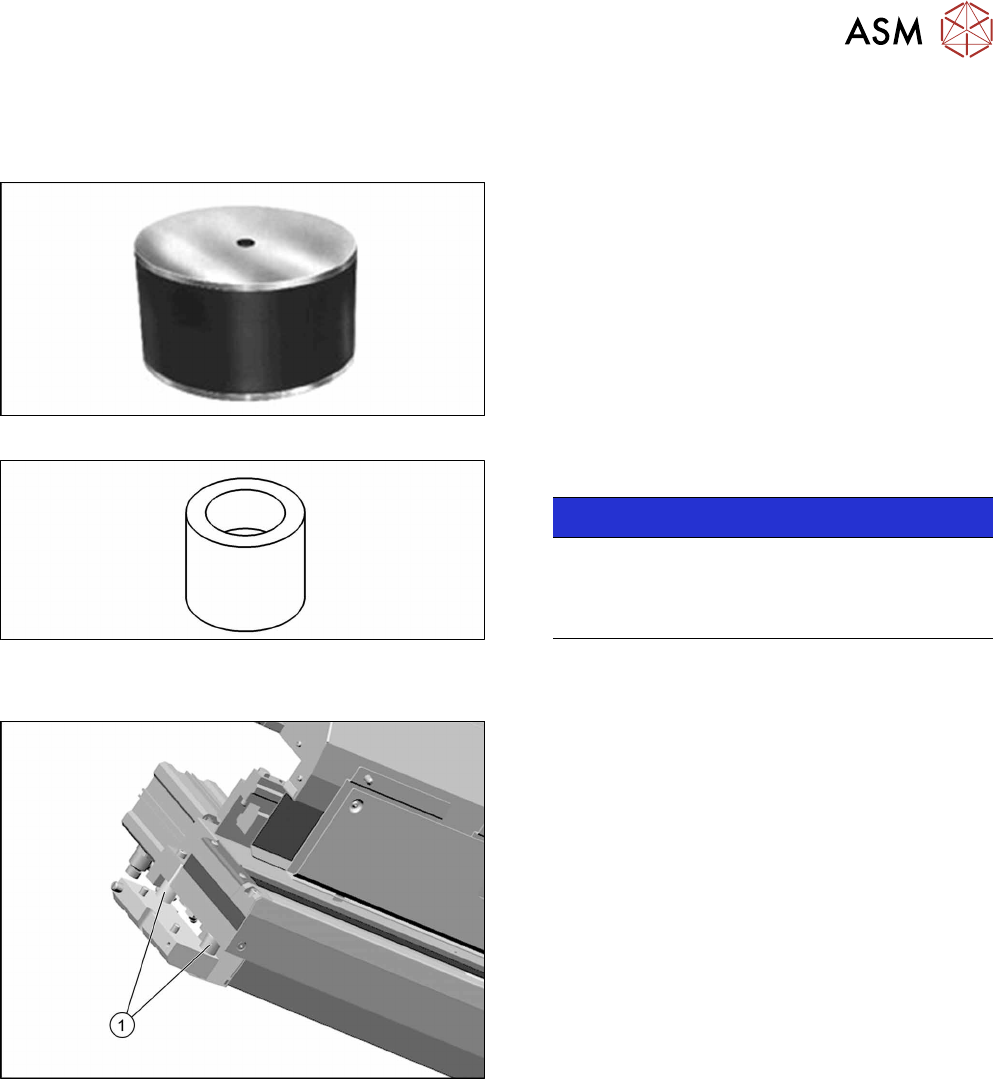
Fig.351: Metal buffer
●
Metal buffer M4.65 Shore [00329209-xx]
Fig.352: Spacer distance piece
●
Spacer distance piece [03007432-xx]
NOTICE!
Same procedure
The removal and installation of the spacer dis-
tance piece is the same as that for the metal buf-
fer. The metal buffer is described below.
.
Overview
Fig.353: Metal buffer and spacer distance piece on cutter
1. Metal buffer and spacer distance piece (2 on
each side)
The metal butters absorb the cutting vibration to
the machine frame.
11 Cutter
11.4 Replacing the Metal Buffer/Spacer Distance Piece
256 Service Manual SIPLACE TX Series 06/2017
Removal
► Switch off the machine, disconnect it from the power supply and secure it to prevent
unauthorized reactivation. Observe the instructions in section 1.2 "Preparatory Work..." [}15].
► Remove the cutter from the machine.
Replacing the Cutter on the COT Insert [03066690-xx] [}252]
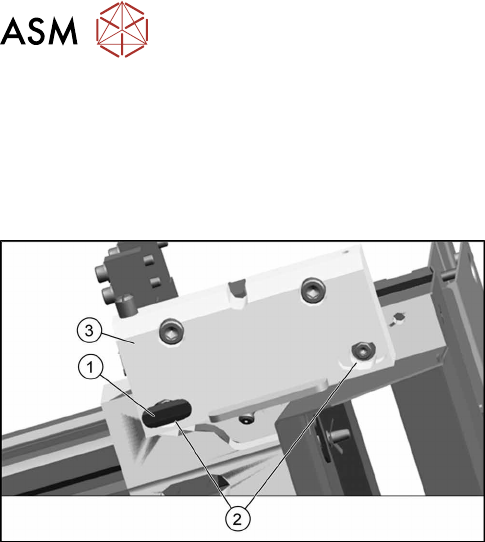
Fig.354: Removing metal buffer
► Remove the plastic cover(1).
► Take out the screws(2).
► Remove the complete mounting strip(3).
► Remove the metal buffer.
Installation
► Follow the removal instructions in reverse order for further installation.
See also
2 Replacing the Cutter on the COT Insert [03066690-xx] [}252]
11 Cutter
11.5 Replacing the Baffle Plate [03019896-xx]
Service Manual SIPLACE TX Series 06/2017 257
11.5 Replacing the Baffle Plate [03019896-xx]
Parts, equipment and tools
●
Baffle plate [03019896-xx]
Overview
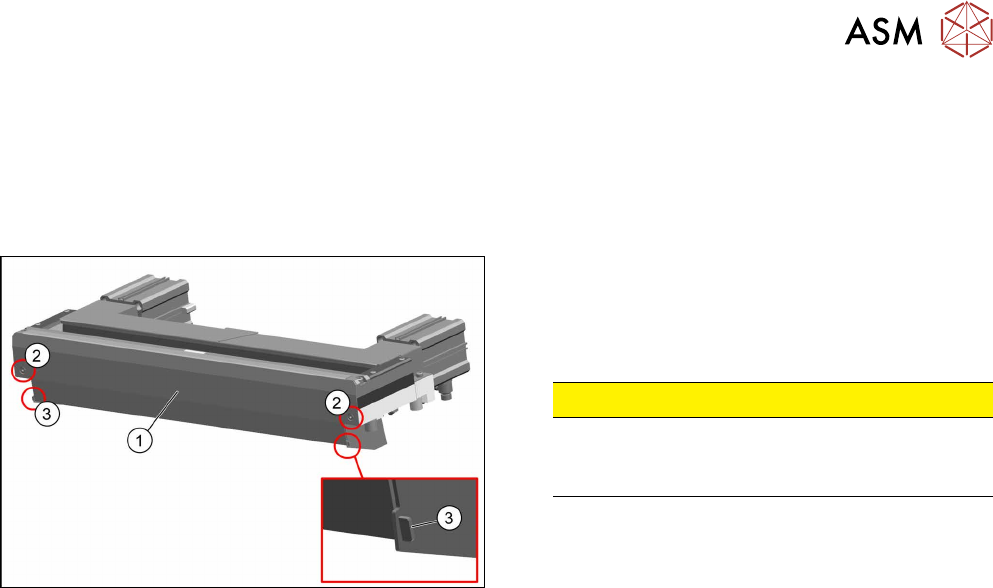
Fig.355: Cutter
1. Baffle plate [03019896-xx]
2. Two fastening screws
3. Clip, connecting baffle plate and protective guard
CAUTION!
Risk of injury
There is a risk of injuring yourself on the cutting
edge of the blades.
.
Removal
► Switch off the machine, disconnect it from the power supply and secure it to prevent
unauthorized reactivation. Observe the instructions in section 1.2 "Preparatory Work..." [}15].
► Remove the cutter from the machine.
Replacing the Cutter on the COT Insert [03066690-xx] [}252]
► Straighten the two clips with pliers.
► Remove the two screws fastening the baffle plate.
► Remove the baffle plate unit from the cutter.
Installation
► Follow the removal instructions in reverse order for installation.
See also
2 Replacing the Cutter on the COT Insert [03066690-xx] [}252]