00198150-02_SM_TX_en.pdf - 第45页
3 SMPS 3.5 MGCUs Service Manual SIPLACE TX Series 06/2017 45 3.5.2 Replacing MGCU [03117531Sxx] Parts, equipment and tools ● Position controller gantry axes MGCU-2 [03117531Sxx] Overview Fig.36: MGCUs 1. MGCUs (without …
3 SMPS
3.5 MGCUs
44 Service Manual SIPLACE TX Series 06/2017
SIPLACE TX2/TX2i micron
Fig.35: SIPLACE TX2/TX2i micron
3 SMPS
3.5 MGCUs
Service Manual SIPLACE TX Series 06/2017 45
3.5.2 Replacing MGCU [03117531Sxx]
Parts, equipment and tools
●
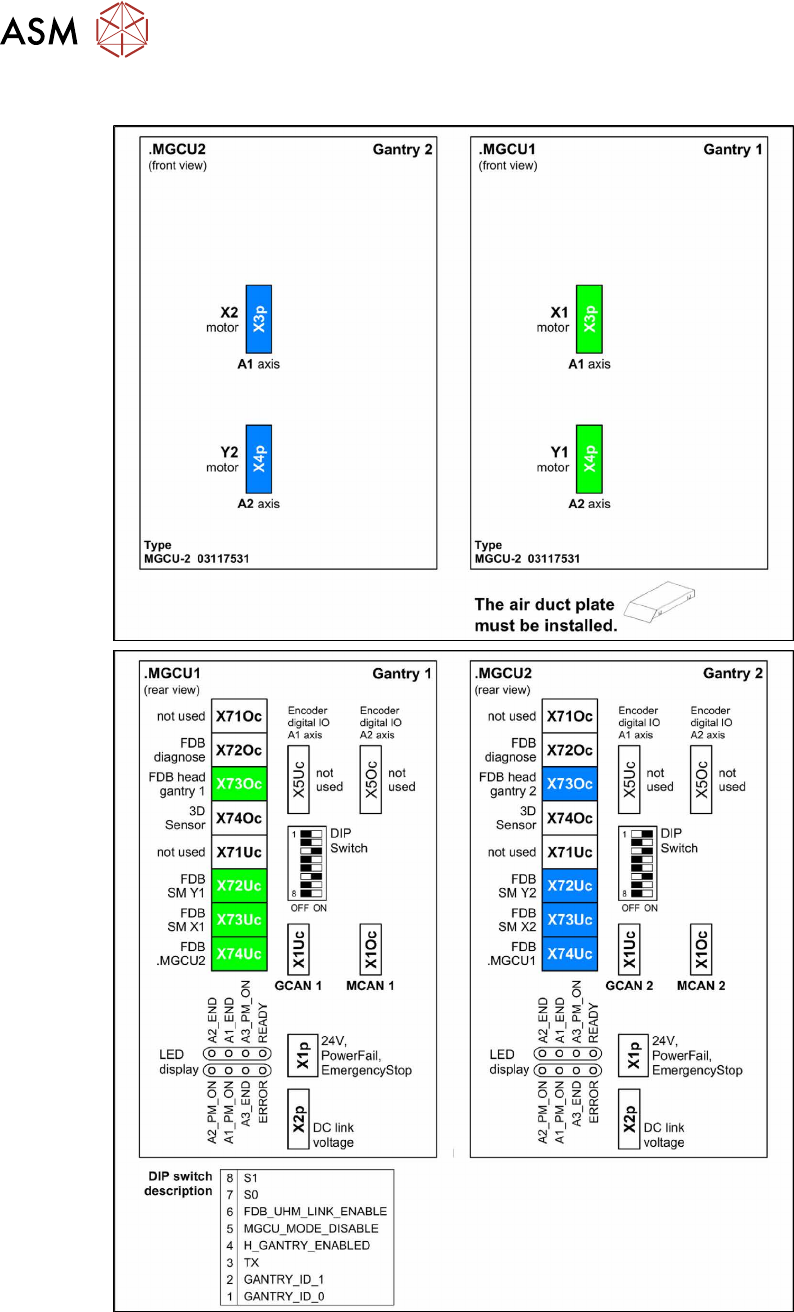
Position controller gantry axes MGCU-2 [03117531Sxx]
Overview
Fig.36: MGCUs
1. MGCUs (without cover air duct blade)
Pay attention to the label colors in the covers and on
the connection cable:
Green is for gantry 1
Blue is for gantry 2
Removal
► Switch off the machine, disconnect it from the power supply and secure it to prevent
unauthorized reactivation. Observe the instructions in section 1.2 "Preparatory Work..." [}15].
► Remove the power supply fastening screw and pull out the power supply. For more informa-
tion about this read section 3.2 "Pulling out the Power Supply" [}35].
DANGER
Checking for absence of voltage!
► Before you start working check the power supply for absence of voltage and observe
the waiting times! For more information about this read section 3.4 "Checking For Ab-
sence of Voltage" [}37].
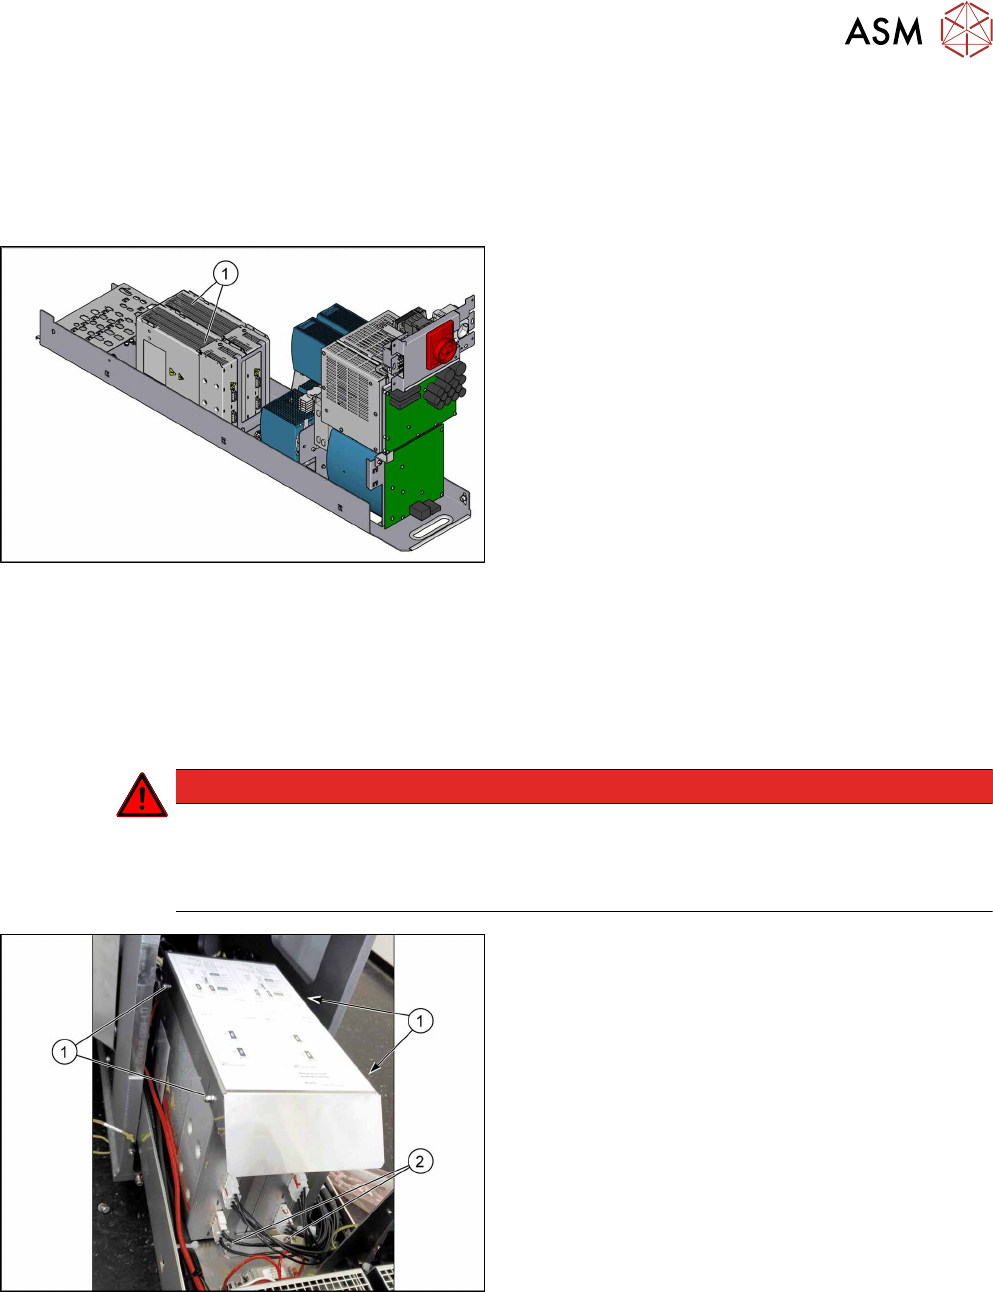
Fig.37: Cover
► Loosen the four nuts(1) fastening the cover (air
duct blade).
► Remove the cover.
► Unplug all connections on the MGCU.
► Remove the two screws(2) fastening the two
MGCUs.
► Remove the MGCU from the machine.
3 SMPS
3.5 MGCUs
46 Service Manual SIPLACE TX Series 06/2017
Installation
► Follow the removal instructions in reverse order for installation. Also observe the following in-
structions:
CAUTION
Installation instructions
► Use the DIP switch to set the gantry ID on the MGCU (see 3.5.1 "Overview of MG-
CUs" [}43]).
► Always make sure that the cables do not rub against any parts or are folded.
► Check the embedded software and perform a download if needed (see 3.5.3 "eSW
Download (SW 70x)" [}46]).
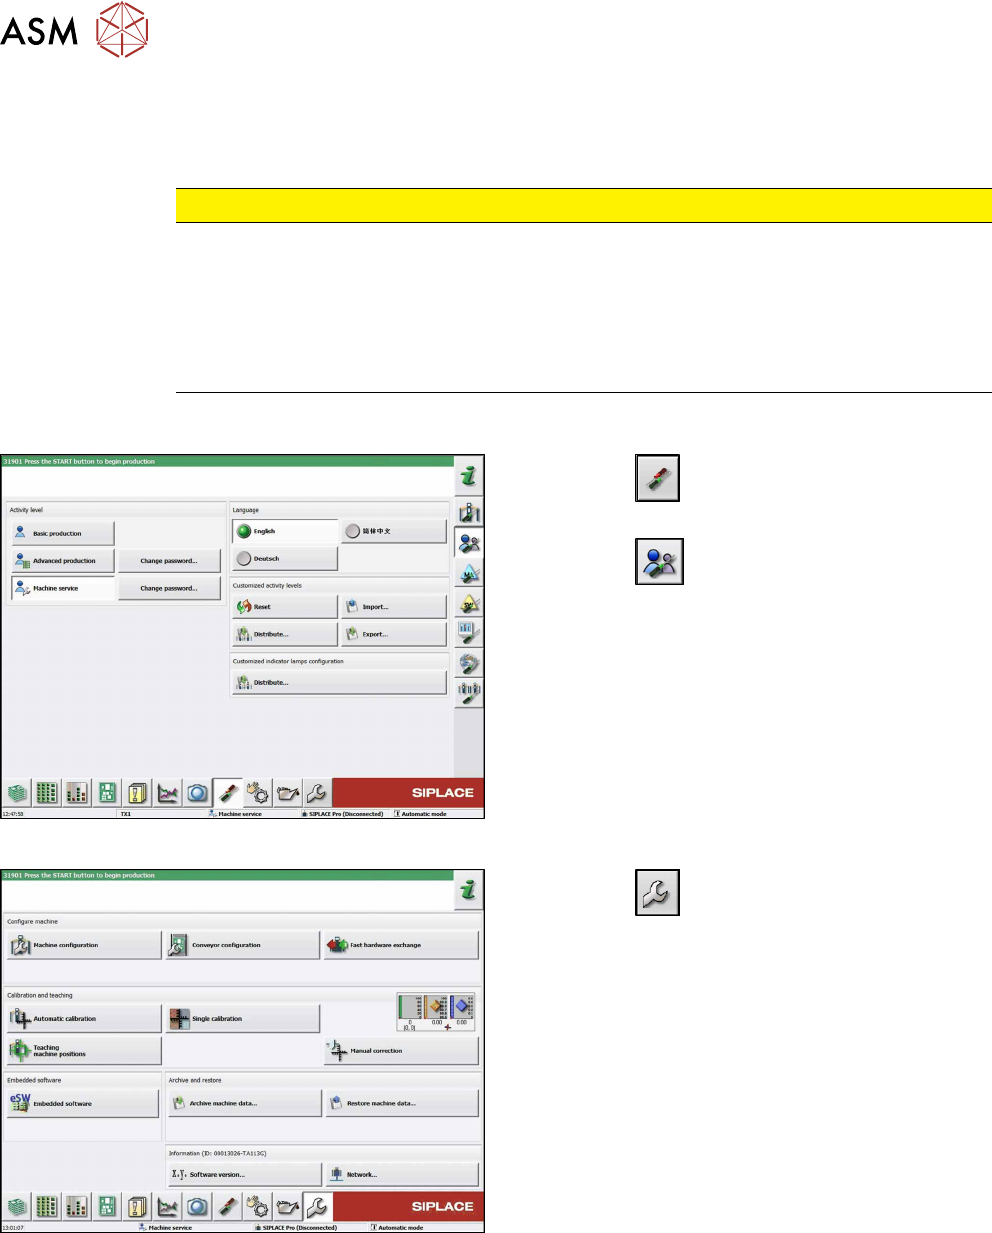
3.5.3 eSW Download (SW 70x)
Fig.38: Select operator level
► Click the
button to enter the Settings
menu.
► Click the
button to open the Check and set
user settings menu.
► Switch to operator level Machine service or bet-
ter.
Fig.39: Service menu
► Click the
button to enter the Service menu.
► Click on the Embedded software button.