4OM-1208-011_w.pdf - 第114页
1-57 AIVEMT -ID Preparation for Cleaning (1) Lens Cleaning Cloth (Accessory) (2) Cotton Swab (3) Recommended Absolute Ethanol : C 2 H 2 O 99.5 vo1/% (High Purity) Cleaning Procedure (1) Press the [LINE MEAS] button on th…
1-56
AIVEMT-ID
4.5 Cleaning of Linear Measure Sensor
Periodically perform cleaning of the linear measure sensor to maintain
reliable and stable measurement of component thickness.
•
Clean the sensor every day.
•
Change cleaning frequency according to varying frequency of use and
environmental conditions.
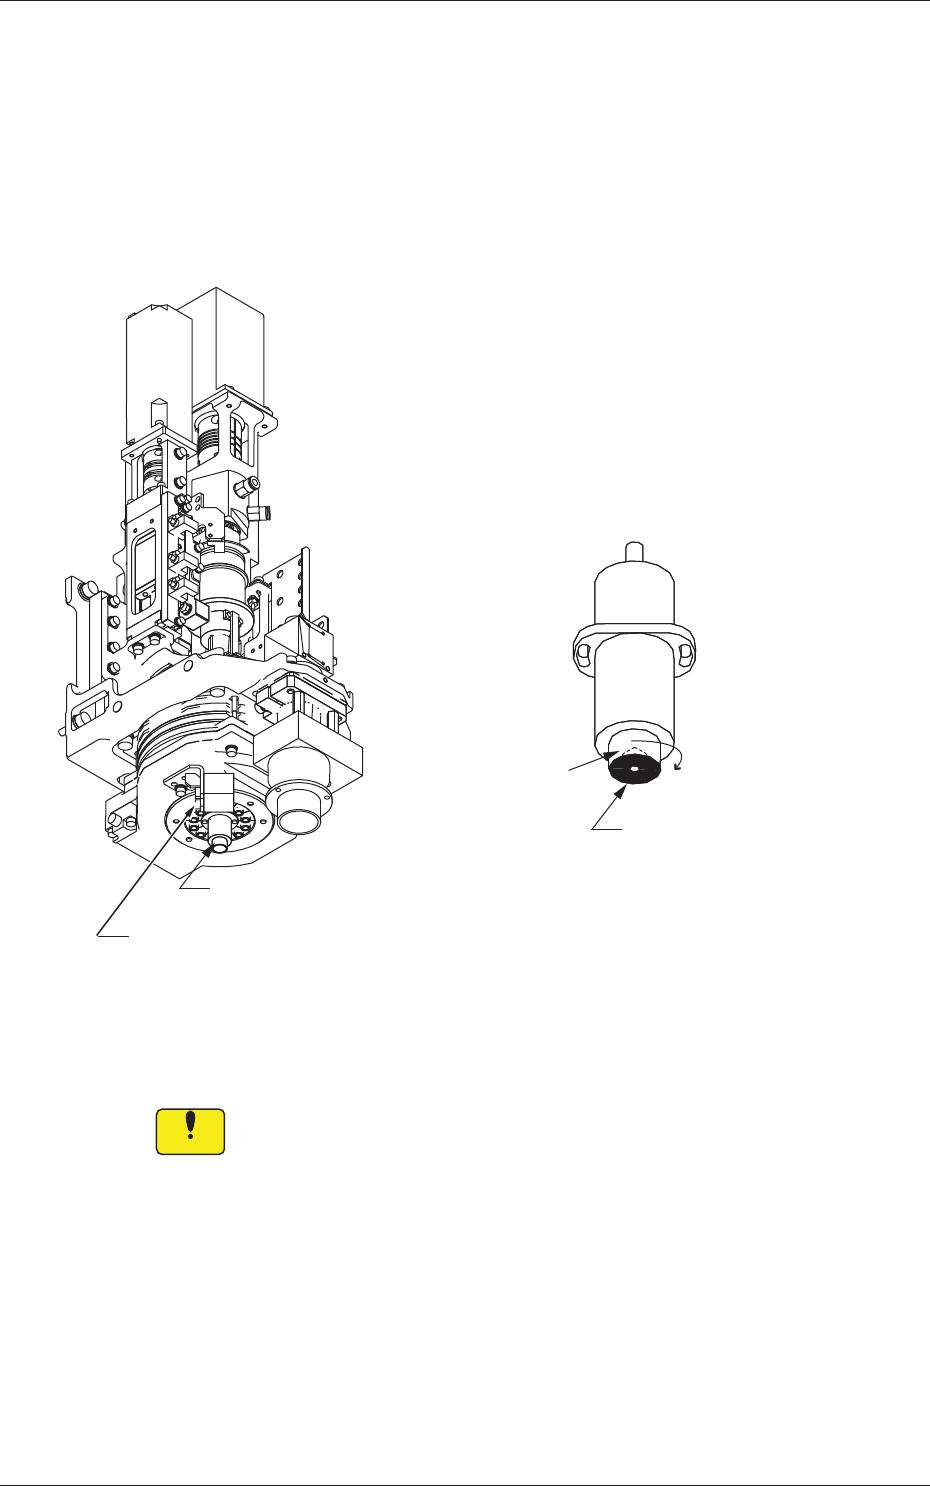
Conic Cap
Linear Measure Sensor
(Light Emitter)
Linear Measure Sensor (Light Receiver)
Surface of Conic
Reflector
Horizontal Direction
Linear Measure Sensor (Light Emitter)
Fig. 4A55
•
While you are cleaning the light emitter
, the surface of the conic refl
ector
must be cleaned softly and horizontally
.
Notice
Cleaning it vertically may damage the conic cap.
When the conic cap is damaged, the component recognition might
not be made correctly.
0606-009
4.5 Cleaning of Linear Measure Sensor
1-57
AIVEMT-ID
Preparation for Cleaning
(1) Lens Cleaning Cloth (Accessory)
(2) Cotton Swab
(3) Recommended Absolute Ethanol : C
2
H
2
O 99.5 vo1/%
(High Purity)
Cleaning Procedure
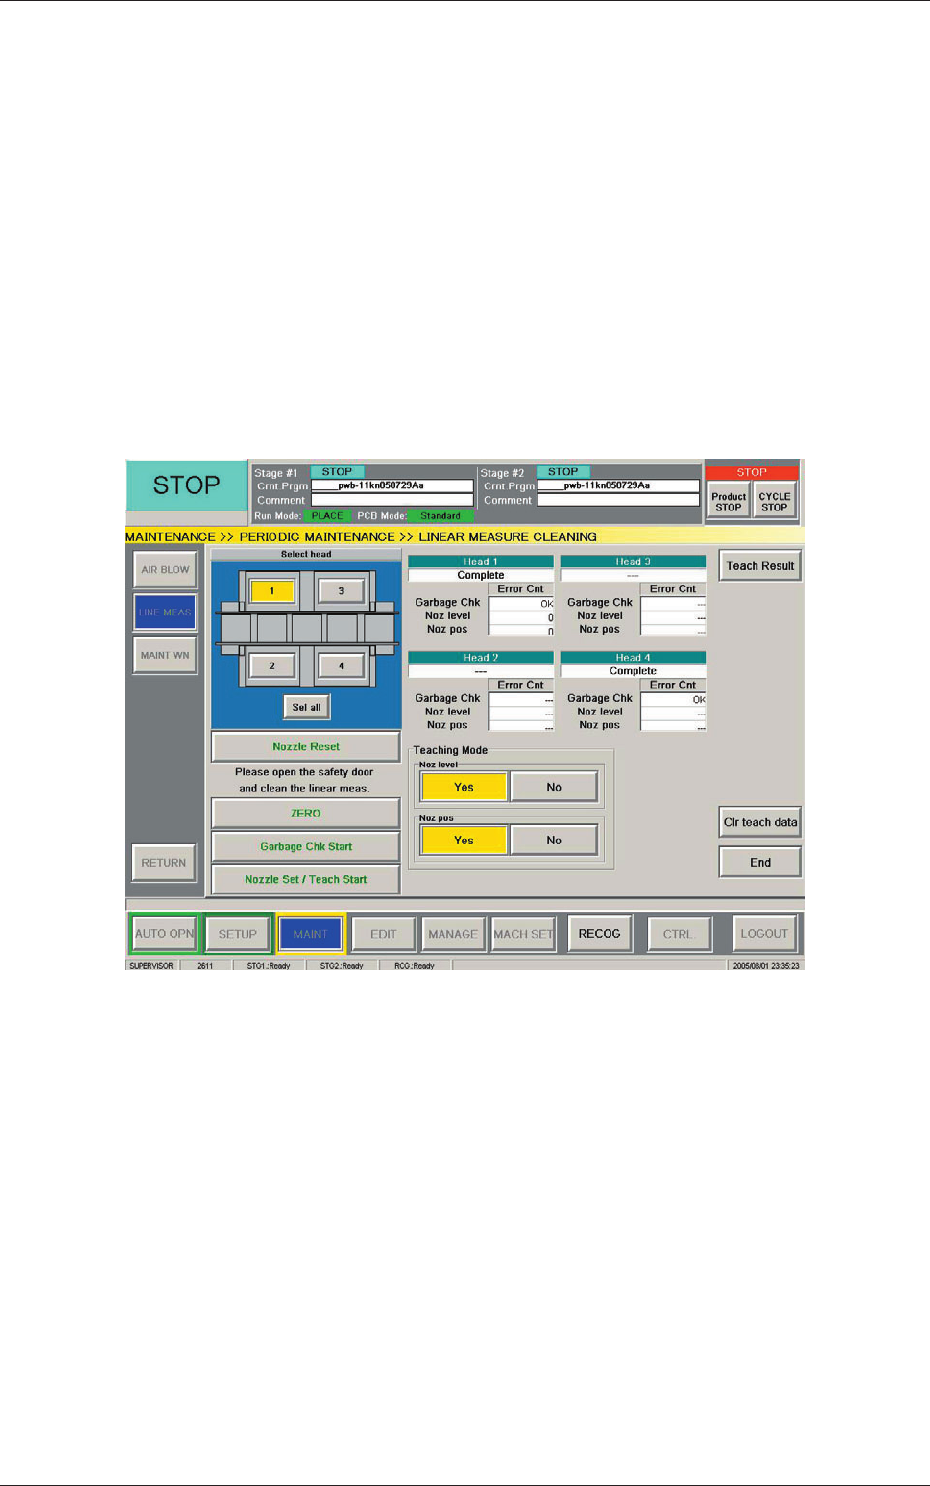
(1) Press the [LINE MEAS] button on the "PERIODIC MAINT" submenu
bar. The "LINEAR MEASURE CLEANING" window appears.
(Operation Sequence: [MAINT] Button on Main Menu Bar
→
[PERIODIC MAINT] Button on Submenu Bar
→
[LINE MEAS]
Button)
Fig. 4A56 "LINEAR MEASURE CLEANING" Window
(
2) Select the head whose linear measure sensor should be cleaned.
(3) Pre
ss the [Nozzle Reset] button to store the vacuum nozzle in the nozzle
stocker (housing).
(4) Press the [READY] switch of the pertinent stage. The LED
extinguishes.
The cover is unlocked.
0606-009
4.5 Cleaning of Linear Measure Sensor
1-58
AIVEMT-ID
(5) Open the cover.
CAUTION
The load power to the motors, etc., is turned OFF but the
maintenance operation must be performed carefully, protecting
your hands from any injury.
(6) Move the placement head manually to an easy-to-access position for
cleaning.
(7) Wipe the light emitter and receiver of the linear measure sensor softly
with a lens cleaning cloth.
Notice
Be sure not to rub the surface of the sensor strong with the cloth.
Otherwise, the sensor may be damaged.
(8) Close the cover.
(9) Press the [READY] switch of the pertinent stage. The LED illuminates.
The cover is locked.
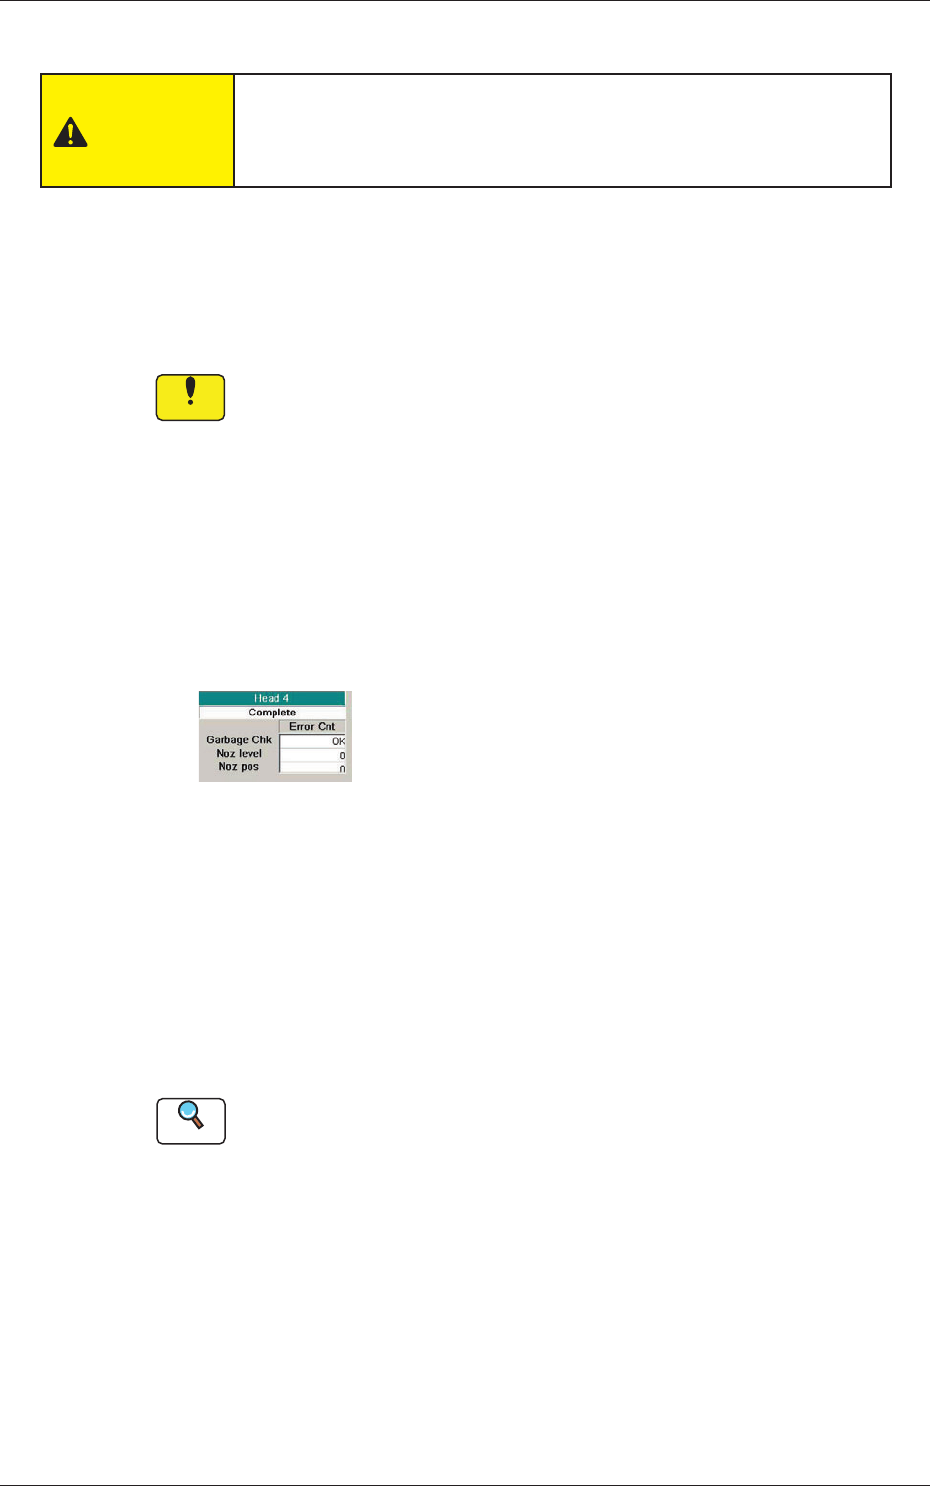
(10) Press the [Garbage Chk Start] button.
"OK" or "NG" appears in the "Garbage Chk" text box of the selected
head.
OK :
No dirt and scratch marks are detected.
NG :
Some dirt and scratch marks are detected.
Fig. 4A57
("OK" Displayed)
When "OK" is displayed, proceed to Step (20).
When "NG" is displayed, go back to Step (4).
When "OK" is not displayed even after Steps (4) through (9) are
repeated several times, follow Steps (11) through (19).
(11) Move down the feeder base and detach the bank feeder change cart
from the machine.
Reference
Refer to "2.4.8 Feeder Bases and Bank Feeder Change Cart" in "Chapter
1" of the instruction manual (Vol. 1: Guide) for how to detach the bank
feeder change cart.
(12) Press the [READY] switch of the pertinent stage. The LED
extinguishes.
The cover is unlocked.
0606-009
4.5 Cleaning of Linear Measure Sensor