4OM-1208-011_w.pdf - 第84页
1-27 AIVEMT -ID Scrap Box Every Day Cleaning Required T ime: 1 minute Draw out the scrap box and remove the empty tape. Fig. 4A18 Upper Surface of Suppressor Every Day Cleaning Required T ime: 2 minutes Remove dirt and d…
1-26
AIVEMT-ID
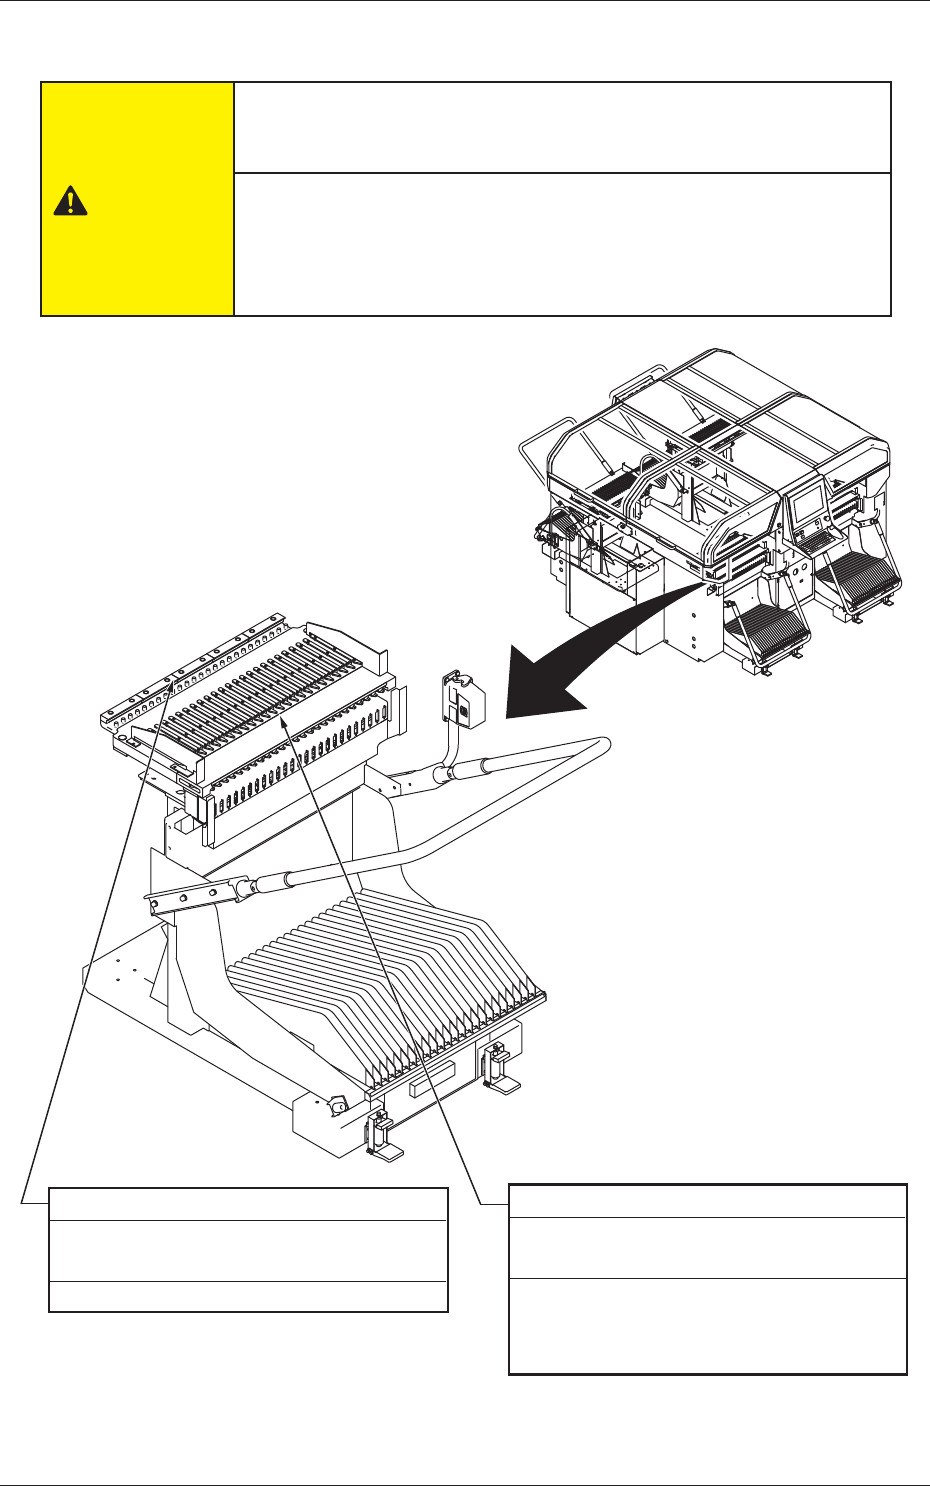
3.3.5 Feeder Cart Section
CAUTION
While attaching the handle slides, be sure to prevent your fingers
from getting jammed.
Be sure to firmly hold the handle to bend and extend.
Otherwise,
the handle will fall, causing an injury
.
Pay special attention to the handle's up/down sliding portion to prevent
fingers from being pinched.
Groove on Feeder Base
Every Week Cleaning
Required Time: 2 minutes
Suck dirt and dust with a vacuum cleaner.
Upper Surface of Feeder Base
Every Day Cleaning
Required Time: 2 minutes
Remove foreign substances and unrequired
components with a vacuum cleaner and
wipe off dirt and dust with a rag.
Fig. 4A17
0611-010
3.3 Inspection, Cleaning, and Lubrication Spots

1-27
AIVEMT-ID
Scrap Box
Every Day Cleaning
Required Time: 1 minute
Draw out the scrap box and remove the
empty tape.
Fig. 4A18
Upper Surface of Suppressor
Every Day Cleaning
Required Time: 2 minutes
Remove dirt and dust with a vacuum
cleaner and wipe the surface clean with a
rag.
Fig. 4A18-1
0606-009
3.3 Inspection, Cleaning, and Lubrication Spots
1-28
AIVEMT-ID
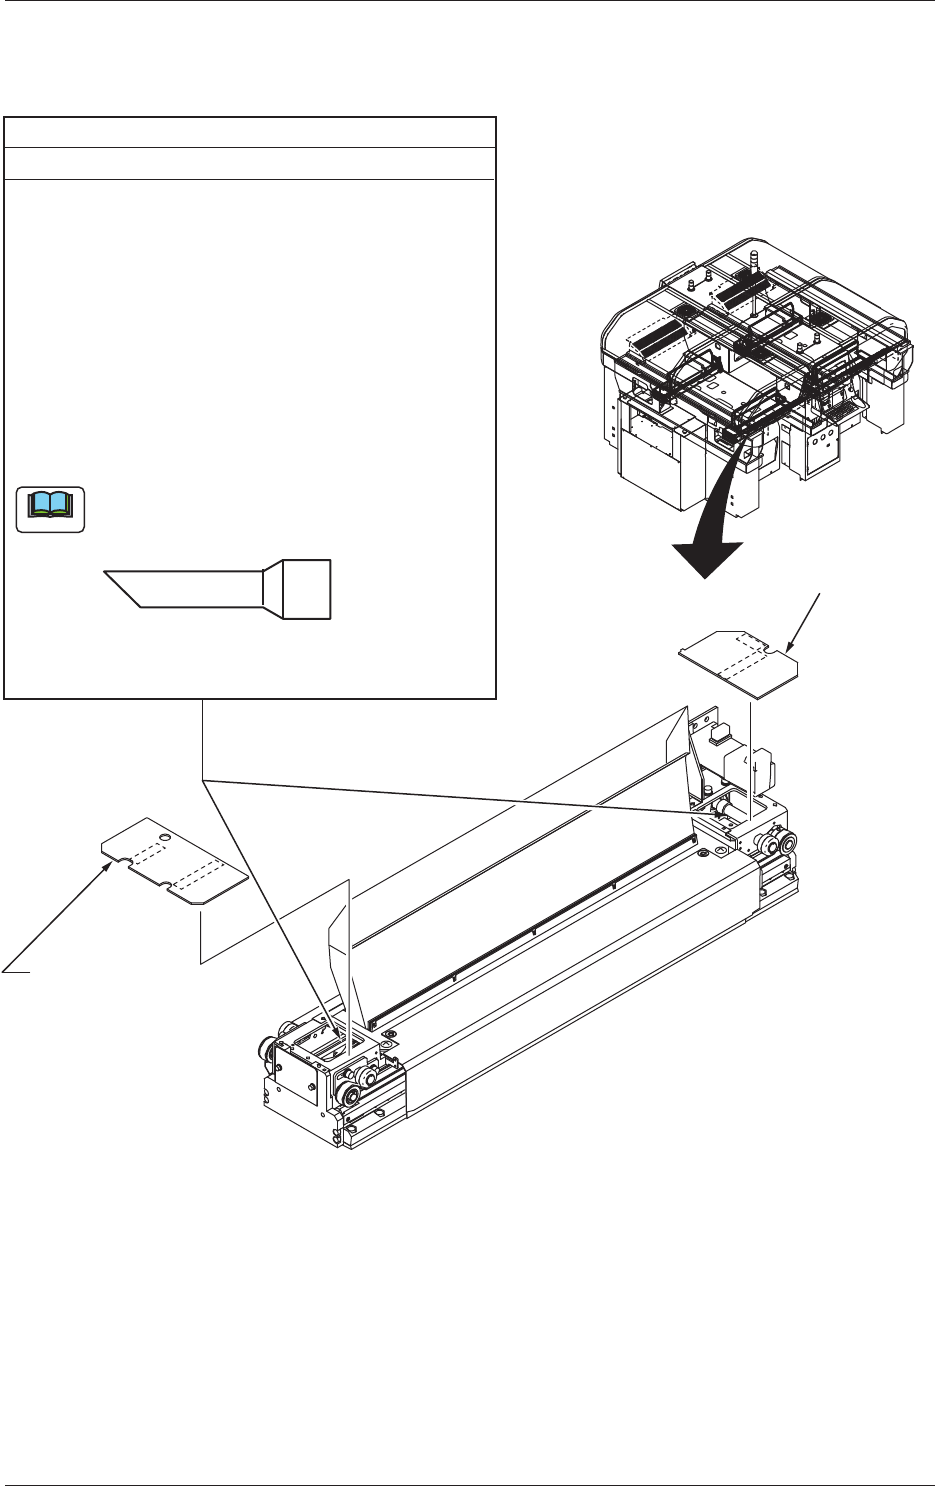
3.3.6 Cutter Section
Transparent Cover
(Motor Side)
Transparent Cover
(Origin Side)
Cutter Boxes (Both Sides)
Every Week Cleaning
(1) Detach the bank feeder change cart.
(2) Move the cutter unit with the [Move Maint. Pos.]
button in the "CUTTER ADJ" window
(the window that opens after the [CUT ADJ]
b
utton on the "UNIT ADJ" submenu bar is pressed).
(3) Turn off the power supply
.
(4) Open the cover.
(5) Detach the transparent covers located on both
sides (origin and motor sides) of the cutter section
and remove dirt and dust with a vacuum cleaner.
Use a vacuum cleaner with a narrow air opening
in the nozzle.
Note
Narrow Air Opening in Nozzle End
(Recommended)
Required Time: 2 minutes
Fig. 4A19-1
0606-009
3.3 Inspection, Cleaning, and Lubrication Spots