4OM-1208-011_w.pdf - 第119页
1-60-2 AIVEMT -ID (2) Insert the filter replacement jig into the hole on the filter holder and pull it up upward. Hole on Filter Holder Jig with pulled-out holder (filters) Filter Replacement Jig Fig. 4A62 (3) Replace the …
1-60-1
AIVEMT-ID
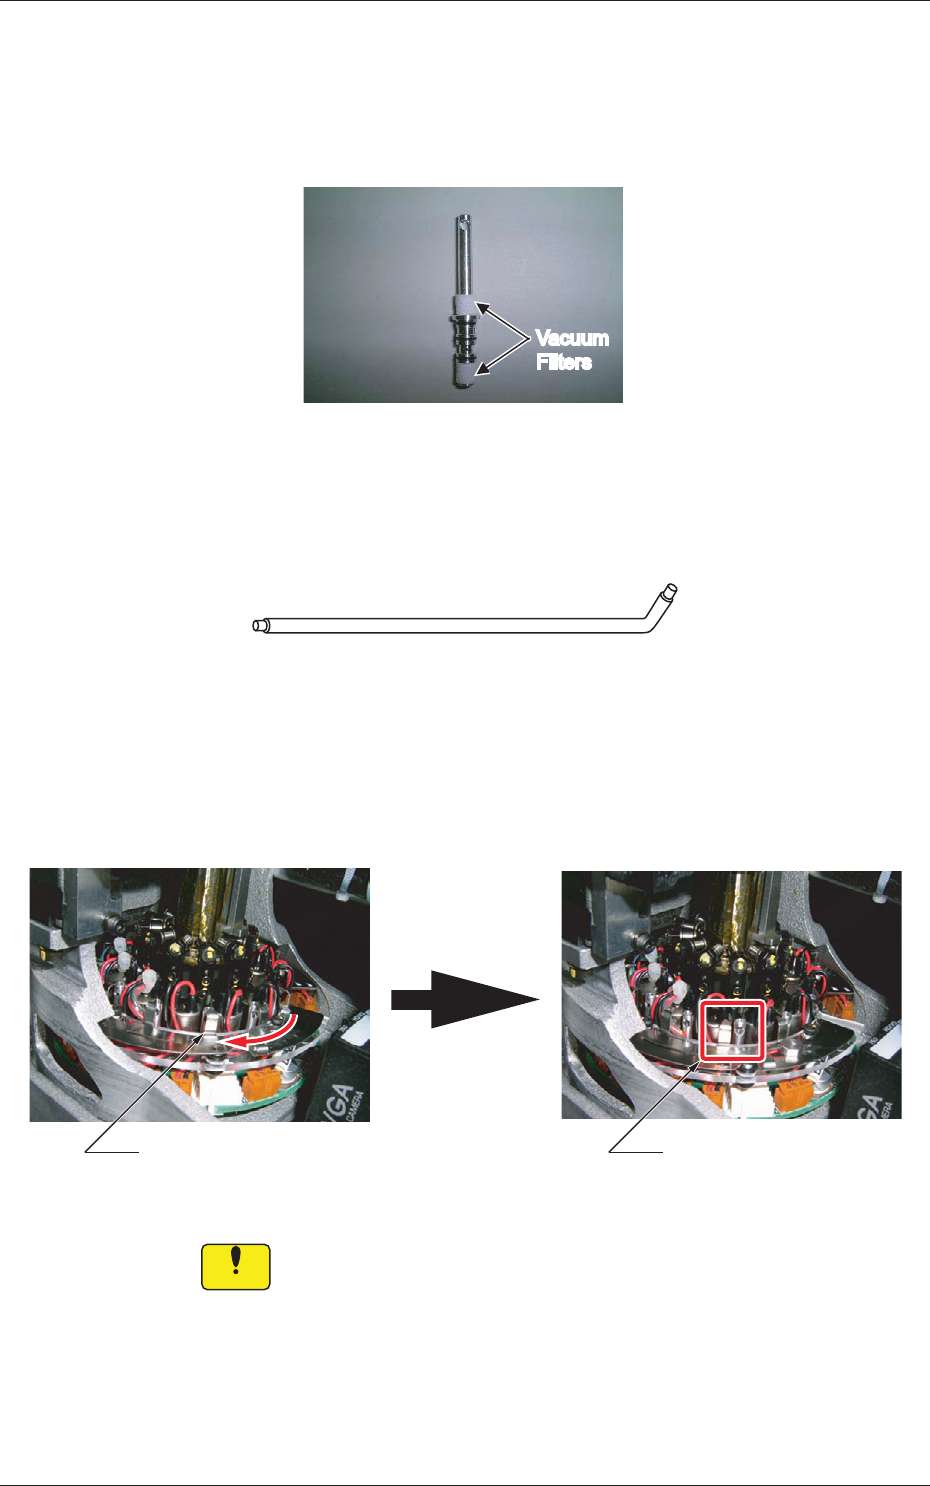
4.6 Replacement Procedure of Vacuum Filters
Time of Replacement
Replace the filters with new ones every three months.
Vacuum
Filters
Vacuum
Filters
Fig. 4A59 Filter Holder
Required Item
Filter Replacement Jig
Fig. 4A60 Filter Replacement Jig
Replacement Procedure
(1) Slide the filter fastener to the left and release the lock of the filter
holder.
Filter UnlockedFilter Locked
Fig. 4A61
Notice
Be sure to slide the filter fastener so that it does not interfere with the
wiring, etc.
0606-009
4.6 Replacement Procedure of Vacuum Filters
1-60-2
AIVEMT-ID
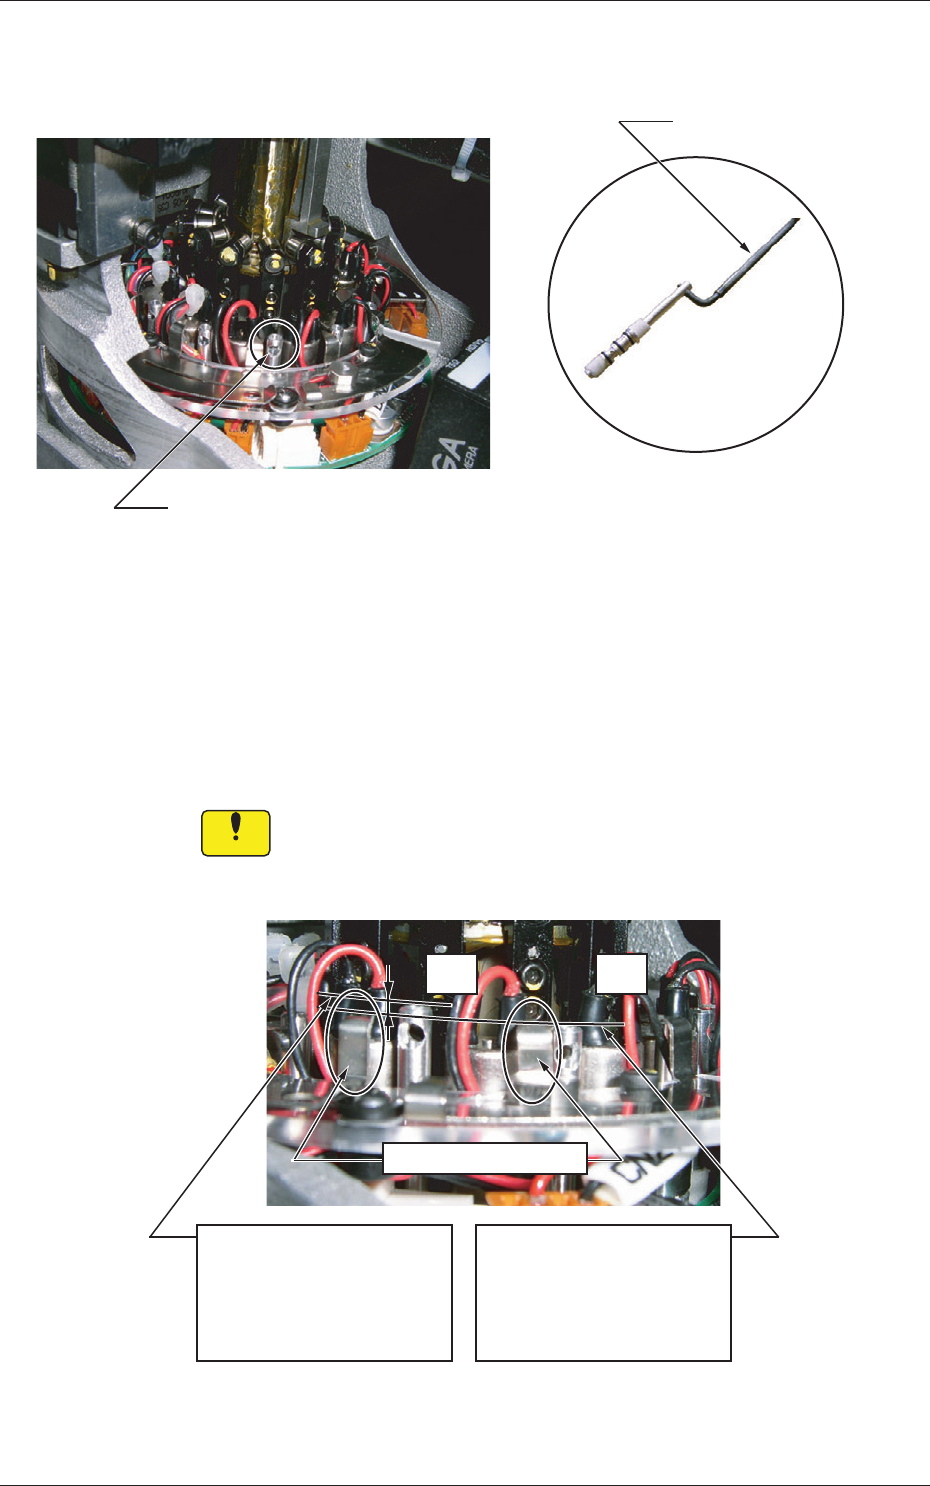
(2) Insert the filter replacement jig into the hole on the filter holder and
pull it up upward.
Hole on Filter Holder
Jig with pulled-out holder (filters)
Filter Replacement Jig
Fig. 4A62
(3) Replace the two vacuum filters on the pulled-out holder with new
ones.
(4) Direct the larger hole on the filter holder outward and insert the
holder with the filter replacement jig.
Be sure to push it deep enough until it stops (down to the lowest
limit).
Notice
The holder should not interfere with the wirings for valves, etc. In addition,
the wires should not be caught in the upper and lower areas of the top
block.
OK
NG
Filter Fastening Claw
<NG: Insufficient Insertion>
The upper surface of the
filter holder is higher than
that of the filter fastening
claw.
<OK: Sufficient Insertion>
The filter fastening claw is
higher than that of the filter
holder.
Fig. 4A63
0606-009
4.6 Replacement Procedure of Vacuum Filters
1-60-3
AIVEMT-ID
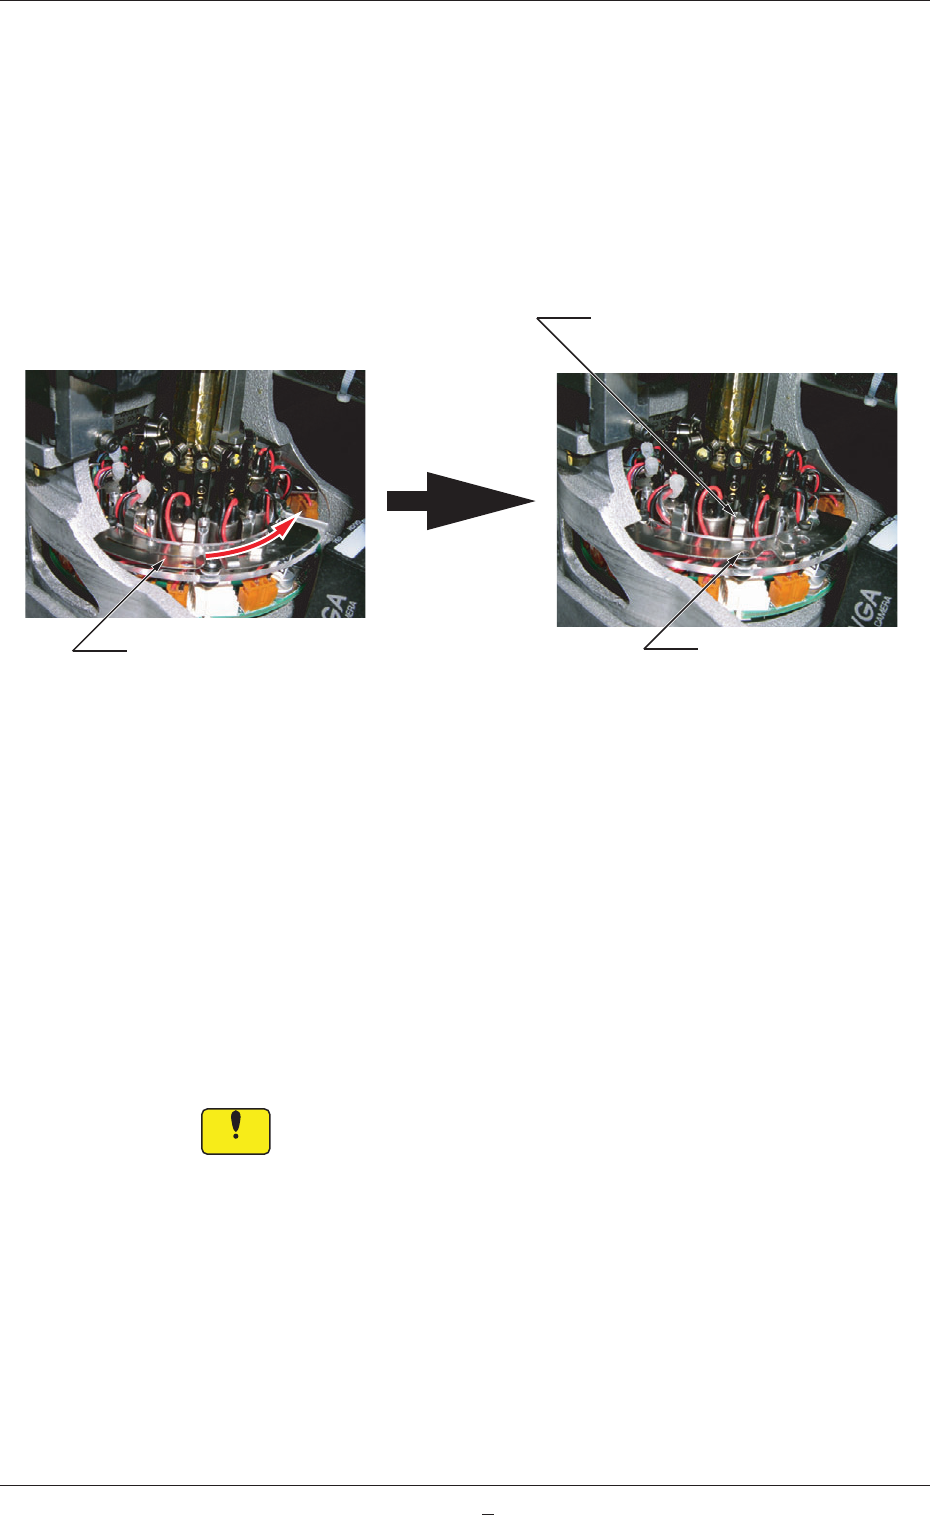
(5) Shake it in the rotational direction and confirm that the it does not
rotate. After that, pull out the filter replacement jig carefully so as
not to pull up the inserted filter together and stay afloat.
(6) Note the following and slide the filter fastener to the right to lock
the filter holder.
•
Confirm that the filter fastening claw is located at the upper
center of the filter holder.
•
Confirm that the ball plunger is locked.
Slide the filter fastener to the right.
Filter Unlocked Filter Locked
Locking Position of Filter
Fastening Claw
Ball Plunger Locked
Fig. 4A64
When the filter fastening claw cannot be locked after being slid
because it interferes with the sideface of the filter holder, it can
be assumed that a foreign substance exists in the hole or the filter
holder is not inserted sufficiently far into the hole.
Check the filter holder that has interfered with the sideface. If a
foreign substance exists in the hole, clean the filter holder to remove
the substance.
After the cleaning is completed and no foreign substance is found in
the hole, starting with Step (4).
Notice
Unless the filter holder is set correctly in place, a pickup error will occur
or the filter will come off and cause an interference with a head. The head
may also be damaged.
0606-009
4.6 Replacement Procedure of Vacuum Filters