00900194-01_SM_ASM ProcessLens_Dual-lane_EN.pdf - 第48页
4 Replacing spare parts at the conveyor 4.3 Conveyor drive 48 Service Manual ASM ProcessLens Dual-lane 09/2018 Overview Fig.20: Overview of the conveyor drives 1 Conveyer Track 1 2 Conveyer Track 2 3 Conveyor drive inpu…
4 Replacing spare parts at the conveyor
4.3 Conveyor drive
Service Manual ASM ProcessLens Dual-lane 09/2018 47
4.3 Conveyor drive
4.3.1 Replacing the conveyor drive
Parts
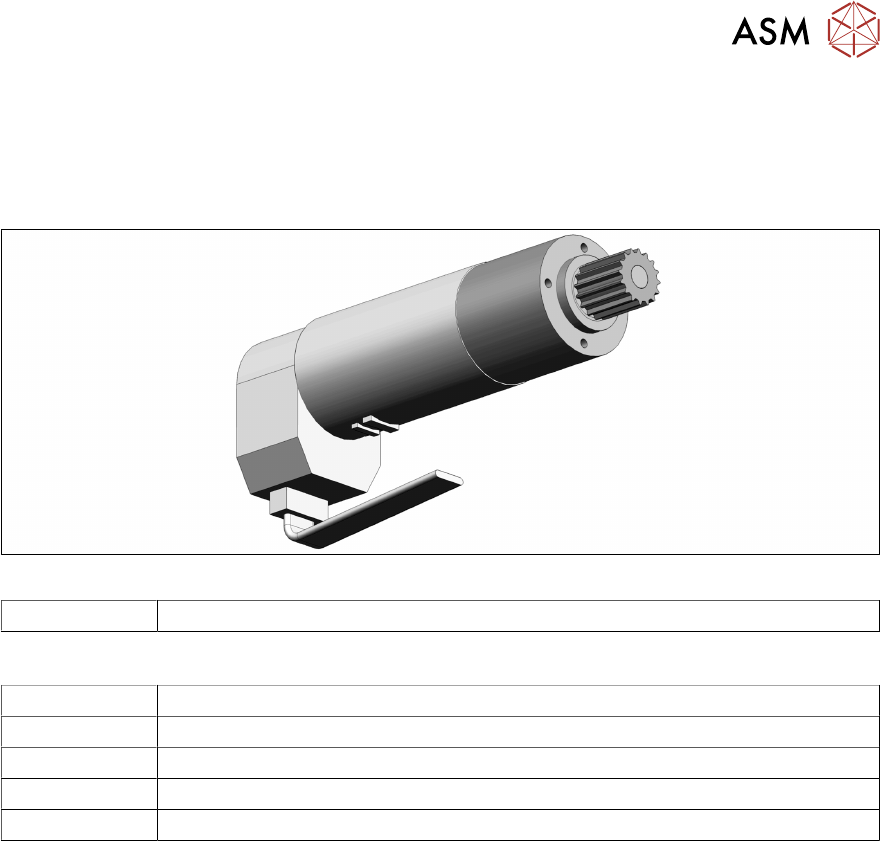
Fig.19: Conveyor drive
03093387‑xx DC drive motor with synchronizing disk SXa
Equipment and tools
00326015‑xx Belt tension measuring device
00353832-xx Allen key set
00096290-xx Fork wrench set
Side cutter
Cable tie
4 Replacing spare parts at the conveyor
4.3 Conveyor drive
48 Service Manual ASM ProcessLens Dual-lane 09/2018
Overview
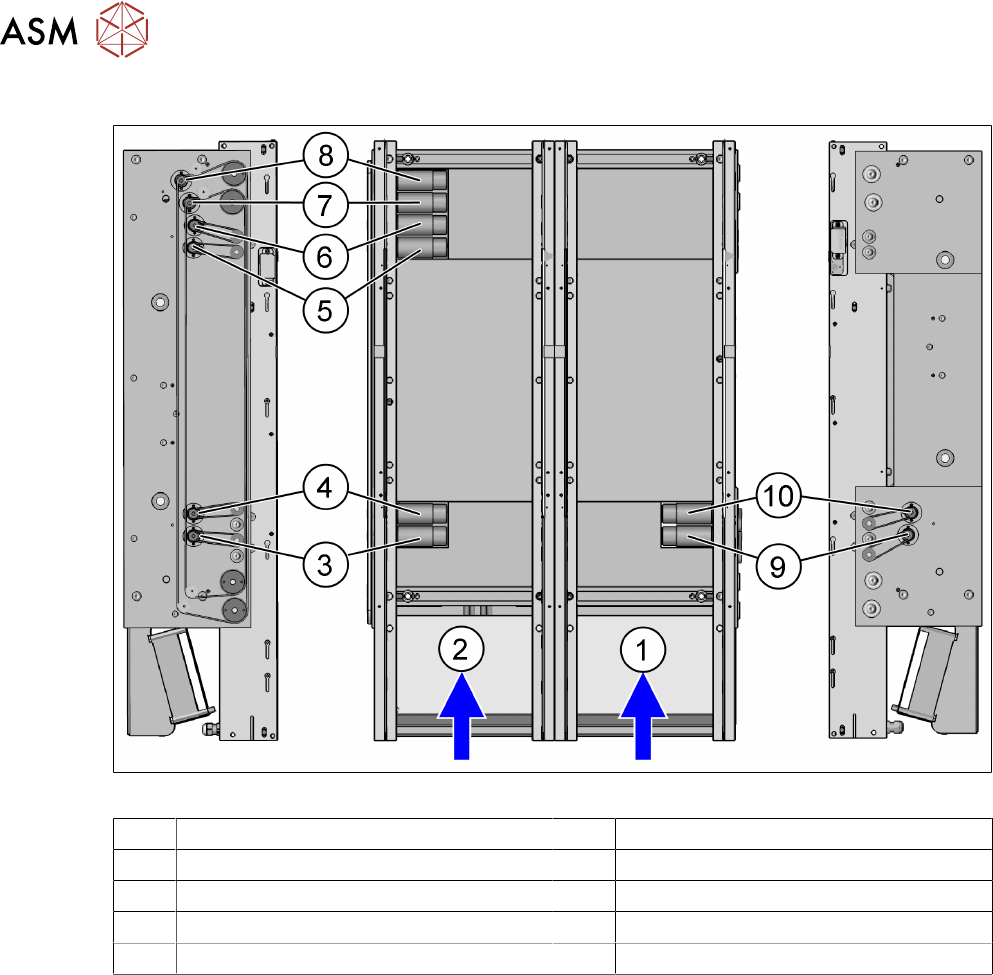
Fig.20: Overview of the conveyor drives
1 Conveyer Track 1 2 Conveyer Track 2
3 Conveyor drive input conveyor track 2 4 Conveyor drive placement area track 2
5 Conveyor drive output conveyor track 1 6 Conveyor drive output conveyor track 2
7 Width adjustment motor track 1 8 Width adjustment motor track 2
9 Conveyor drive input track 1 10 Conveyor drive placement area track 1
4 Replacing spare parts at the conveyor
4.3 Conveyor drive
Service Manual ASM ProcessLens Dual-lane 09/2018 49
Removal
► Use the software or manually move the conveyor rail into a position which allows you best
access.
– To move the conveyor rail manually, pull the toothed belt of the width adjustment unit.
► Switch off the machine, disconnect it from the power supply and secure it to prevent
unauthorized reactivation.
► The fastening screws of the conveyor drives are on the outer side of the conveyor.
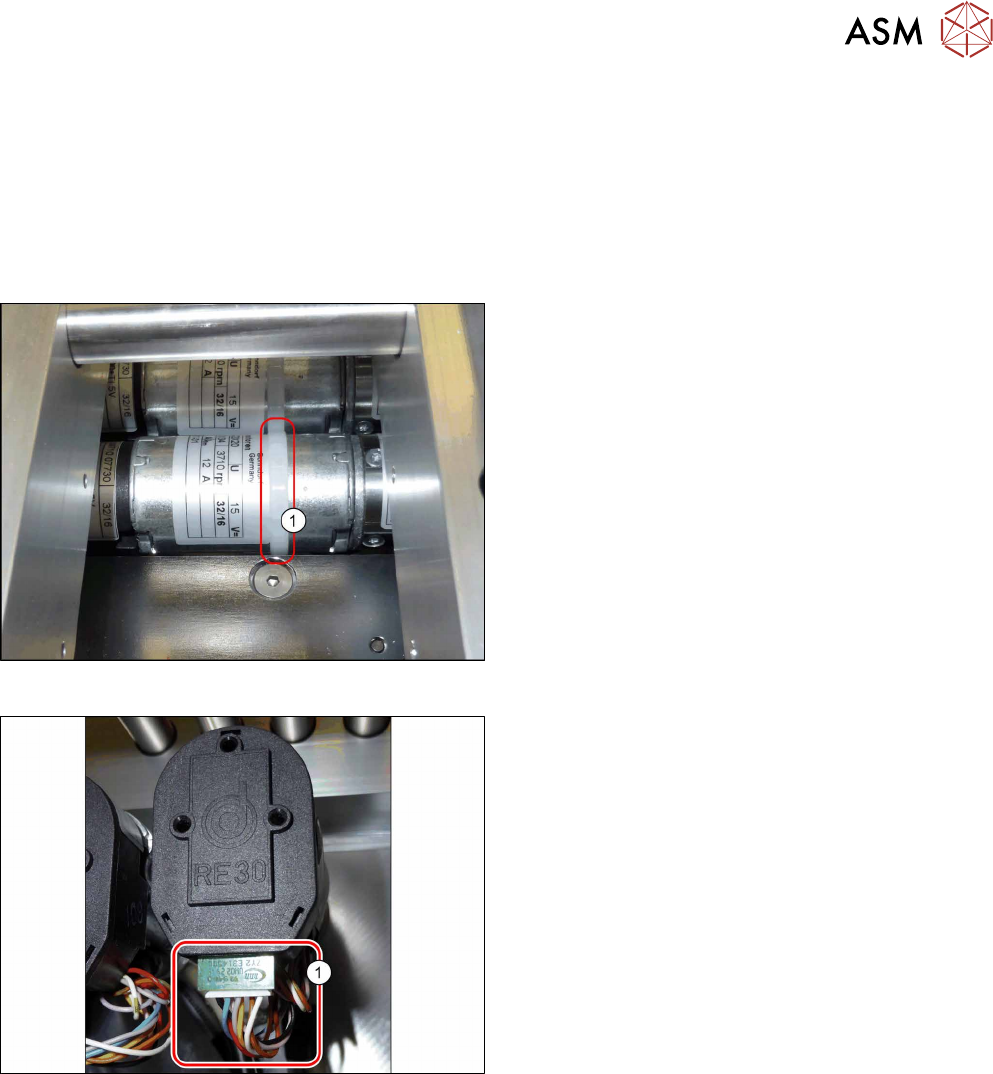
Fig.21: Cable tie
► Remove the cable tie(1) around the conveyor
drive.
Fig.22: Electrical connections
► Unplug all electrical connections from the con-
veyor drive(1). You may want to mark their posi-
tions for easier exact replacement later on.