00900194-01_SM_ASM ProcessLens_Dual-lane_EN.pdf - 第68页
4 Replacing spare parts at the conveyor 4.5 Conveyor belt, belt drive and hexagonal shaft 68 Service Manual ASM ProcessLens Dual-lane 09/2018 Fig.43: Input side(1) and output side(2) ► Glue the sheet metal plate to th…
4 Replacing spare parts at the conveyor
4.5 Conveyor belt, belt drive and hexagonal shaft
Service Manual ASM ProcessLens Dual-lane 09/2018 67
Installation
► Clean the adhesive surfaces on the conveyor rail.
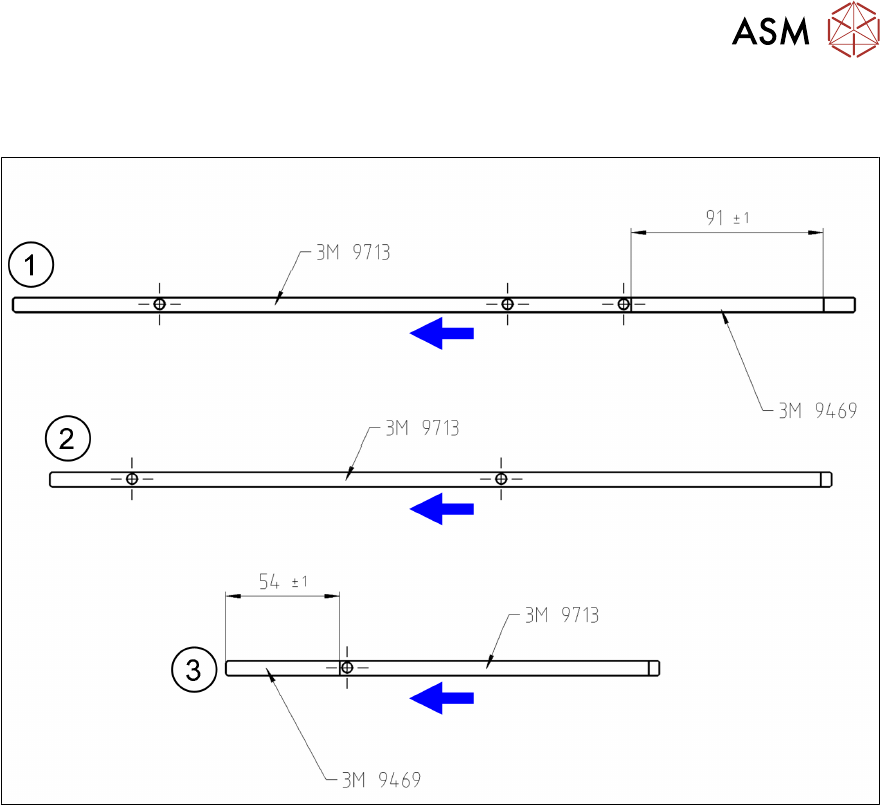
Fig.42: Attaching the adhesive tapes
► Attach the adhesive tapes to the side sheet metal plates as described in the figure. Observe
the following points:
– In the input area(1) towards the outside of the machine, electrically conductive adhesive
tape 3M-9469 [03154790-xx] is applied on a 91mm wide stripe.
– In the placement area(2), the electrically conductive adhesive tape is not used.
– In the output area(3) towards the outside of the machine, a 54mm wide stripe is applied
with electrically conductive adhesive tape 3M-9469 [03154790-xx].
– The other surfaces of the sheet metal plates are not applied with electrically conductive
tape 3M-9713 [03154789‑xx]. Make sure to keep the holes for the light barriers free.
4 Replacing spare parts at the conveyor
4.5 Conveyor belt, belt drive and hexagonal shaft
68 Service Manual ASM ProcessLens Dual-lane 09/2018
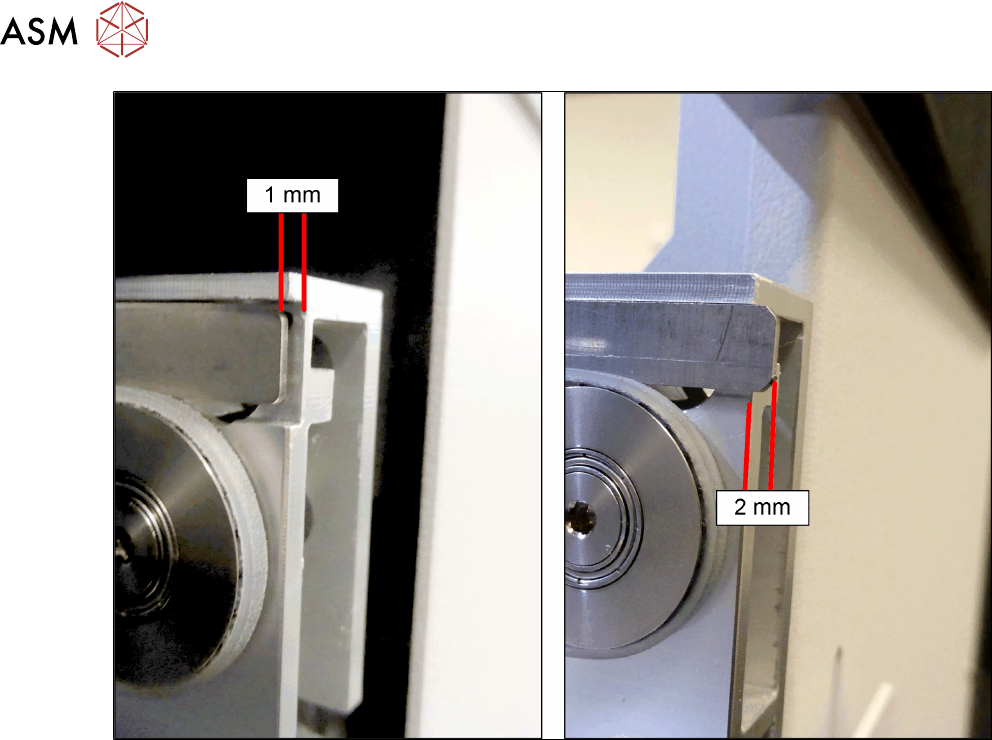
Fig.43: Input side(1) and output side(2)
► Glue the sheet metal plate to the conveyor rail. Observe the following points:
– On the input side(1), the side metal sheet plate is attached 1mm towards the inside.
– On the output side(2), the side metal sheet plate protrudes the rail by 2mm.
► Fit the toothed belt.
Replacing the toothed belt (conveyor belt)
4 Replacing spare parts at the conveyor
4.5 Conveyor belt, belt drive and hexagonal shaft
Service Manual ASM ProcessLens Dual-lane 09/2018 69
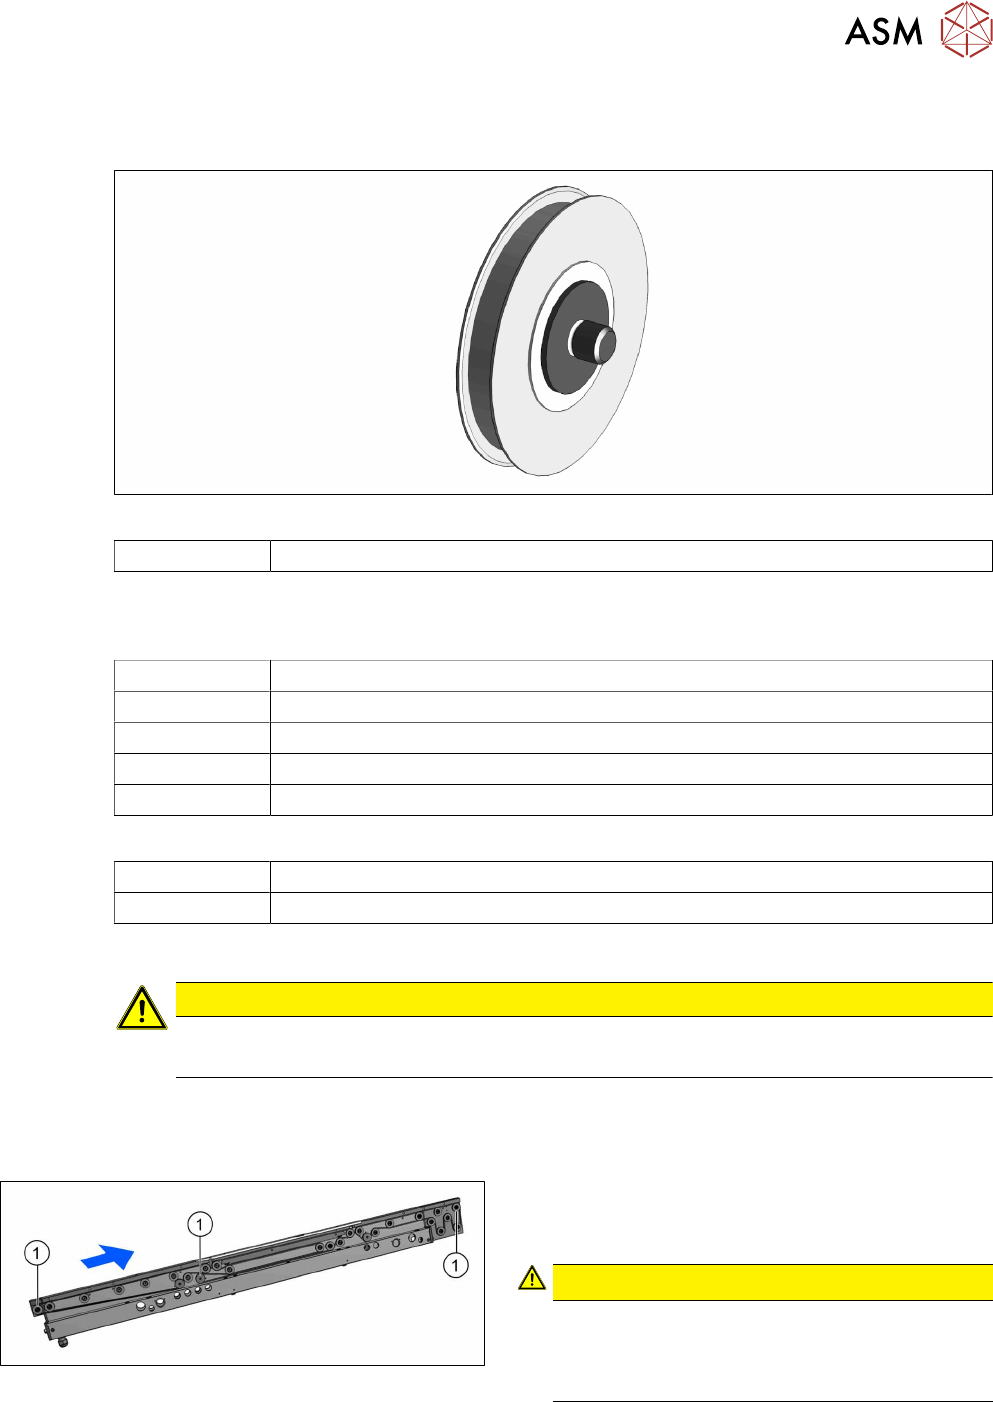
4.5.4 Replacing the idler pulley (conveyor belt)
Parts
Fig.44: Idler pulley
03121201‑xx Idler pulley 20x2.5 M-C complete
See also 4.5.5 "Replacing the pinion gear drive" [}71]
Equipment and tools
00386253‑xx Torque screwdriver ESD 0.4 - 1.0Nm
03078706‑xx Bit holder for screwdriver TorqueVario
00326015‑xx Belt tension measuring device
00353832-xx Allen key set
Bit, size 4
If required:
Magnet lifter or tweezers and adhesive tape
Measuring scale
Removal
CAUTION
Toothed belt
► Make sure that the toothed belt is not folded or otherwise damaged.
► Use the software or manually move the conveyor rail into a position which allows you best
access.
– To move the conveyor rail manually, pull the toothed belt of the width adjustment unit.
Fig.45: Movable idler pulleys
► If you are replacing a movable idler pulley(1),
you will have to move the conveyor rail to get
access to the T-slot nut (see below).
CAUTION!
Fix the T slot nut!
When replacing a movable idler pulley, fix the T
slot nut to the inner side of the conveyor rail (see
description below).
.
► Switch off the machine, disconnect it from the power supply and secure it to prevent
unauthorized reactivation.