MAN00000772_SI-G200BB_SVCPDFA.pdf - 第132页
System software clear installation process WKGB-10109-01 System software clear installation process 1/1 1 System software cl ear installation process If you are upgrading normally , use the p rocedure in "WKGB-10101…
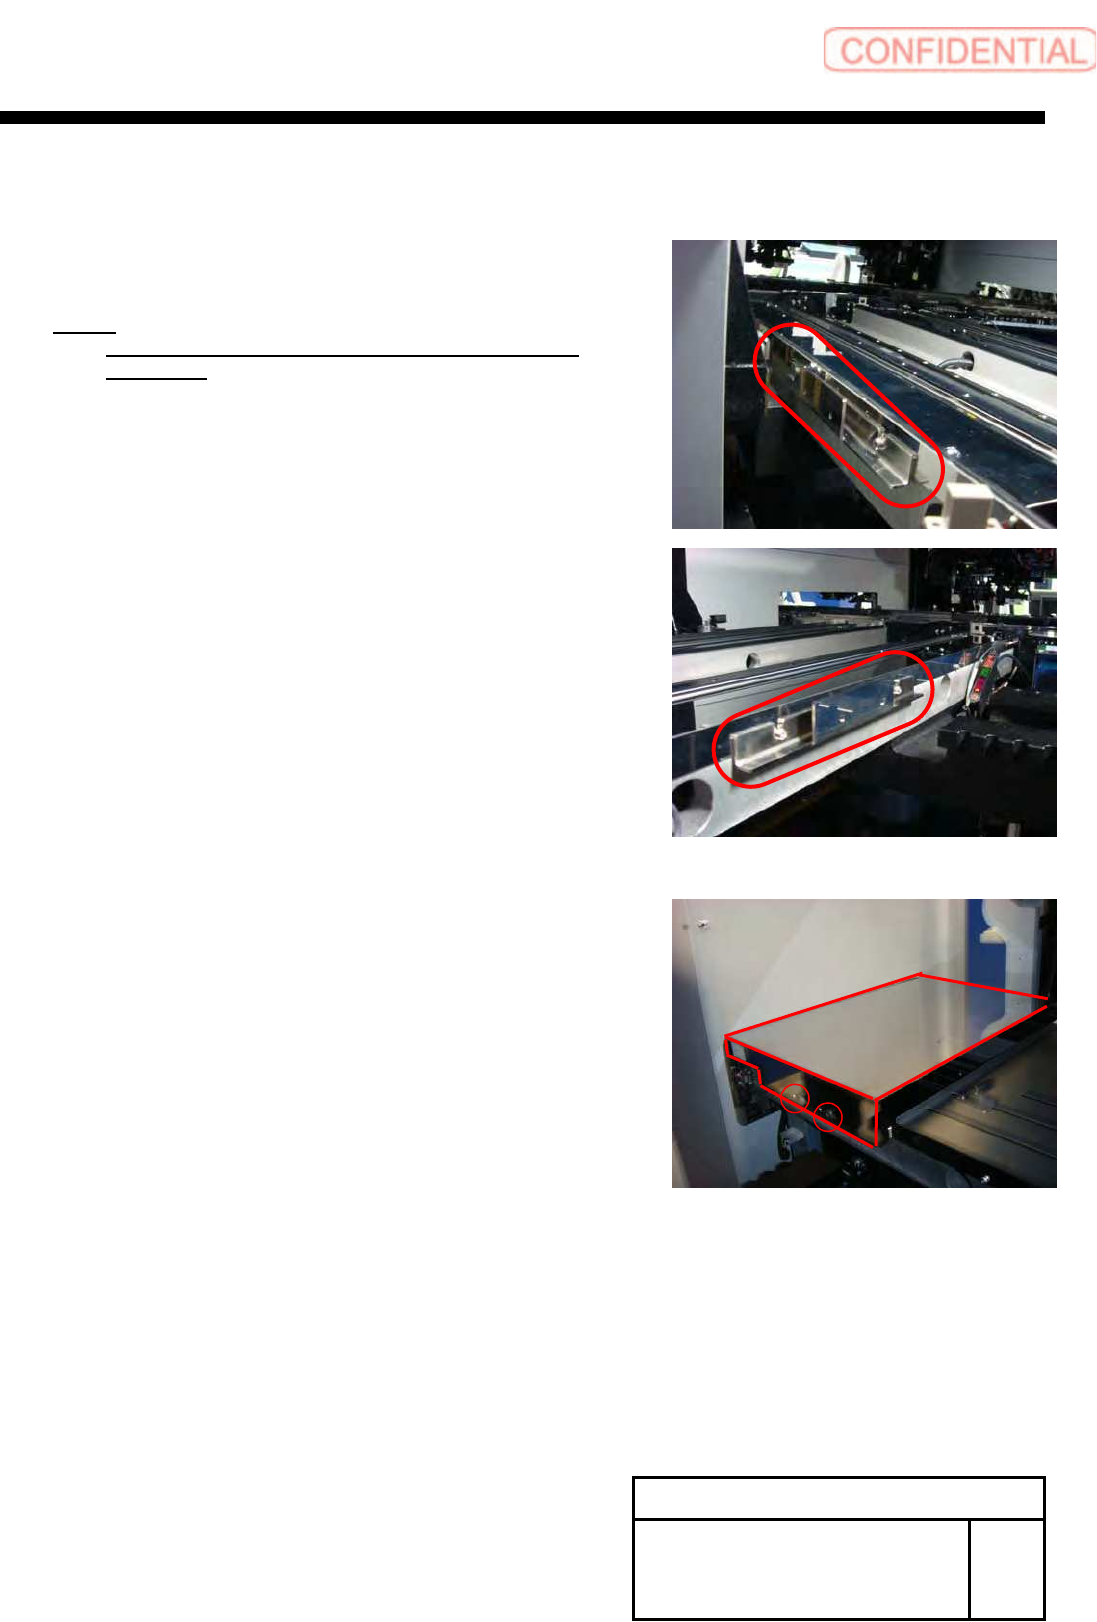
Install Tray Unit (Re-setup after tray unit moved)
SEET
19/19
WKGB-10105-02
Installing Tray Unit
(Re-setup after tray unit moved)
[Installation of hood]
1 Install the hood bracket with the 2-CP3x10
to S axis unit.
NOTE:
Commonly use the screws fixing the guide for the
S Axis rail.
2 Install the hood with the +T4x8.
System software clear installation process
WKGB-10109-01
System software clear installation process
1/11
System software clear installation process
If you are upgrading normally, use the procedure in "WKGB-10101-01".
This document describes…
The software clear installation which is a coping process for
troubles from software reasons.
Intended software version and models
ver. 1.72 or later / SI-G200 AA &SI-G200 BB
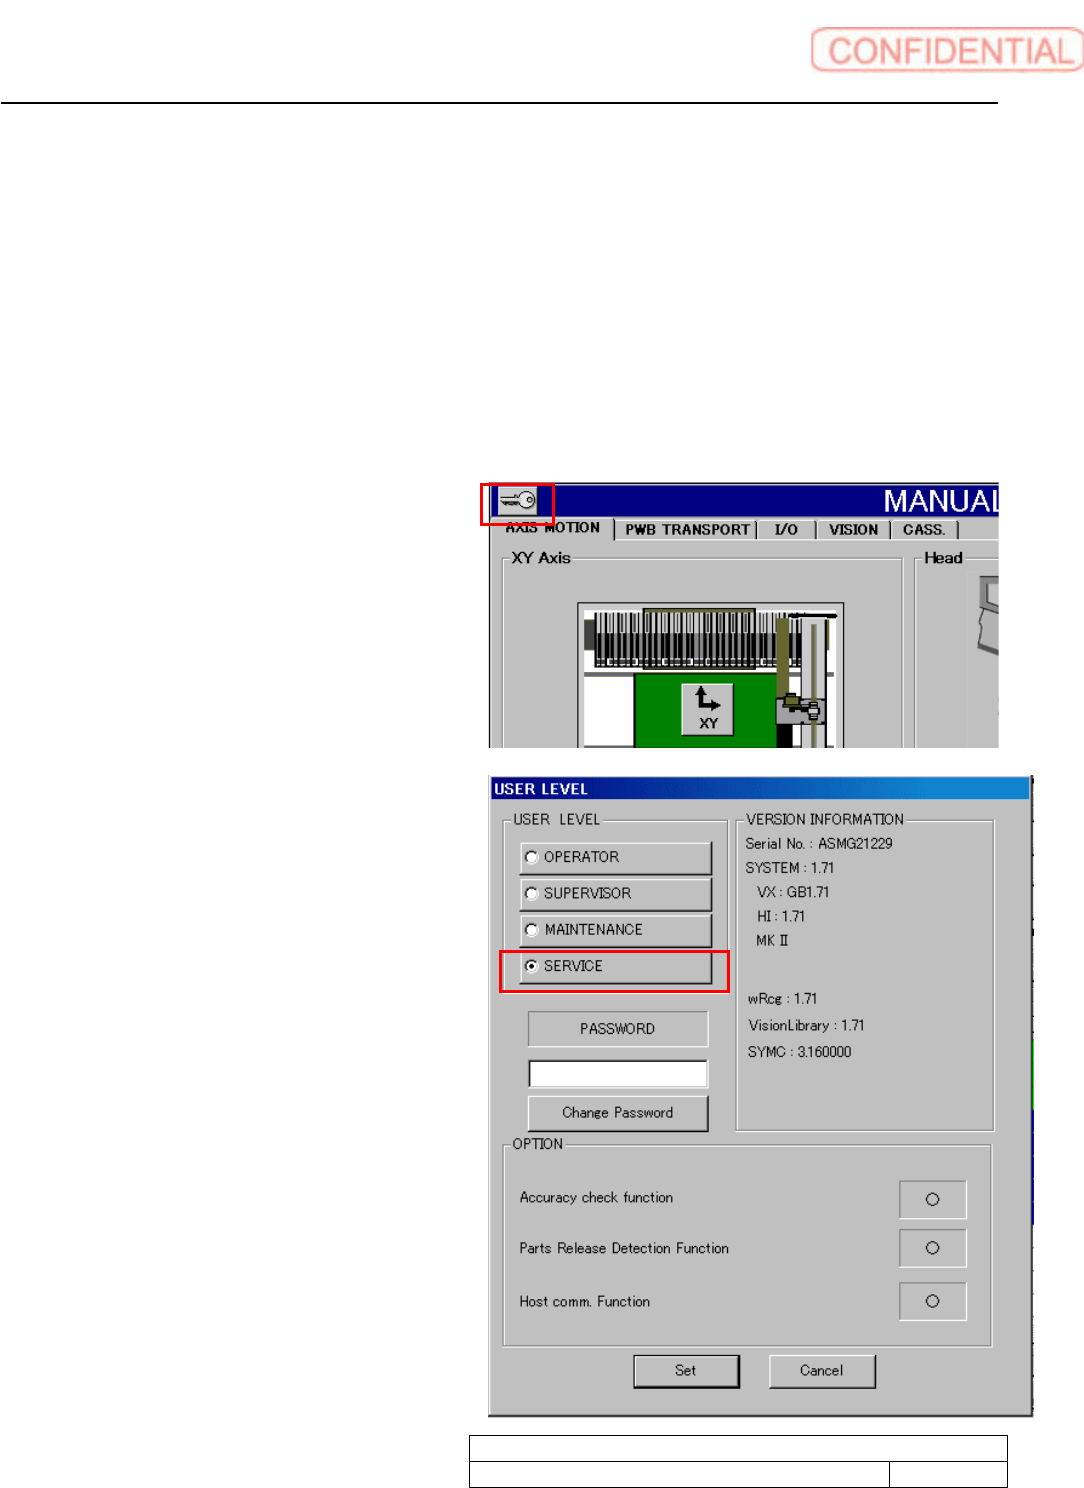
User level setting
1. Click the key mark on the left shoulder of
the screen to show Use level display screen.
2. Click Service radio button to show cursor in
password field.
System software clear installation process
WKGB-10109-01
System software clear installation process
2/11
3. Confirm VERSION
INFORMATION. The install
system is depends on machine
model. Take memo system type
referring as below.
If Only 1) System version indication
is available. Select SI-G200 Mk1 /
Mk2 AA.
If 2)Model indication shows “MK
Ⅱ” Select SI-G200 Select SI-G200 Mk1 / Mk2 AA.
If 2)Model indication shows “MKⅢ Type F”. Machine has a conveyor with ejector.
Select Sl-G200 Mk3 Type F AA with EJ.
If 2)Model indication shows MKⅢ Type F. Machine has a conveyor without ejector.
Select G200 Mk3 Type F AA without EJ.
If 2)Model indication shows MKⅢ Type F. Machine has parallel conveyors without ejector.
Select G200 Mk3 Type F AA without EJ
4. Input password to click SET button.
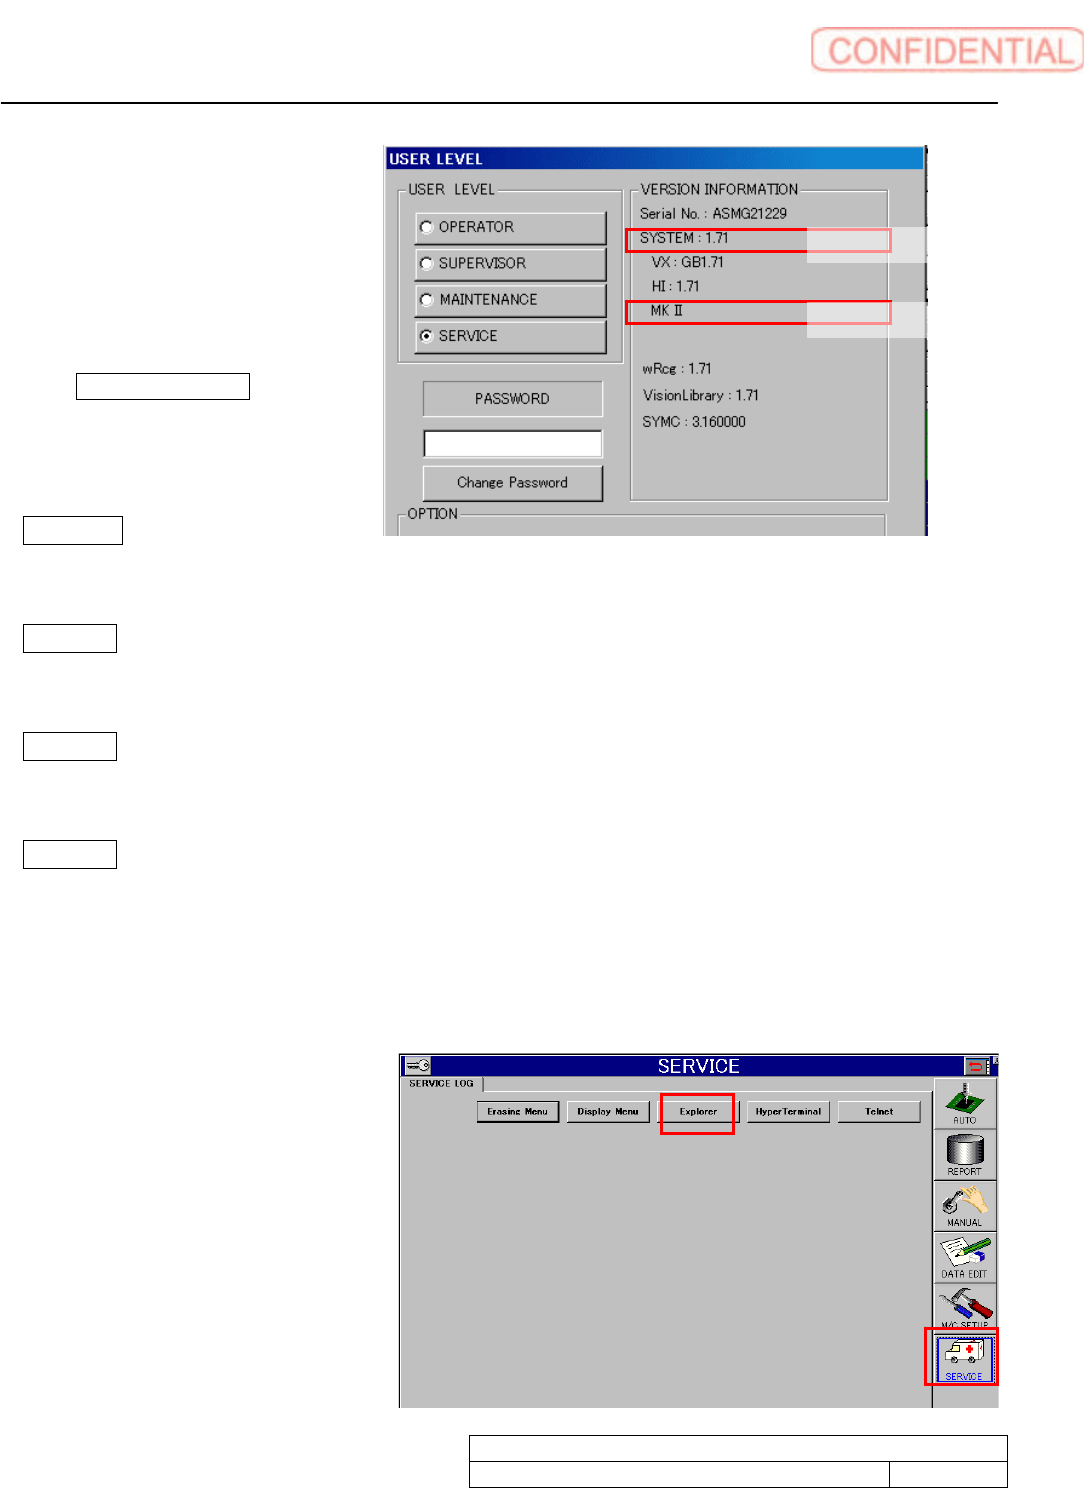
5. HI display appears. DATA EDIT, MC_SETUP, and SERVICE button appears on the screen right
side.
Click SERVICE button to show
explorer button. The explorer
starts up.
1) System version
2) Model