00193891-0702_AI_LP_Barcode_DE+EN.pdf - 第168页
2 PCB barcode scanner assembly instructions SIPLACE 2.7 Installing the PCB barcode scanner 10/2009 Edition 168 2.7.3.2 Electrical connection: HS-60 / D4 / D1 / D2 barcode distributor / conveyor contro l : Plug the connec…
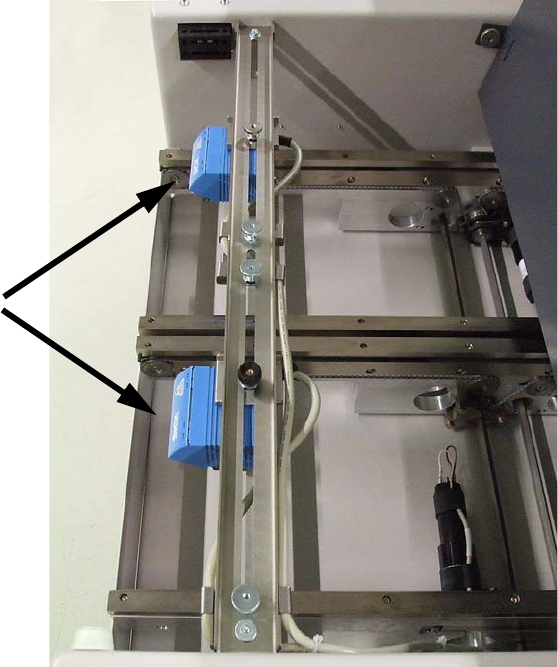
Scanner fitted
SIPLACE 2 PCB barcode scanner assembly instructions
10/2009 Edition 2.7 Installing the PCB barcode scanner
167
2
2
2 PCB barcode scanner assembly instructions SIPLACE
2.7 Installing the PCB barcode scanner 10/2009 Edition
168
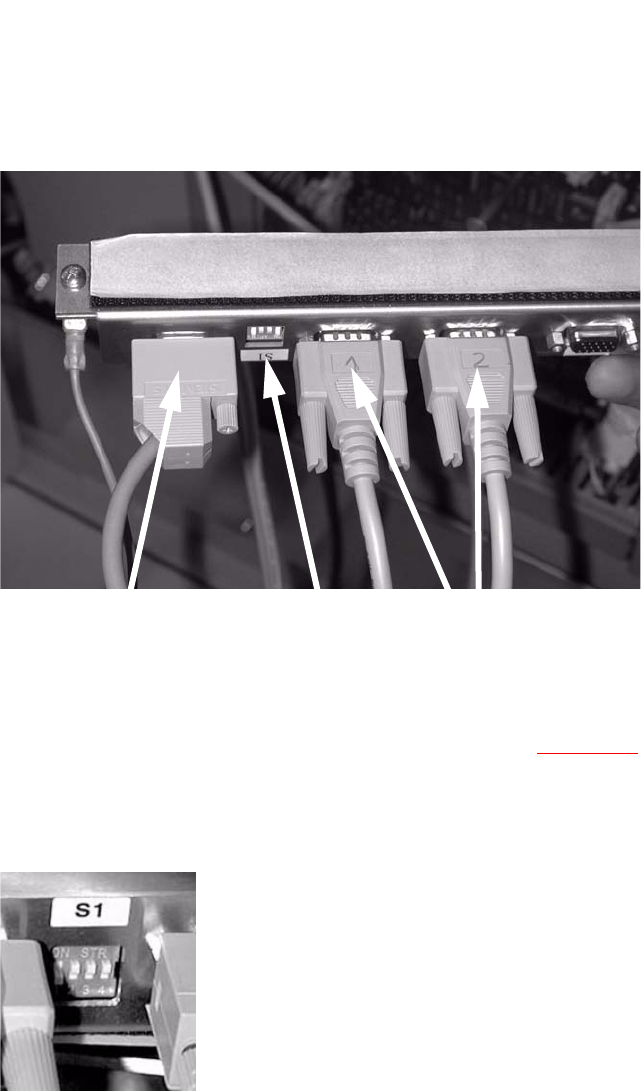
2.7.3.2 Electrical connection: HS-60 / D4 / D1 / D2 barcode distributor / conveyor control
: Plug the connecting cables for the barcode scanner into the distributor rail as follows:
X1
Single conveyor topside
X2
Single conveyor underside
X3
Dual conveyor topside
X4 Dual conveyor underside
X5 Connection to the conveyor control
Connection
(current + control)
Switch
Barcode scanner
2
: Plug the cable (item no.: 03016825-01 for SIPLACE D4 or 03016827 SIPLACE D1/D2) into the
PCB barcode distributor X5 (see also the wiring diagram,
Section 2.9) and run it to the con-
veyor control.
: Set the relevant switch for the connected scanner to OFF and the others to ON.
2
: Stick the distributor rail inside the drawer unit (see photograph below).
SIPLACE 2 PCB barcode scanner assembly instructions
10/2009 Edition 2.7 Installing the PCB barcode scanner
169
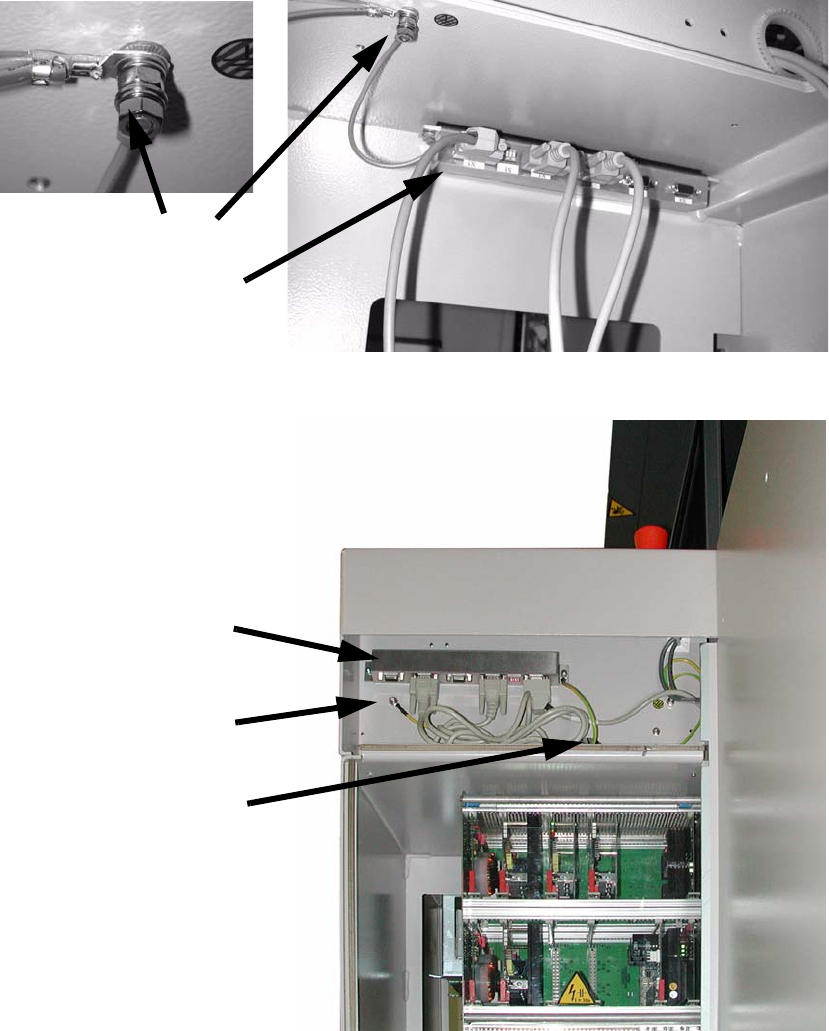
: Connect the grounding cable for the distributor rail to the available grounding point.
The grounding cable must be connected with plai
n washer, snap ring and nut M5.
Grounding
Distributor rail
SIPLACE HS-60
SIPLACE D-series
Distributor rail
Grounding
Run cable
through the gap
2
2
: Fit the cover to the conveyor control.