00193891-0702_AI_LP_Barcode_DE+EN.pdf - 第195页
SIPLACE 2 PCB barcode scanner assembly instructions 10/2009 Edition 2.7 Installing the PCB barcode scanner 195 : Place the other hinge in the hole and screw the protective cover to the hinge. 2 screws 2 2 : Align the cov…
2 PCB barcode scanner assembly instructions SIPLACE
2.7 Installing the PCB barcode scanner 10/2009 Edition
194
Fitting the protective cover 2
: Remove the film from the new protective cover and its components.
: Use the hing
es from the old cover for the new one.
Remove the white packing discs from the sides.
Screw a hinge onto the cover.
2 screws
2
2
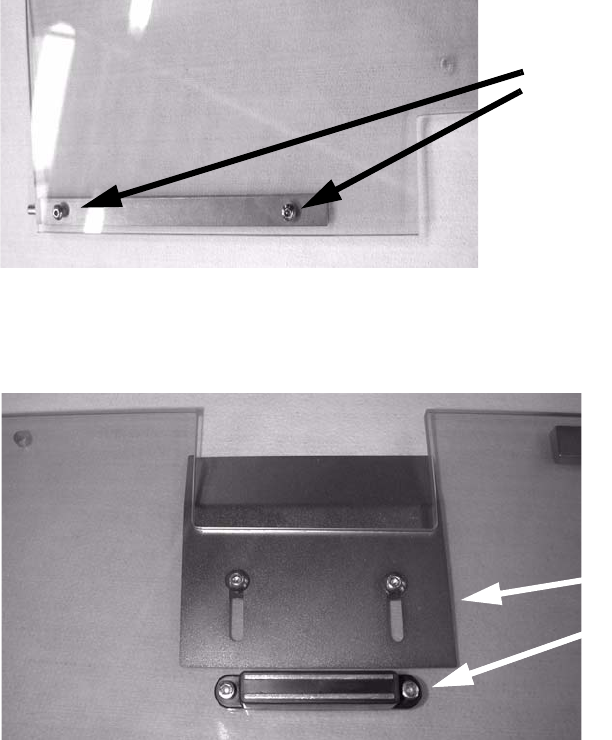
: Screw the protective plate and magnet to the protective cover.
Protective plate
MagnetMagnet
2
2
: Remove the cover switch actuator from the old cover and fit it onto the new one. Only do the
screws up loosely so that the actuator can be accurately positioned later.
2
2
2
2
2
SIPLACE 2 PCB barcode scanner assembly instructions
10/2009 Edition 2.7 Installing the PCB barcode scanner
195
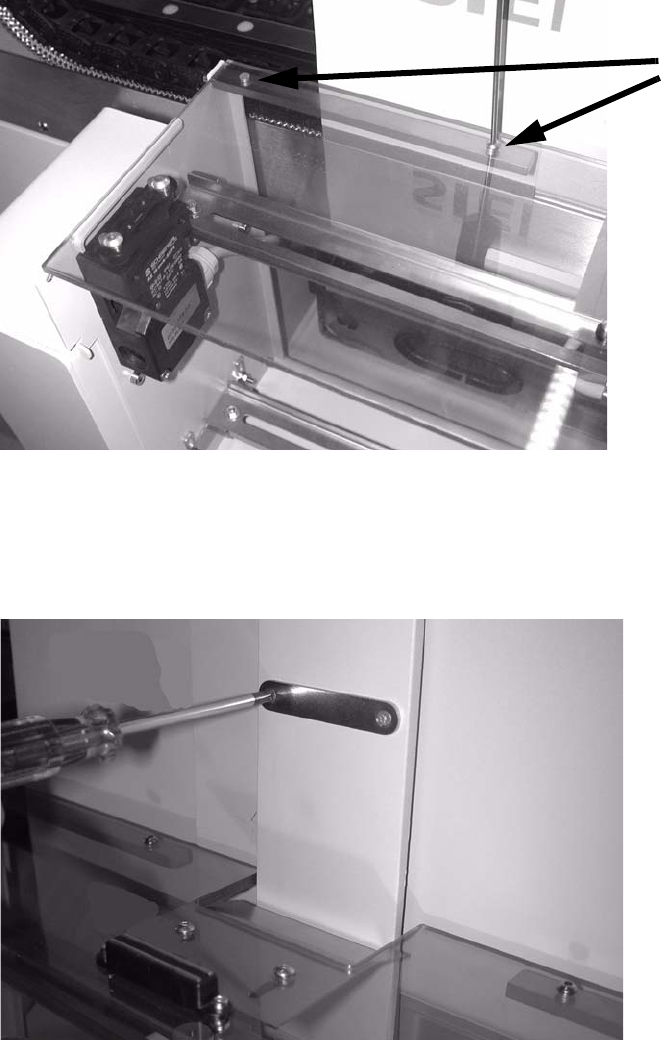
: Place the other hinge in the hole and screw the protective cover to the hinge.
2 screws
2
2
: Align the cover switch and actuator.
: Screw the oppo
site magnet plate onto the machine cross-member.
2
2
2
2
2
2 PCB barcode scanner assembly instructions SIPLACE
2.7 Installing the PCB barcode scanner 10/2009 Edition
196
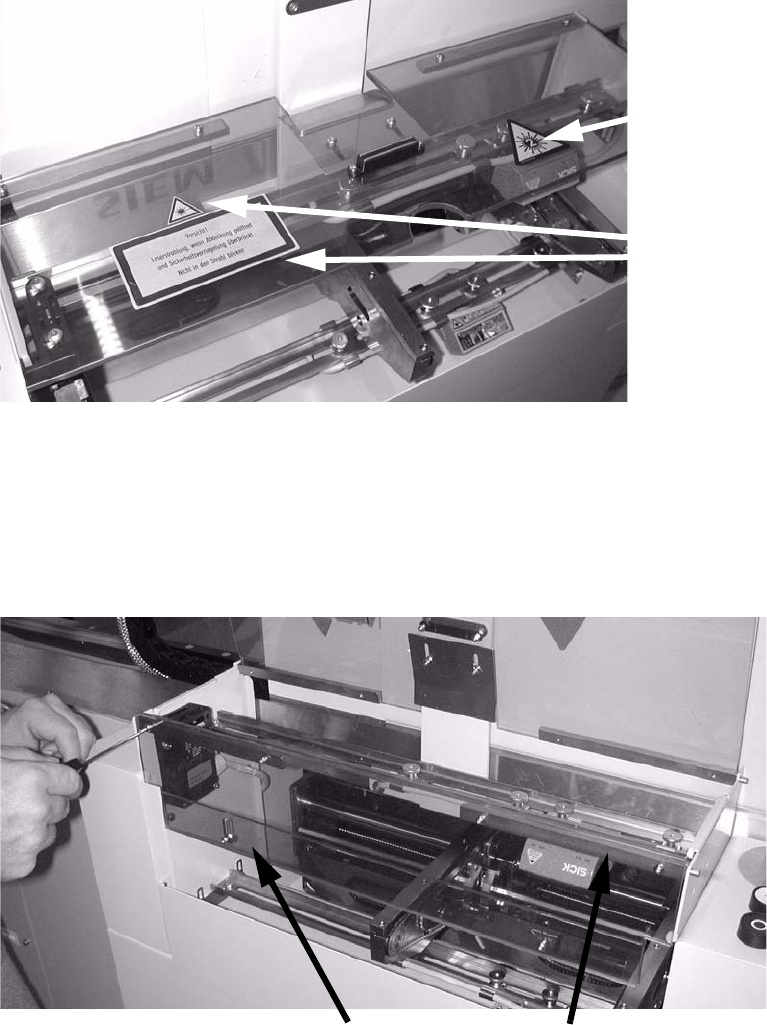
: Affix the protective sticker to the protective flap.
This sticker is manda-
tory for the 2D bar-
code, as this has a
class 2 laser.
Sticker.
2
: Screw the narrow Plexiglas strips onto the cover that is mounted at right angles over the PCB
feeder.
: Fit the front cover, once again premounting one hinge, then screwing the cover to the inserted
h
inge.
The plexiglas strips must be on the inside.
plexiglas strips
Hinges
2
: Tighten any screws that are still loose.
: Refit and close all removed panels, covers and protective hoods.