00193891-0702_AI_LP_Barcode_DE+EN.pdf - 第243页
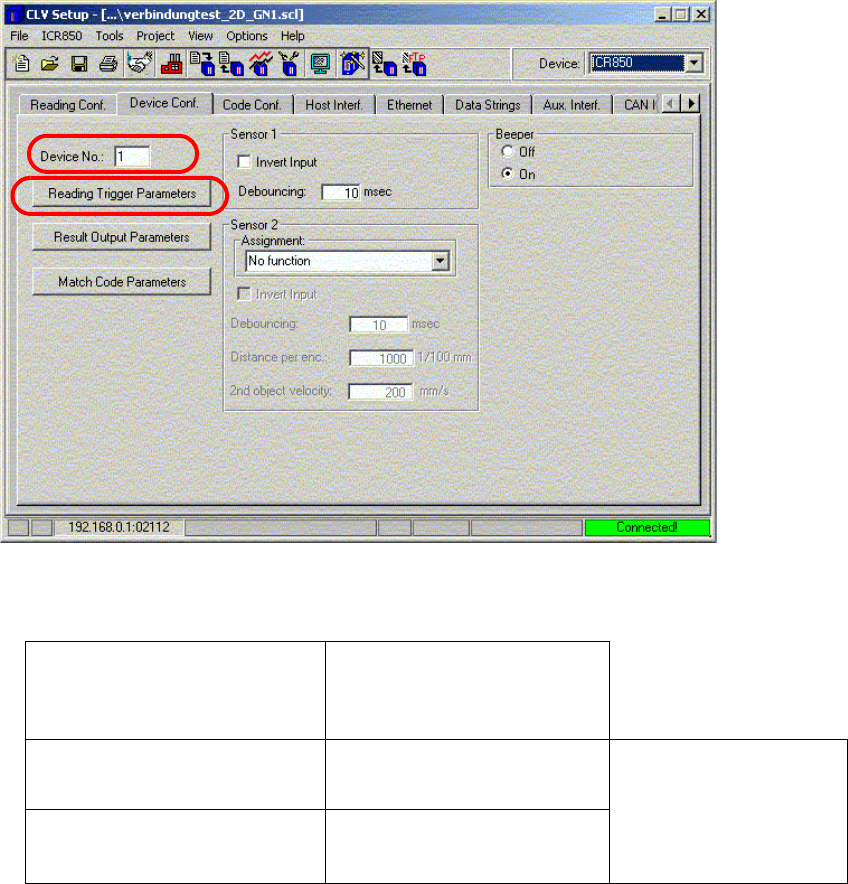
SIPLACE 2 PCB barcode scanner assembly instructions 10/2009 Edition 2.11 PCB barcode scanner configuration 243 : Select the "D evice conf." tab. 2 : Enter the device number as shown in the t able. Left-hand PCB…
2 PCB barcode scanner assembly instructions SIPLACE
2.11 PCB barcode scanner configuration 10/2009 Edition
242
The scanning frequency is adjusted automatically.
PLEASE NOTE:
Once the configuration is complete,
an image of the defined barcode can be output.
The object velocity can be changed if the barcode appears squashed or stretched.
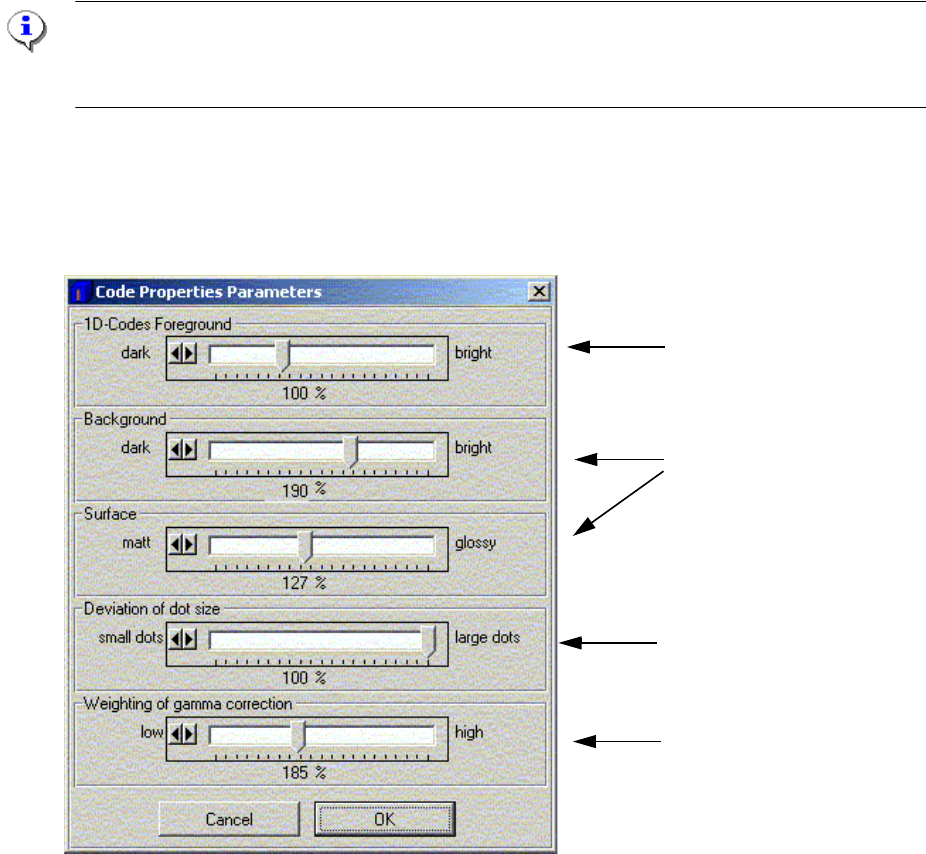
: Click on the "Code Properties Parameters" button.
This window is used to adjust the barcode quality.
Setting for 1D barcodes
Setting for 1/2D barcodes
Setting for 1/2D dot matrix
barcodes
Background hiding for 1/2D
barcodes
Fig. 2.11 - 36 Adjusting the barcode quality
2
2
2
2
2
2
2
SIPLACE 2 PCB barcode scanner assembly instructions
10/2009 Edition 2.11 PCB barcode scanner configuration
243
: Select the "Device conf." tab.
2
: Enter the device number as shown in the table.
Left-hand PCB conveyor track (2)
on dual conveyor option only
Right-hand PCB conveyor
track
(1)
PCB barcode scanner ‘topside’
3 1
PCB barcode scanner
‘topsi
de’
PCB conveyor
PCB barcode scanner
‘underside’
4 2
2
2
2
2
2
2
2
2 PCB barcode scanner assembly instructions SIPLACE
2.11 PCB barcode scanner configuration 10/2009 Edition
244
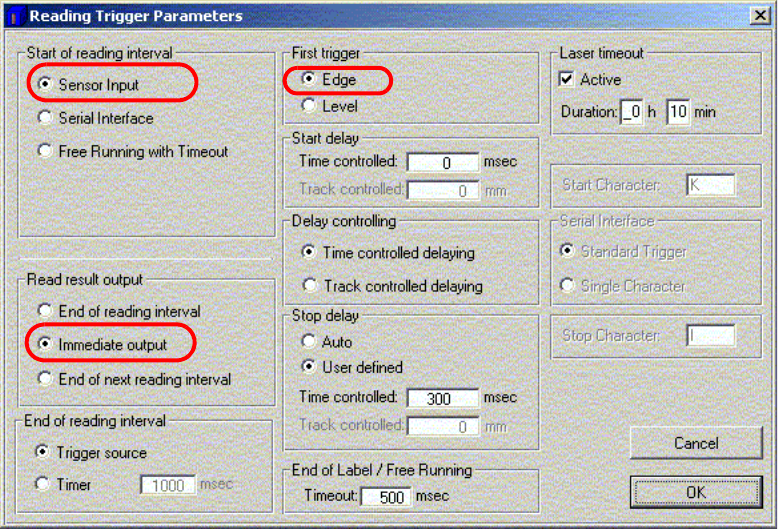
: Click on "Reading trigger parameters".
Fig. 2.11 - 37 Reading trigger parameters
2
: Activate the functions as shown in the above screenshot.
: Click on OK to confirm your input.