00193891-0702_AI_LP_Barcode_DE+EN.pdf - 第259页
SIPLACE 2 PCB barcode scanner assembly instructions 10/2009 Edition 2.12 Tips & tricks for the barcode scanner 259 2.12.3 ICR850 scanner Please note that there are two dif ferent type ICR850 scanners: 2 ICR850-1920S0…
2 PCB barcode scanner assembly instructions SIPLACE
2.12 Tips & tricks for the barcode scanner 10/2009 Edition
258
2.12 Tips & tricks for the barcode scanner
2.12.1 Background
This technical information was written because there are a few changes in the CLV_Setup soft-
ware version 4.3 compared to older versions. 2
We have also integrated new knowledge and practical experience gained in using the PCB bar-
code scanner. 2
This is simply a supplement to 00193891-05 Retr
ofit in
structions for PCB barcode scanner and
will shortly be incorporated into these retrofit instructions. 2
2.12.2 Software installation
The CLV software must be installed on the default path (C:\Program Files\SICK\CLV) as it is only
this path that is enabled to run the programs in the firewall. 2
If a firewall message appears on the desktop or if no image is displayed in the ImageFTP window,
then you
should check whether the install path specified above was actually used. 2
If you still cannot establish a connection to the scanner,
then you should delete the address res-
olution protocol (ARP). 2
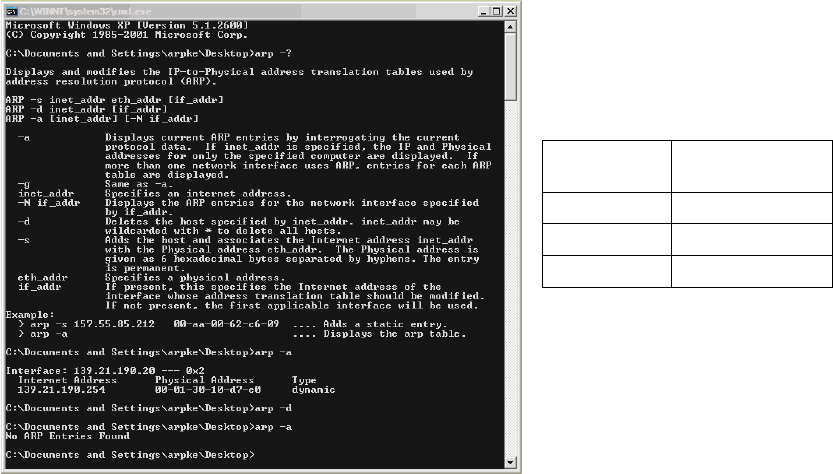
To do this, select "Start" and then enter the command "cmd" to swit
ch to the DOS level (see picture
below). You can then use the following commands: 2
DOS
command
Description
arp -?
ARP / help
arp -a
ARP / display
arp -d
ARP / delete
2
SIPLACE 2 PCB barcode scanner assembly instructions
10/2009 Edition 2.12 Tips & tricks for the barcode scanner
259
2.12.3 ICR850 scanner
Please note that there are two different type ICR850 scanners: 2
ICR850-1920S03: Item number 00119679-01 Focus height 60 mm for SIPLACE HS / HF / X2
ICR850-1920S04: Item number 00119689-01
Focus height
85 mm for SIPLACE S / F 2
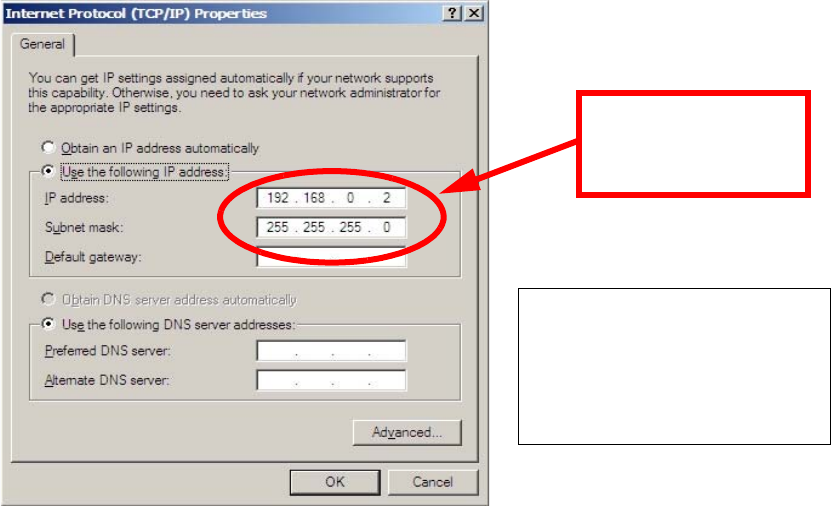
2.12.4 Network settings
The notebook (server) is assigned IP address 192.168.0.2 2
and subnet mask 255.255.255.0. 2
The scanner will have entered the IP
address
192.168.0.1 when it was supplied. 2
First the notebook is
assigned IP address
192.168.0.2.
For a detailed description, see:
00193891-05
Retrofit instructions for PCB bar-
code section 1.11.6.2
Setting the network address
2
2
Then establish the connection using a cross-over cable between the notebook and scanner 2
and start the CLV_Setup software. 2
2
2
2
2
2 PCB barcode scanner assembly instructions SIPLACE
2.12 Tips & tricks for the barcode scanner 10/2009 Edition
260
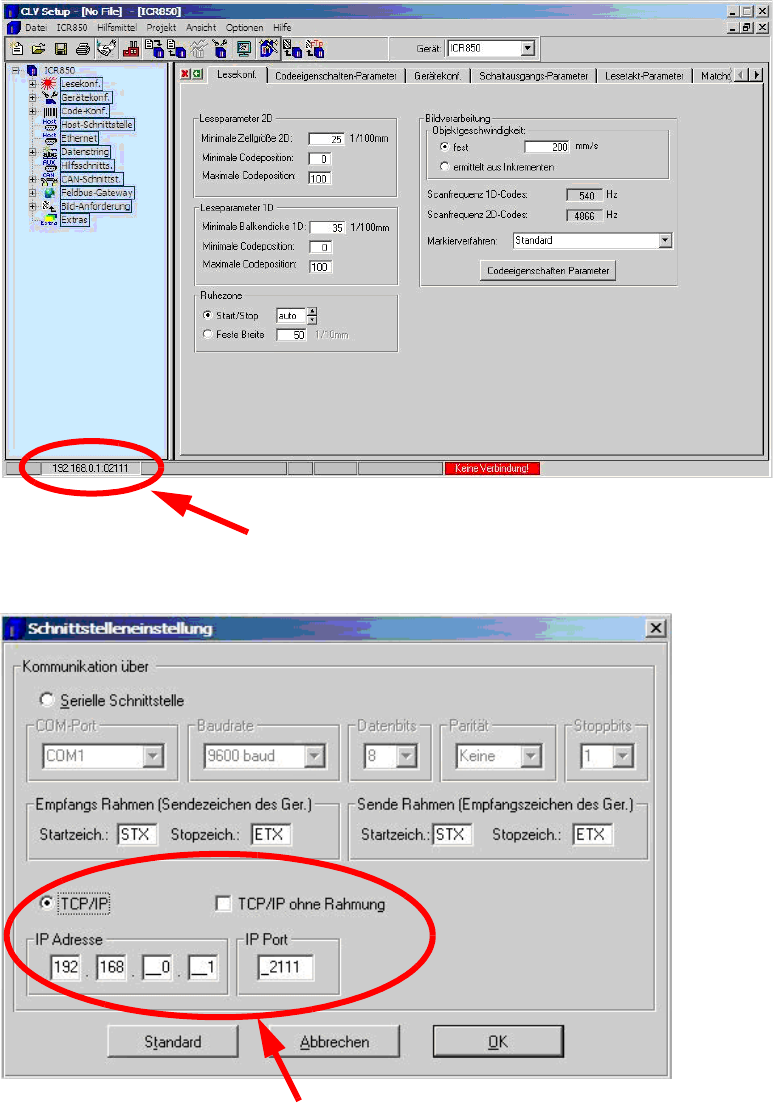
2.12.5 CLV software
Double-click on the IP at the bottom left to open the window for the
interface settings.
Use these settings to connect via TCP/IP (cross-over cable).
2
2