00193891-0702_AI_LP_Barcode_DE+EN.pdf - 第188页
2 PCB barcode scanner assembly instructions SIPLACE 2.7 Installing the PCB barcode scanner 10/2009 Edition 188 : Run the connecting cable (s) of the barcode sca nner( s) past the extension kit an d pass them through the …
SIPLACE 2 PCB barcode scanner assembly instructions
10/2009 Edition 2.7 Installing the PCB barcode scanner
187
2
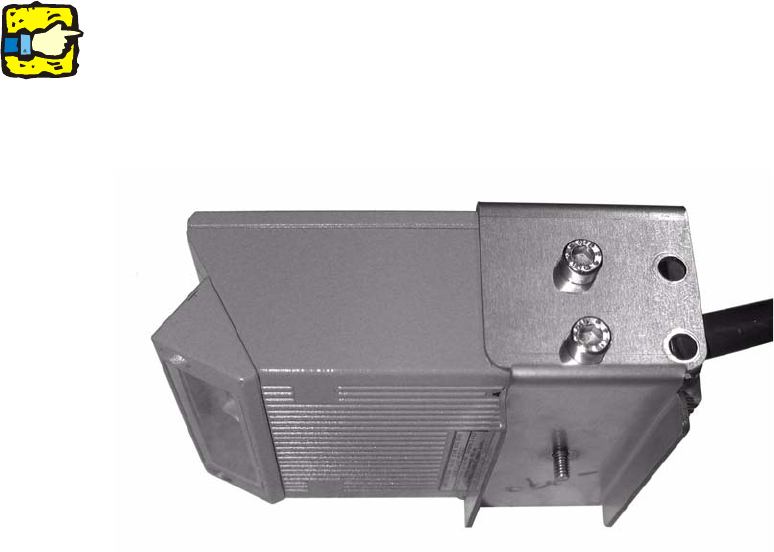
On the S-27 HM with dual conveyor the 2D barcode scanner in the lower track 2 is mounted as
shown in the photo below. 2
These machines also no longer have a protective
plate beneath the conveyor. If the machine is
an earlier model, the protective plate should be removed. 2
2
2
: When running the cable, make sure that it is not in the traveling range of the conveyor width
adjuster and does not rub against the side panels and motors of the width adjuster.
: Screw the spa
cer block back at its original location
(in case it will be needed later).
2
2
2
2
2
2
2
2
2
2
2
2
2 PCB barcode scanner assembly instructions SIPLACE
2.7 Installing the PCB barcode scanner 10/2009 Edition
188
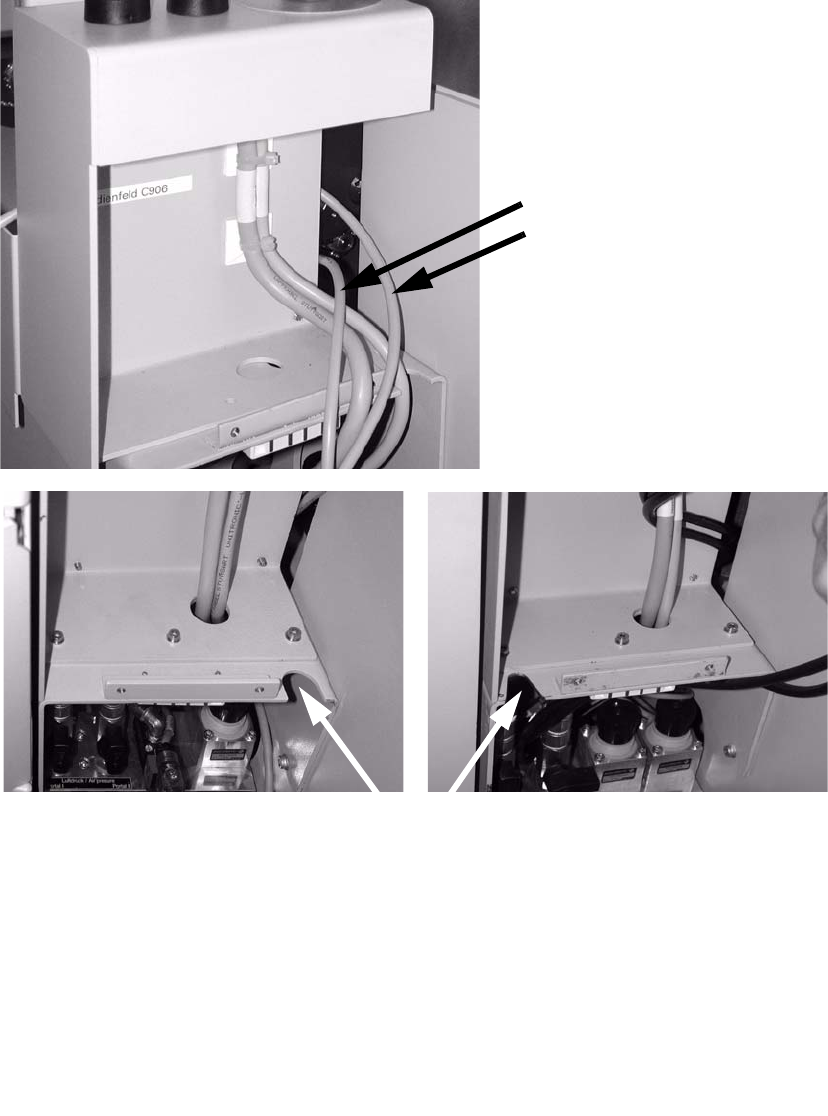
: Run the connecting cable(s) of the barcode scanner(s) past the extension kit and pass them
through the slot in the direction of the pneumatic unit.
Connecting cables for
barcode scanners (1 to 4)
Route cables through one of the penetration slots.
2
2
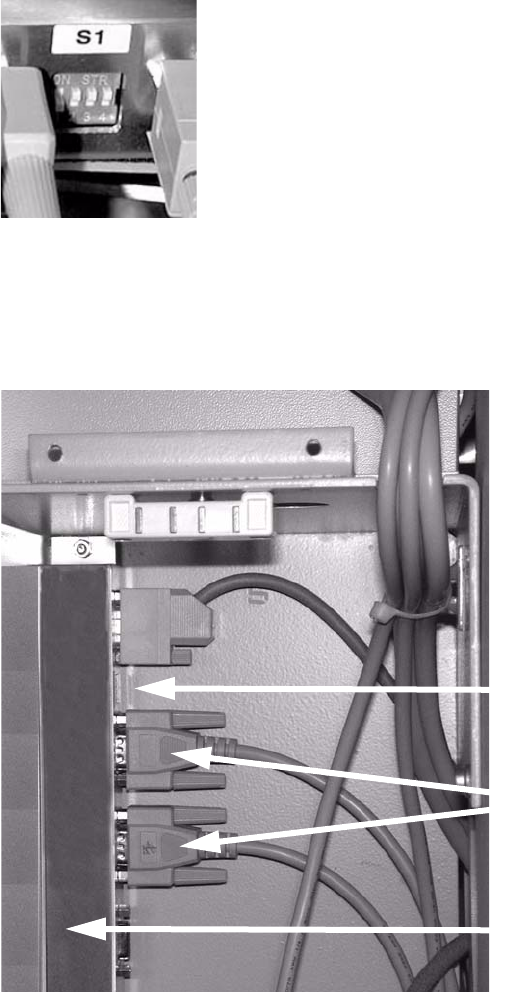
: Connect the connecting cable for the barcode scanner to the distributor rail as shown below:
X1
Single conveyor topside
X2
Single conveyor underside
X3
Dual conveyor topside
X4 Dual conveyor underside
X5 Connection to the conveyor control
SIPLACE 2 PCB barcode scanner assembly instructions
10/2009 Edition 2.7 Installing the PCB barcode scanner
189
: Set the relevant switch for the connected scanner to OFF and the others to ON.
2
2
: Release the pneumatic unit.
: Affix the distributor rail to the top left-hand corner of the pneumatic module.
Distributor rail
Switch
Plug connectors
2
2
2
2
2
2