00193891-0702_AI_LP_Barcode_DE+EN.pdf - 第190页
2 PCB barcode scanner assembly instructions SIPLACE 2.7 Installing the PCB barcode scanner 10/2009 Edition 190 : Connect the groundin g cable for the distribu tor rail to the available gr ounding point s. Grounding point…
SIPLACE 2 PCB barcode scanner assembly instructions
10/2009 Edition 2.7 Installing the PCB barcode scanner
189
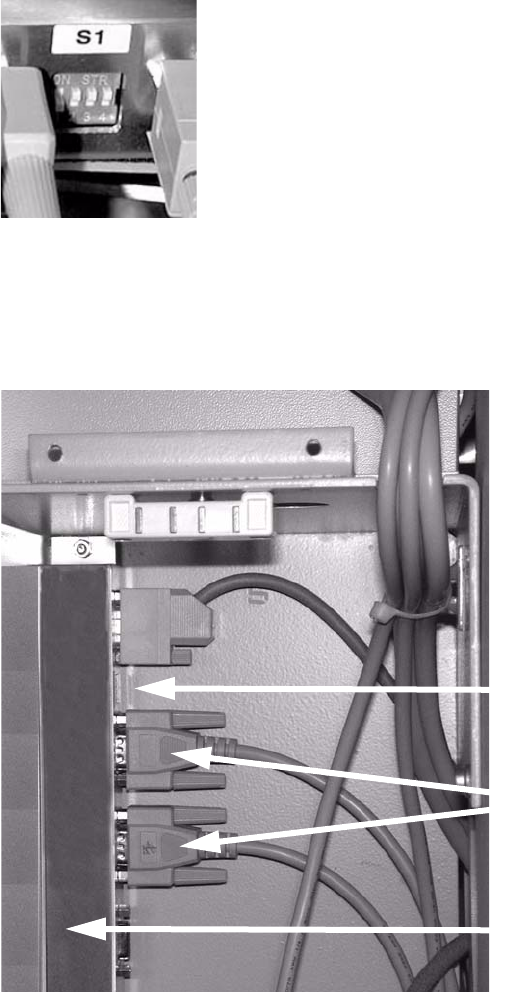
: Set the relevant switch for the connected scanner to OFF and the others to ON.
2
2
: Release the pneumatic unit.
: Affix the distributor rail to the top left-hand corner of the pneumatic module.
Distributor rail
Switch
Plug connectors
2
2
2
2
2
2
2 PCB barcode scanner assembly instructions SIPLACE
2.7 Installing the PCB barcode scanner 10/2009 Edition
190
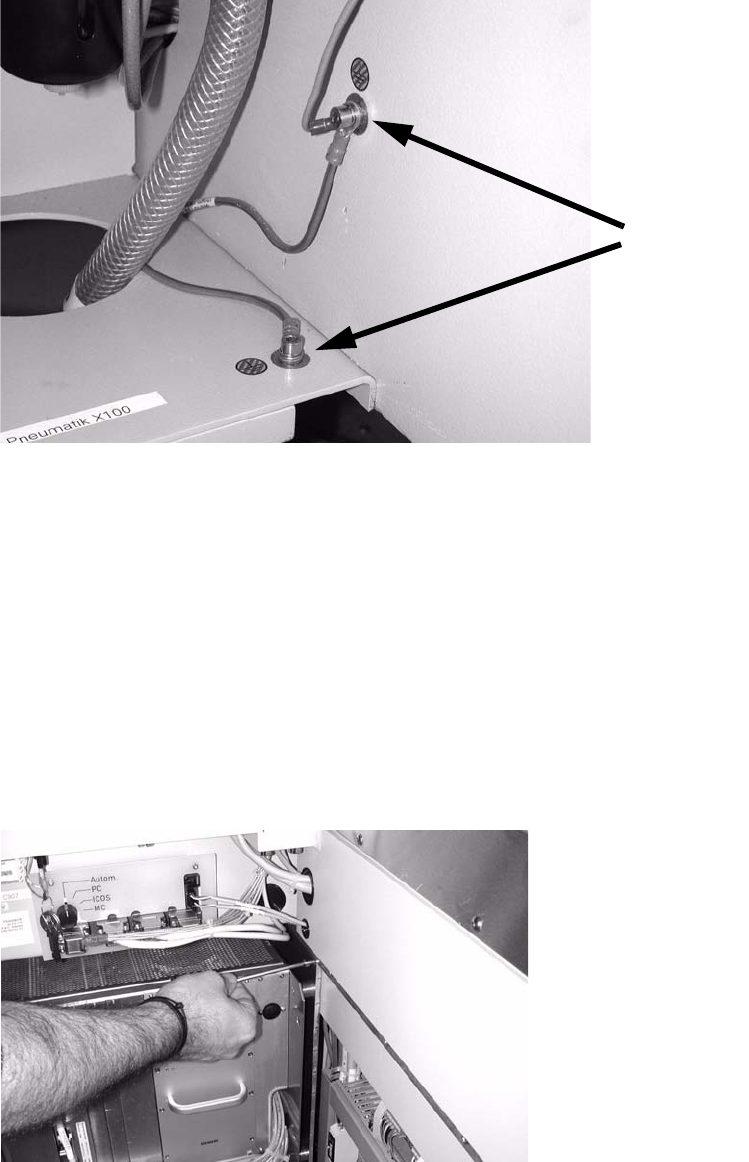
: Connect the grounding cable for the distributor rail to the available grounding points.
Grounding points
2
2
: Slide the barcode control cable through the machine frame (using a suitable tool if necessary)
to the module on the other side of the machine.
S-27 HM
Cable no.: 03016827-01
F4, F5, F5 HM, S-20, S-23, S-25 HM
Cable no.: 00373479-01
2
: Open the door of the module on the other side of the machine, to the left as viewed in the di-
rection of travel.
: Undo the module screw, remove the module and place it carefully on the floor.
2
2
SIPLACE 2 PCB barcode scanner assembly instructions
10/2009 Edition 2.7 Installing the PCB barcode scanner
191
Electrical connection S-27 HM 2
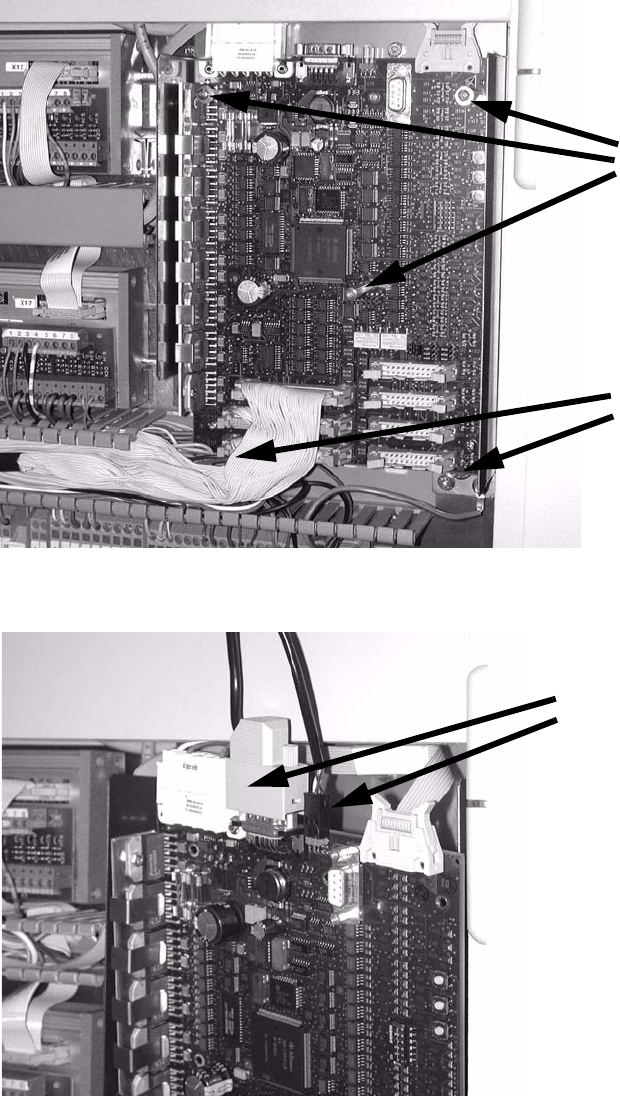
: Remove the plexiglas cover from the conveyor control.
: Remove the two screws and three socket-head pins
from the conveyor control and remove it..
2 screws
3 socket-head pins
2
: Plug the barcode connection cables into the top of the conveyor control.
Barcode connection cables
2