1_H24维修手册.pdf - 第180页
E d i ti o n 5 .0 H 24 H ead R ep ai r T r ai n i n g T ext f o r S er vi ce E n g i n ee r s Pr o p e r d at a m e a s u r e m e n t fo r H 2 4 h e a d u s i n g h e a d b e n c h 1 . 3 Z - a x i s P r ope r D a t a M e…
Edition 5.0 H24 Head Repair Training Text for Service Engineers
Proper data measurement for H24 head using head bench
9. Remove the Q0 proper data measurement jig (2AGKHJ015101). Move the Z-axis lever
to the position where it does not interfere with the syringe pusher.
10. Click [Next].
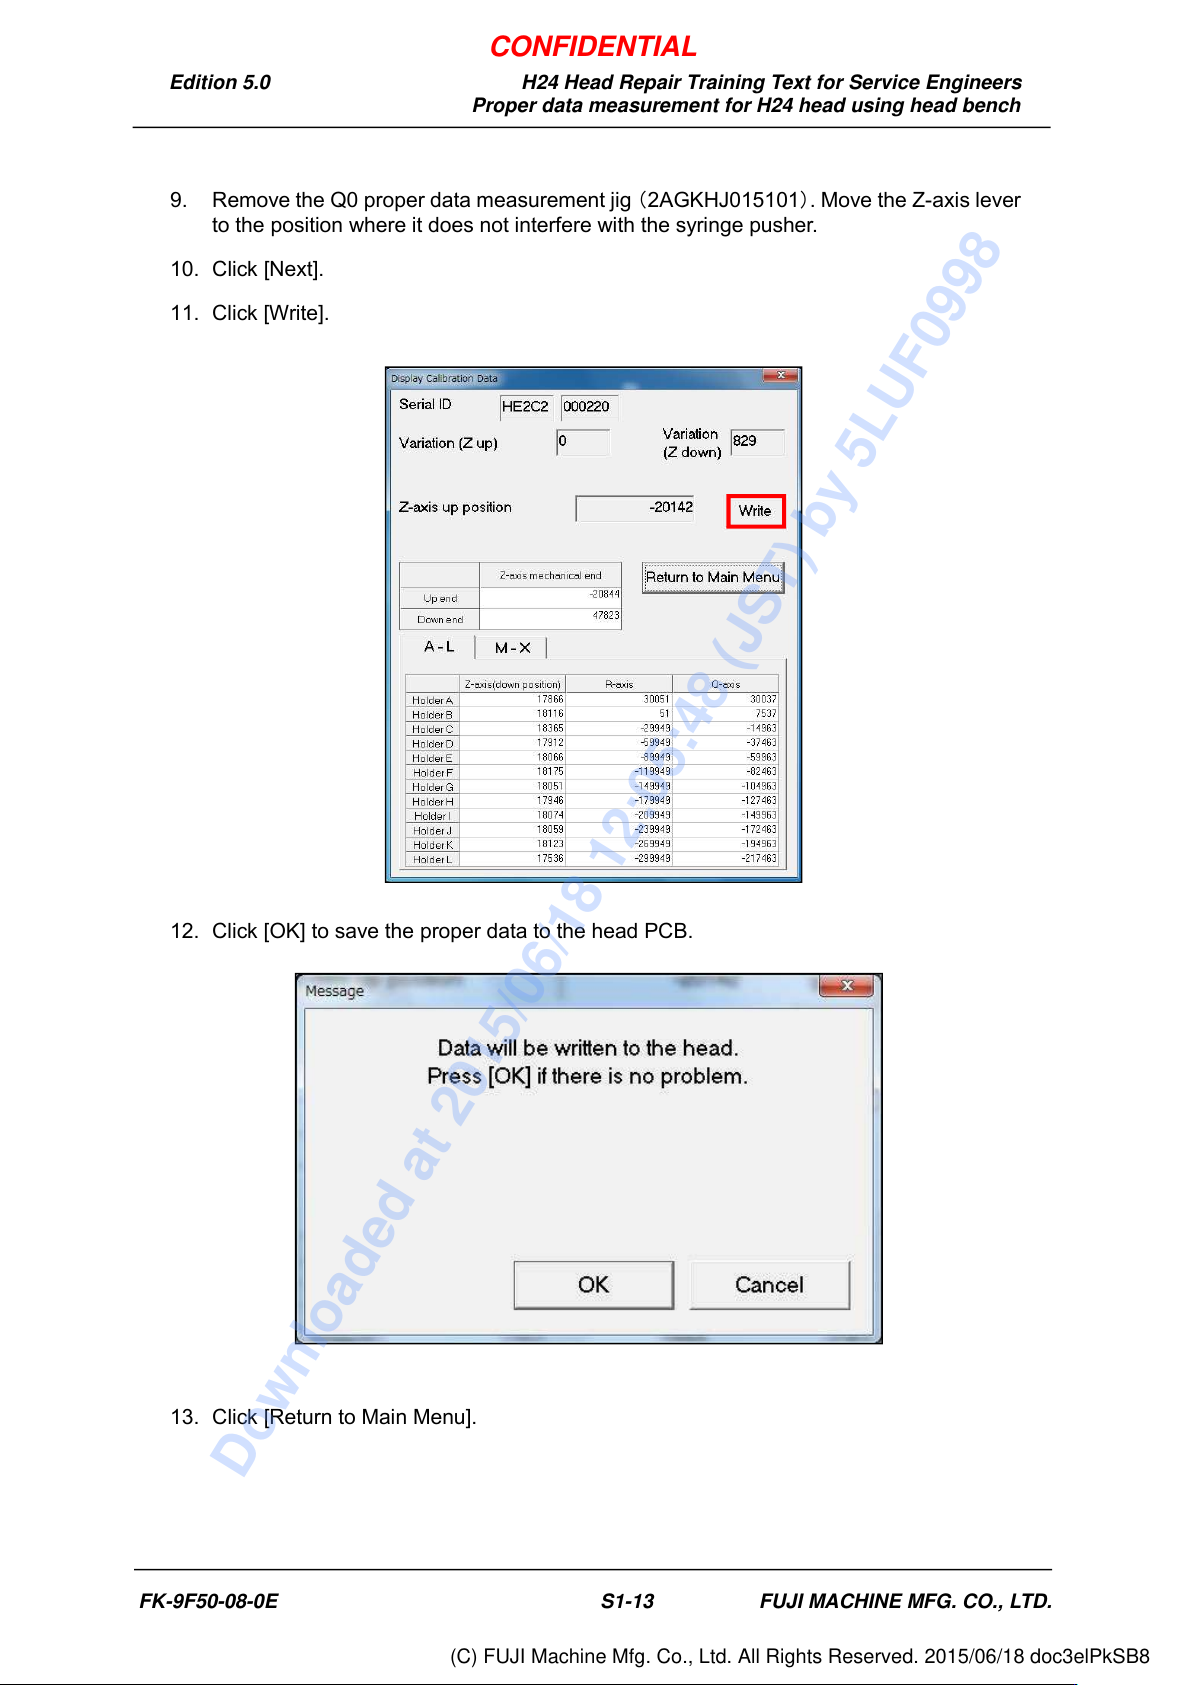
11. Click [Write].
12. Click [OK] to save the proper data to the head PCB.
13. Click [Return to Main Menu].
FK-9F50-08-0E S1-13 FUJI MACHINE MFG. CO., LTD.
CONFIDENTIAL
Downloaded at 2015/06/18 12:05:48 (JST) by 5LUF0998
(C) FUJI Machine Mfg. Co., Ltd. All Rights Reserved. 2015/06/18 doc3elPkSB8
Edition 5.0 H24 Head Repair Training Text for Service Engineers
Proper data measurement for H24 head using head bench
1.3
Z-axis Proper Data Measurement
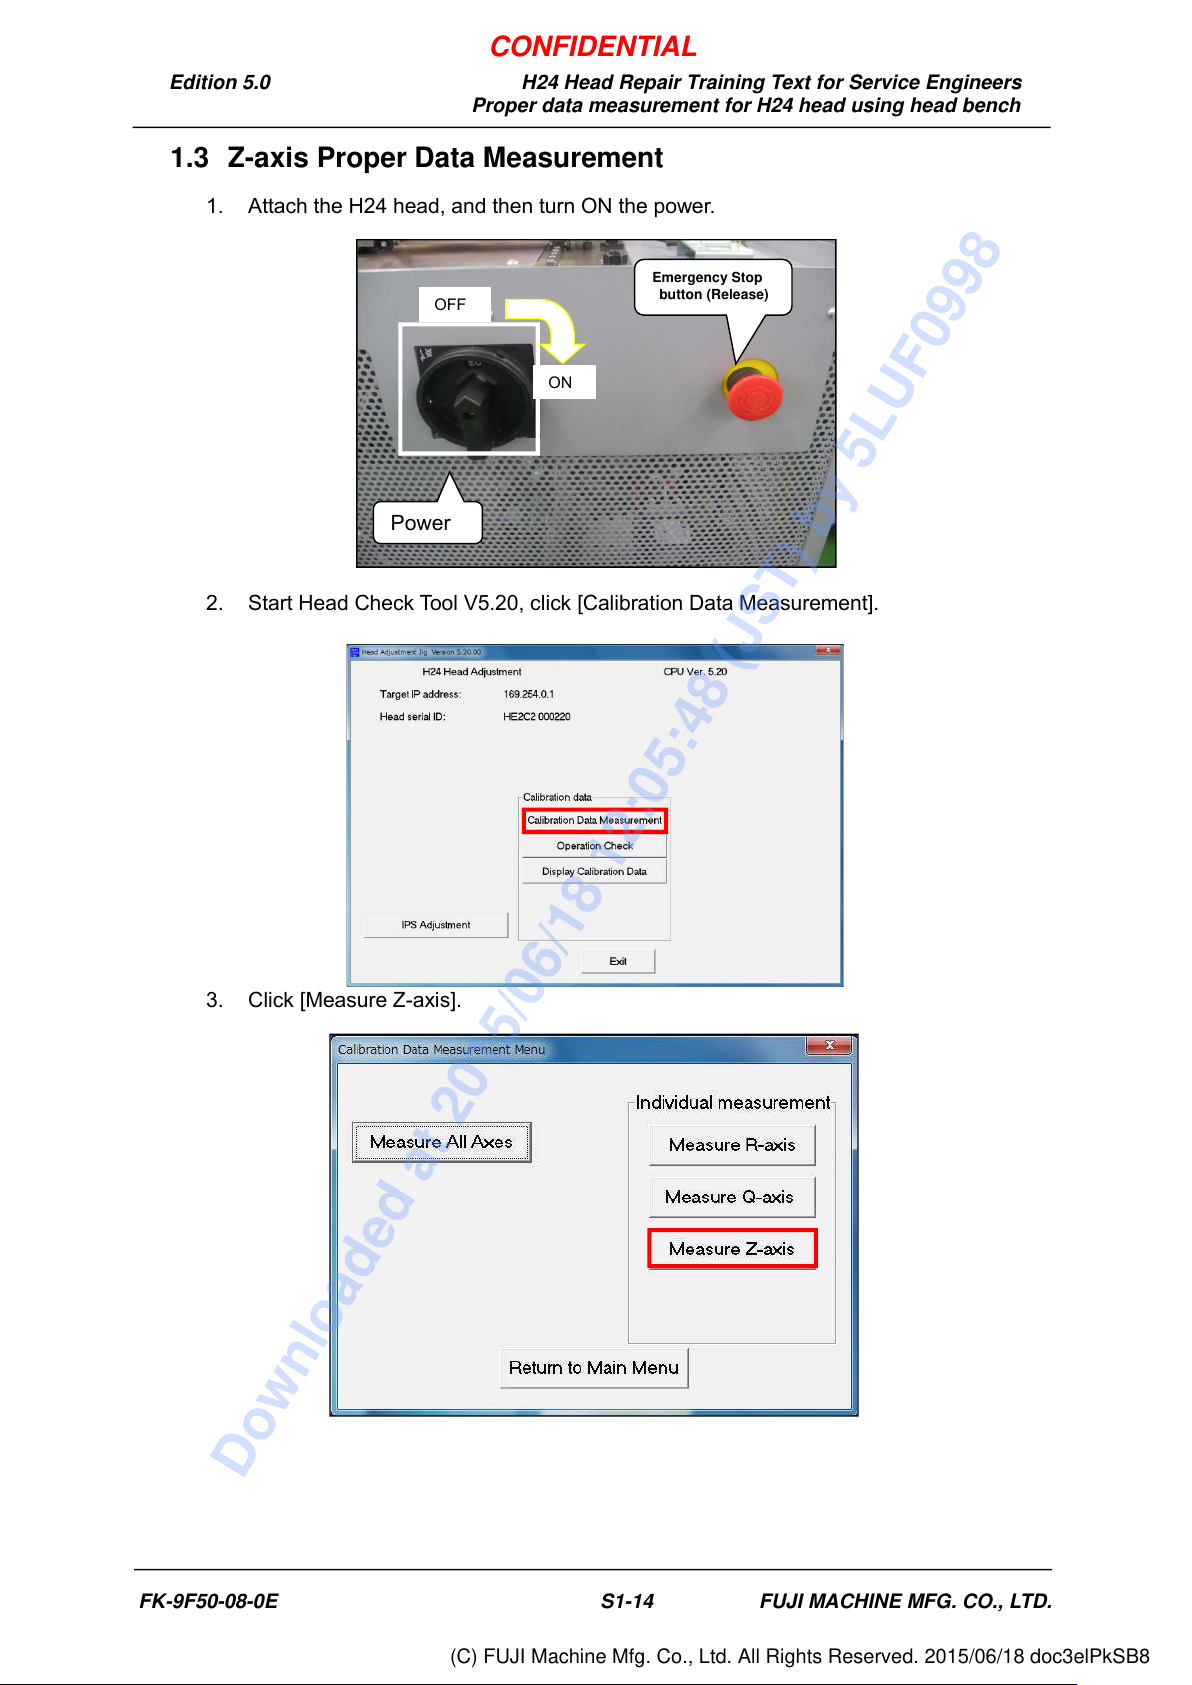
1. Attach the H24 head, and then turn ON the power.
2. Start Head Check Tool V5.20, click [Calibration Data Measurement].
3. Click [Measure Z-axis].
OFF
ON
Emergency Stop
button (Release)
Power
FK-9F50-08-0E S1-14 FUJI MACHINE MFG. CO., LTD.
CONFIDENTIAL
Downloaded at 2015/06/18 12:05:48 (JST) by 5LUF0998
(C) FUJI Machine Mfg. Co., Ltd. All Rights Reserved. 2015/06/18 doc3elPkSB8
Edition 5.0 H24 Head Repair Training Text for Service Engineers
Proper data measurement for H24 head using head bench
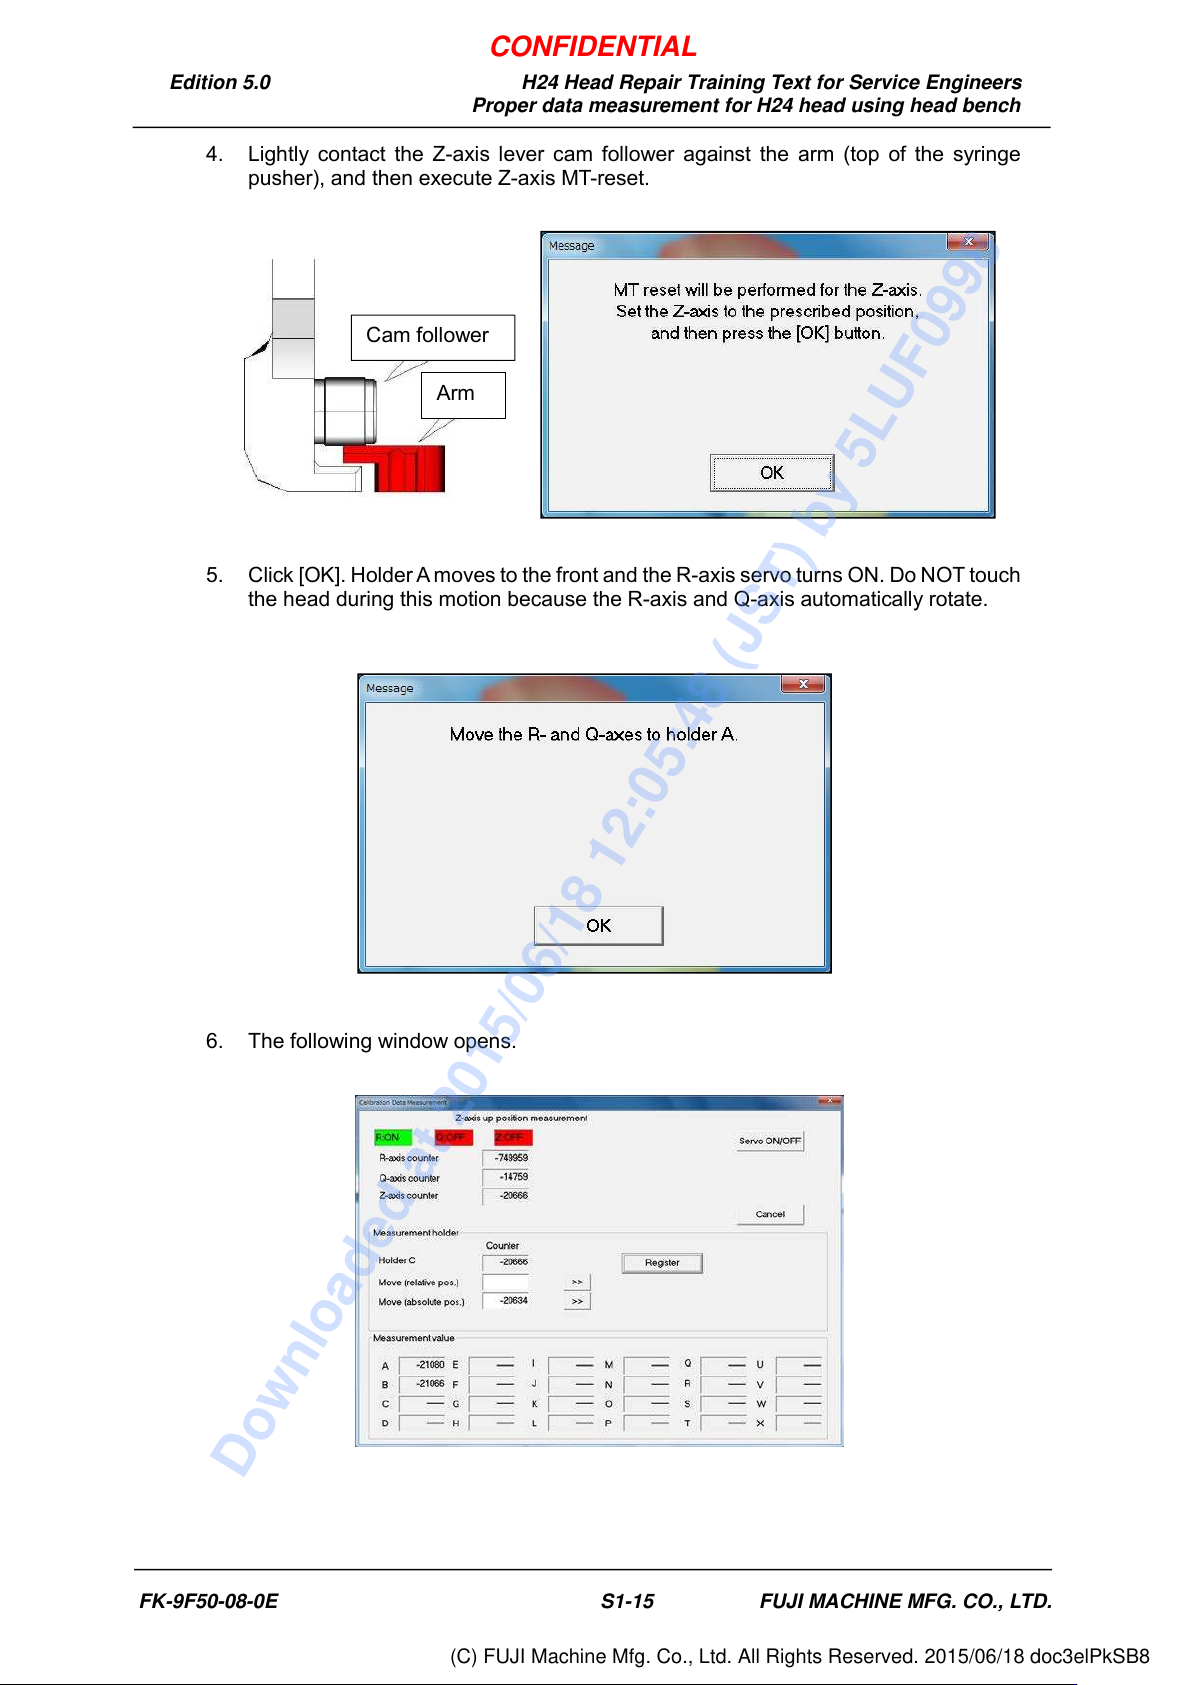
4. Lightly contact the Z-axis lever cam follower against the arm (top of the syringe
pusher), and then execute Z-axis MT-reset.
5. Click [OK]. Holder A moves to the front and the R-axis servo turns ON. Do NOT touch
the head during this motion because the R-axis and Q-axis automatically rotate.
6. The following window opens.
Cam follower
Arm
FK-9F50-08-0E S1-15 FUJI MACHINE MFG. CO., LTD.
CONFIDENTIAL
Downloaded at 2015/06/18 12:05:48 (JST) by 5LUF0998
(C) FUJI Machine Mfg. Co., Ltd. All Rights Reserved. 2015/06/18 doc3elPkSB8