1_H24维修手册.pdf - 第22页
E d i ti o n 5 .0 H 24 H ead R ep ai r T r ai n i n g T ext f o r S er vi ce E n g i n ee r s R e p l a c i n g th e s y r i n g e s 4. P u l l t he s pr i ng b ac k a nd s et t he s pr i ng r et a i n er j i g o n t he …
Edition 5.0 H24 Head Repair Training Text for Service Engineers
Replacing the syringes
1.2 Attaching the New Syringe
1. Apply a thin layer of Biral to the new syringe.
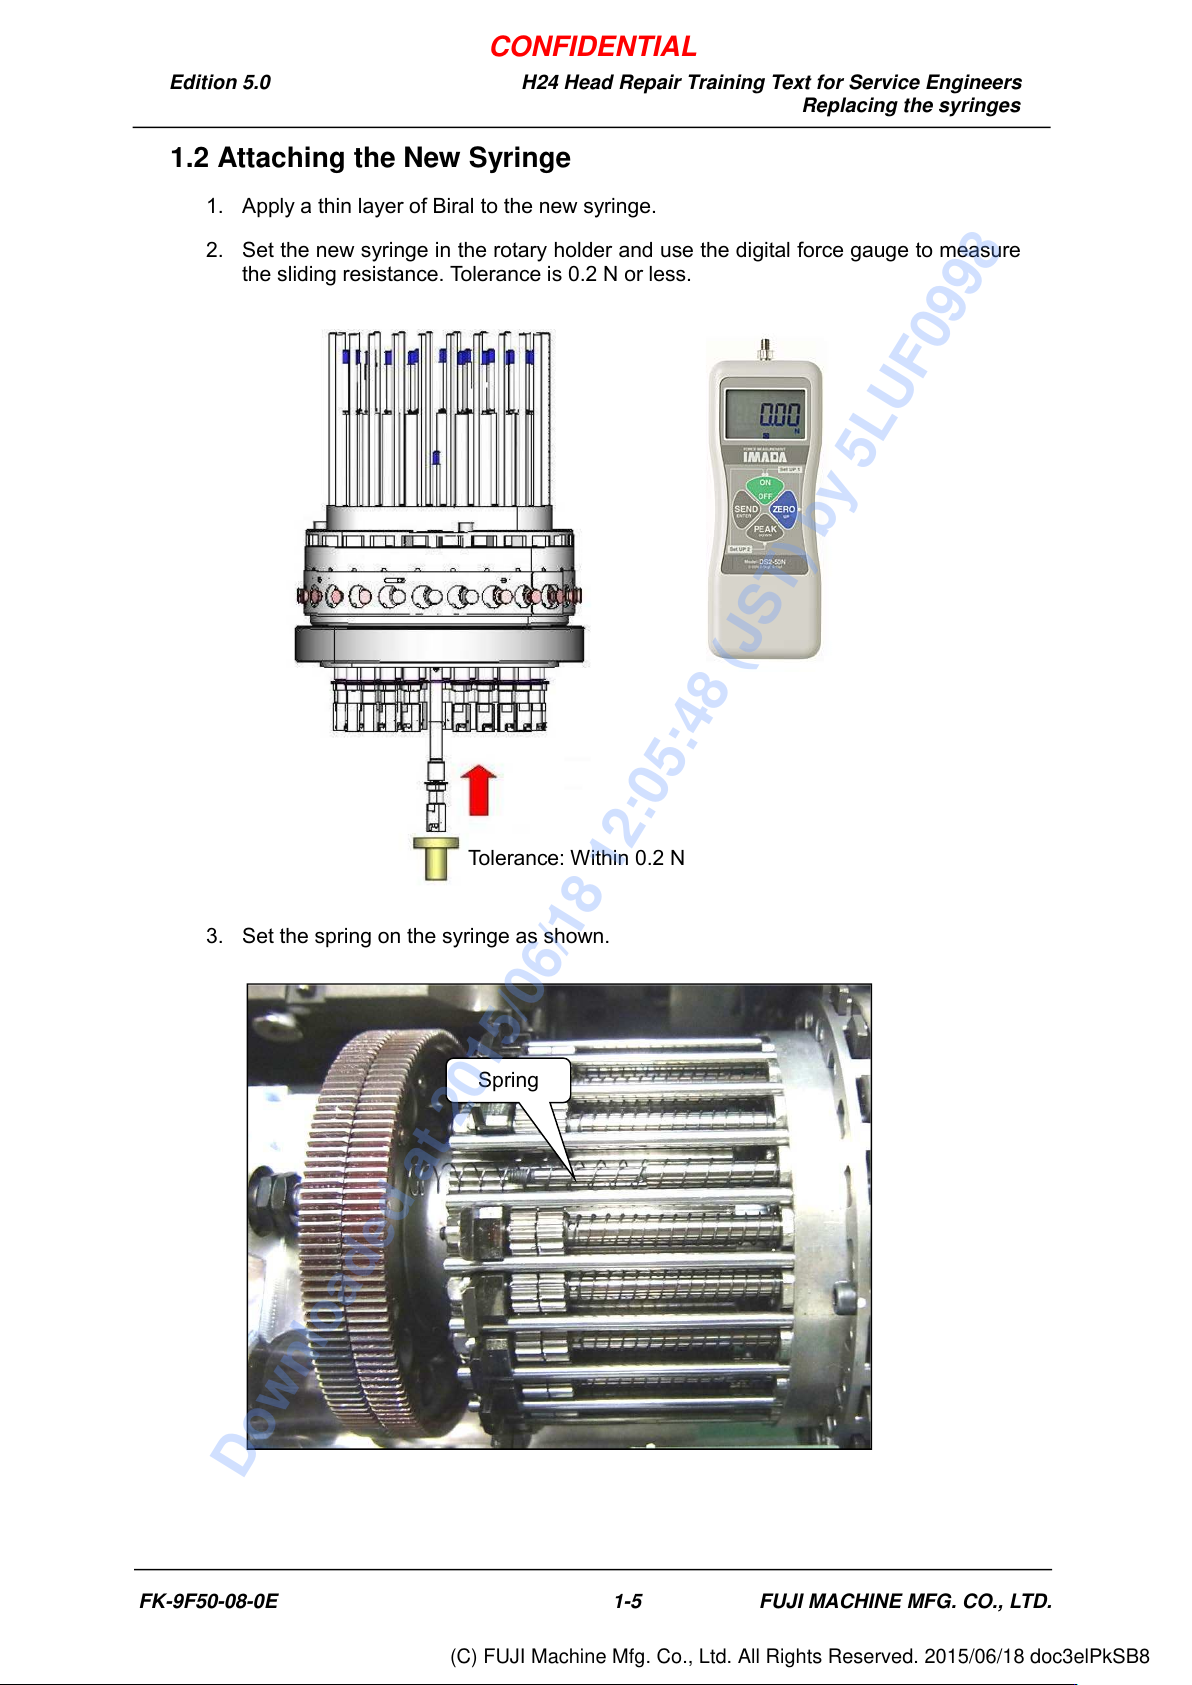
2. Set the new syringe in the rotary holder and use the digital force gauge to measure
the sliding resistance. Tolerance is 0.2 N or less.
3. Set the spring on the syringe as shown.
Tolerance: Within 0.2 N
Spring
FK-9F50-08-0E 1-5 FUJI MACHINE MFG. CO., LTD.
CONFIDENTIAL
Downloaded at 2015/06/18 12:05:48 (JST) by 5LUF0998
(C) FUJI Machine Mfg. Co., Ltd. All Rights Reserved. 2015/06/18 doc3elPkSB8
Edition 5.0 H24 Head Repair Training Text for Service Engineers
Replacing the syringes
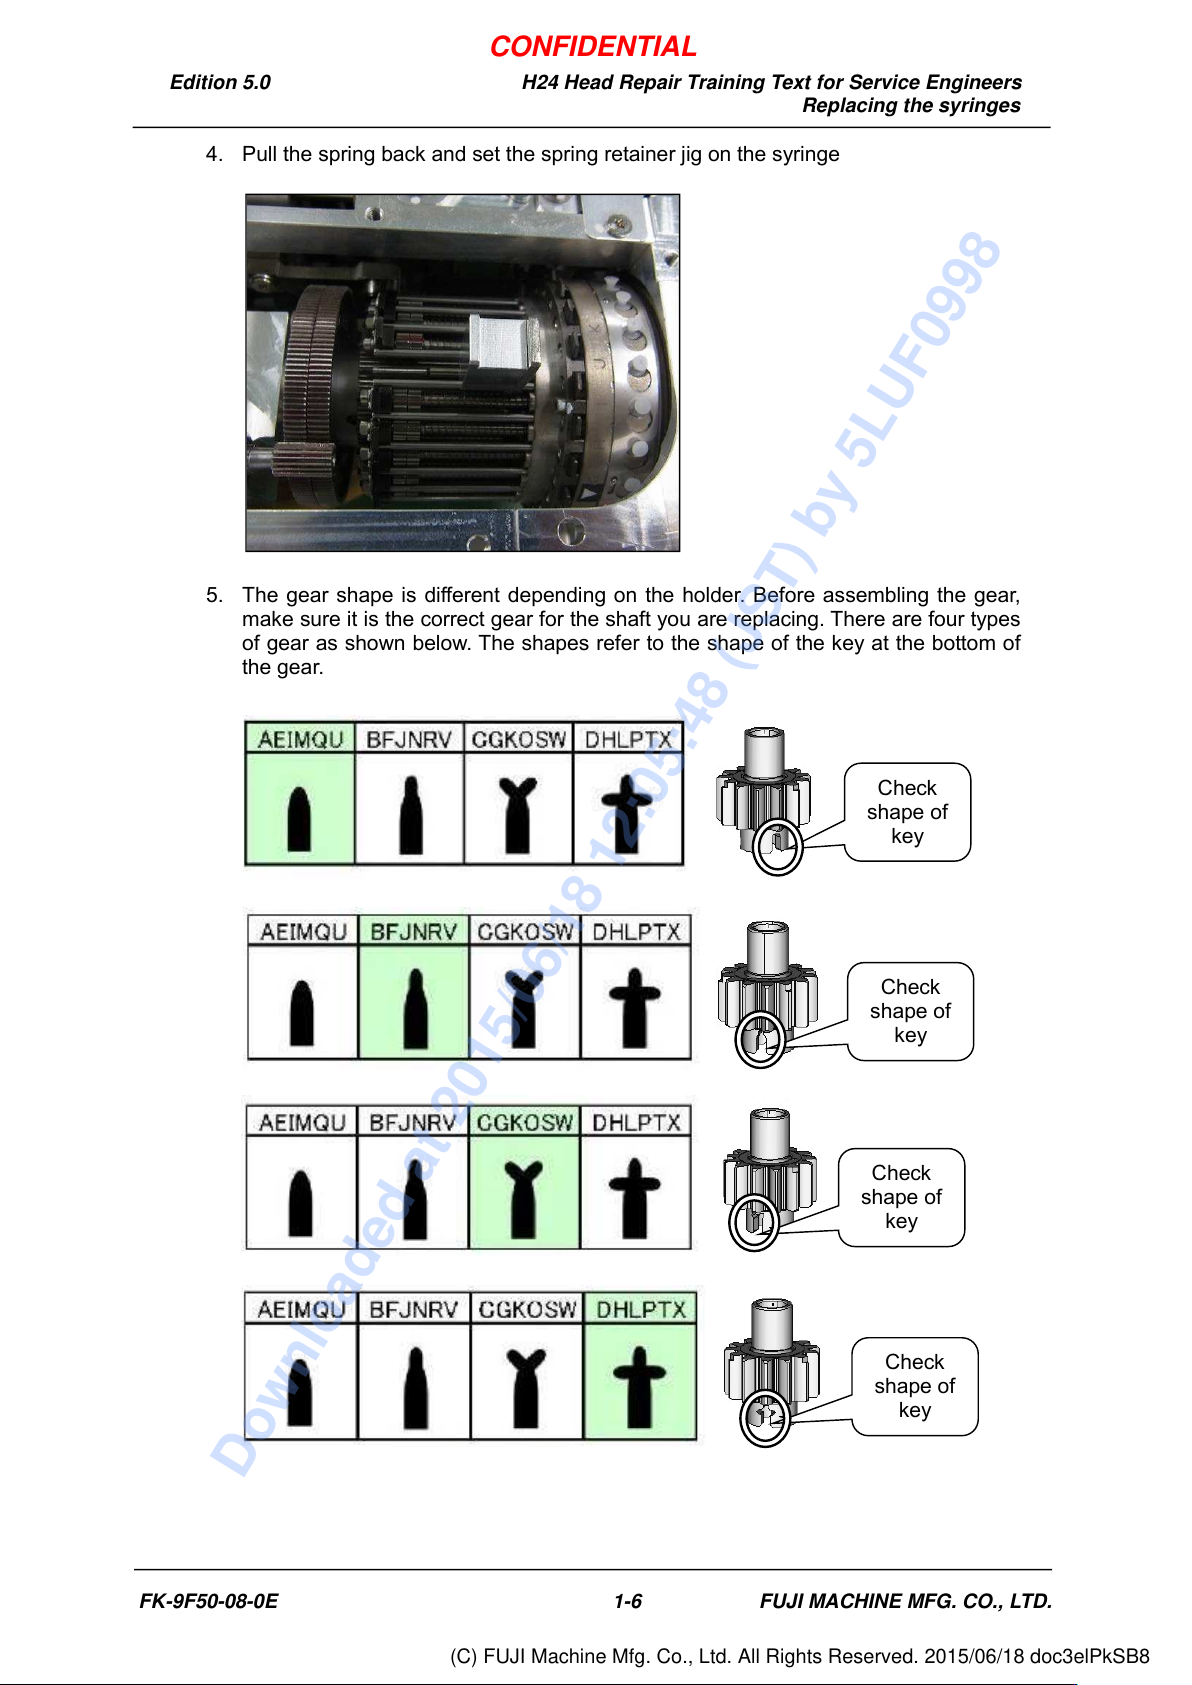
4. Pull the spring back and set the spring retainer jig on the syringe
5. The gear shape is different depending on the holder. Before assembling the gear,
make sure it is the correct gear for the shaft you are replacing. There are four types
of gear as shown below. The shapes refer to the shape of the key at the bottom of
the gear.
Check
shape of
key
Check
shape of
key
Check
shape of
key
Check
shape of
key
FK-9F50-08-0E 1-6 FUJI MACHINE MFG. CO., LTD.
CONFIDENTIAL
Downloaded at 2015/06/18 12:05:48 (JST) by 5LUF0998
(C) FUJI Machine Mfg. Co., Ltd. All Rights Reserved. 2015/06/18 doc3elPkSB8
Edition 5.0 H24 Head Repair Training Text for Service Engineers
Replacing the syringes
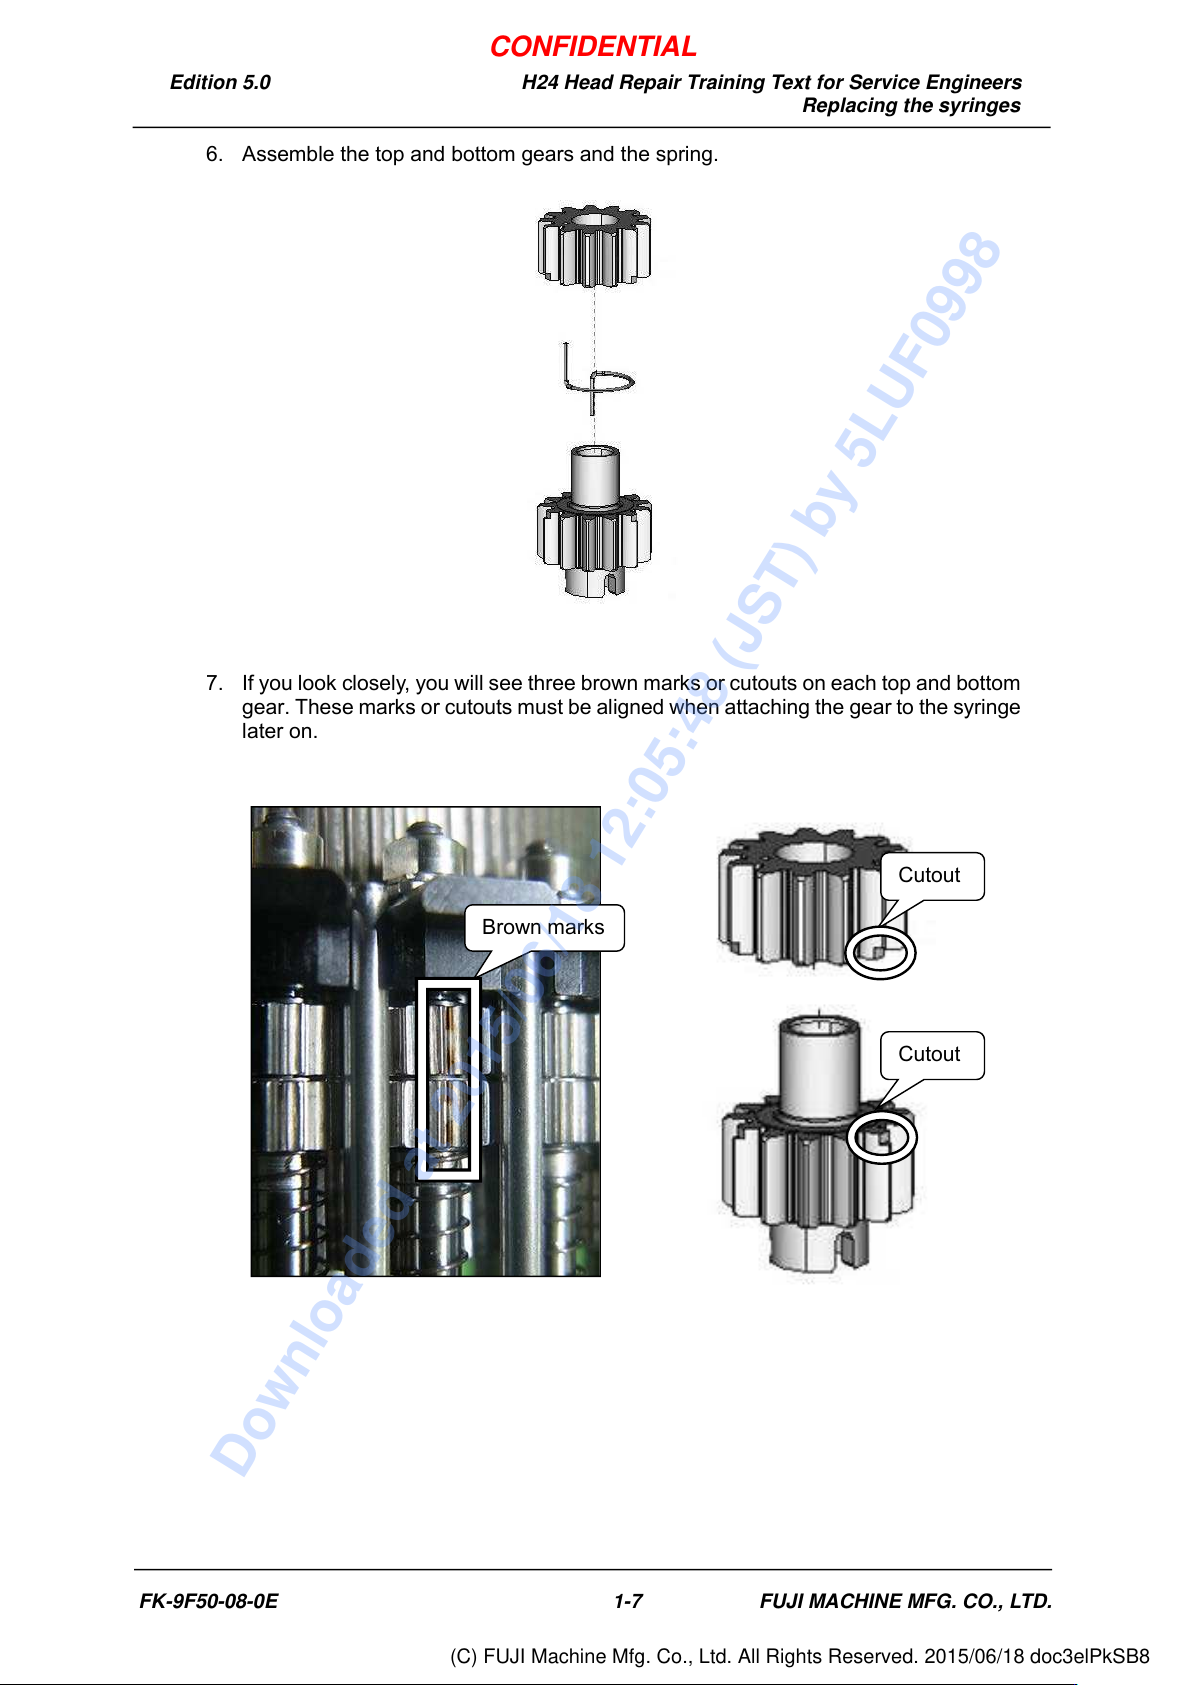
6. Assemble the top and bottom gears and the spring.
7. If you look closely, you will see three brown marks or cutouts on each top and bottom
gear. These marks or cutouts must be aligned when attaching the gear to the syringe
later on.
Cutout
Cutout
Brown marks
FK-9F50-08-0E 1-7 FUJI MACHINE MFG. CO., LTD.
CONFIDENTIAL
Downloaded at 2015/06/18 12:05:48 (JST) by 5LUF0998
(C) FUJI Machine Mfg. Co., Ltd. All Rights Reserved. 2015/06/18 doc3elPkSB8