1_H24维修手册.pdf - 第25页
E d i ti o n 5 .0 H 24 H ead R ep ai r T r ai n i n g T ext f o r S er vi ce E n g i n ee r s R e p l a c i n g th e s y r i n g e s 10. A f te r a tta c h i ng t he ge ar , c hec k t he c ut out on t he bot t om o f t h…
Edition 5.0 H24 Head Repair Training Text for Service Engineers
Replacing the syringes
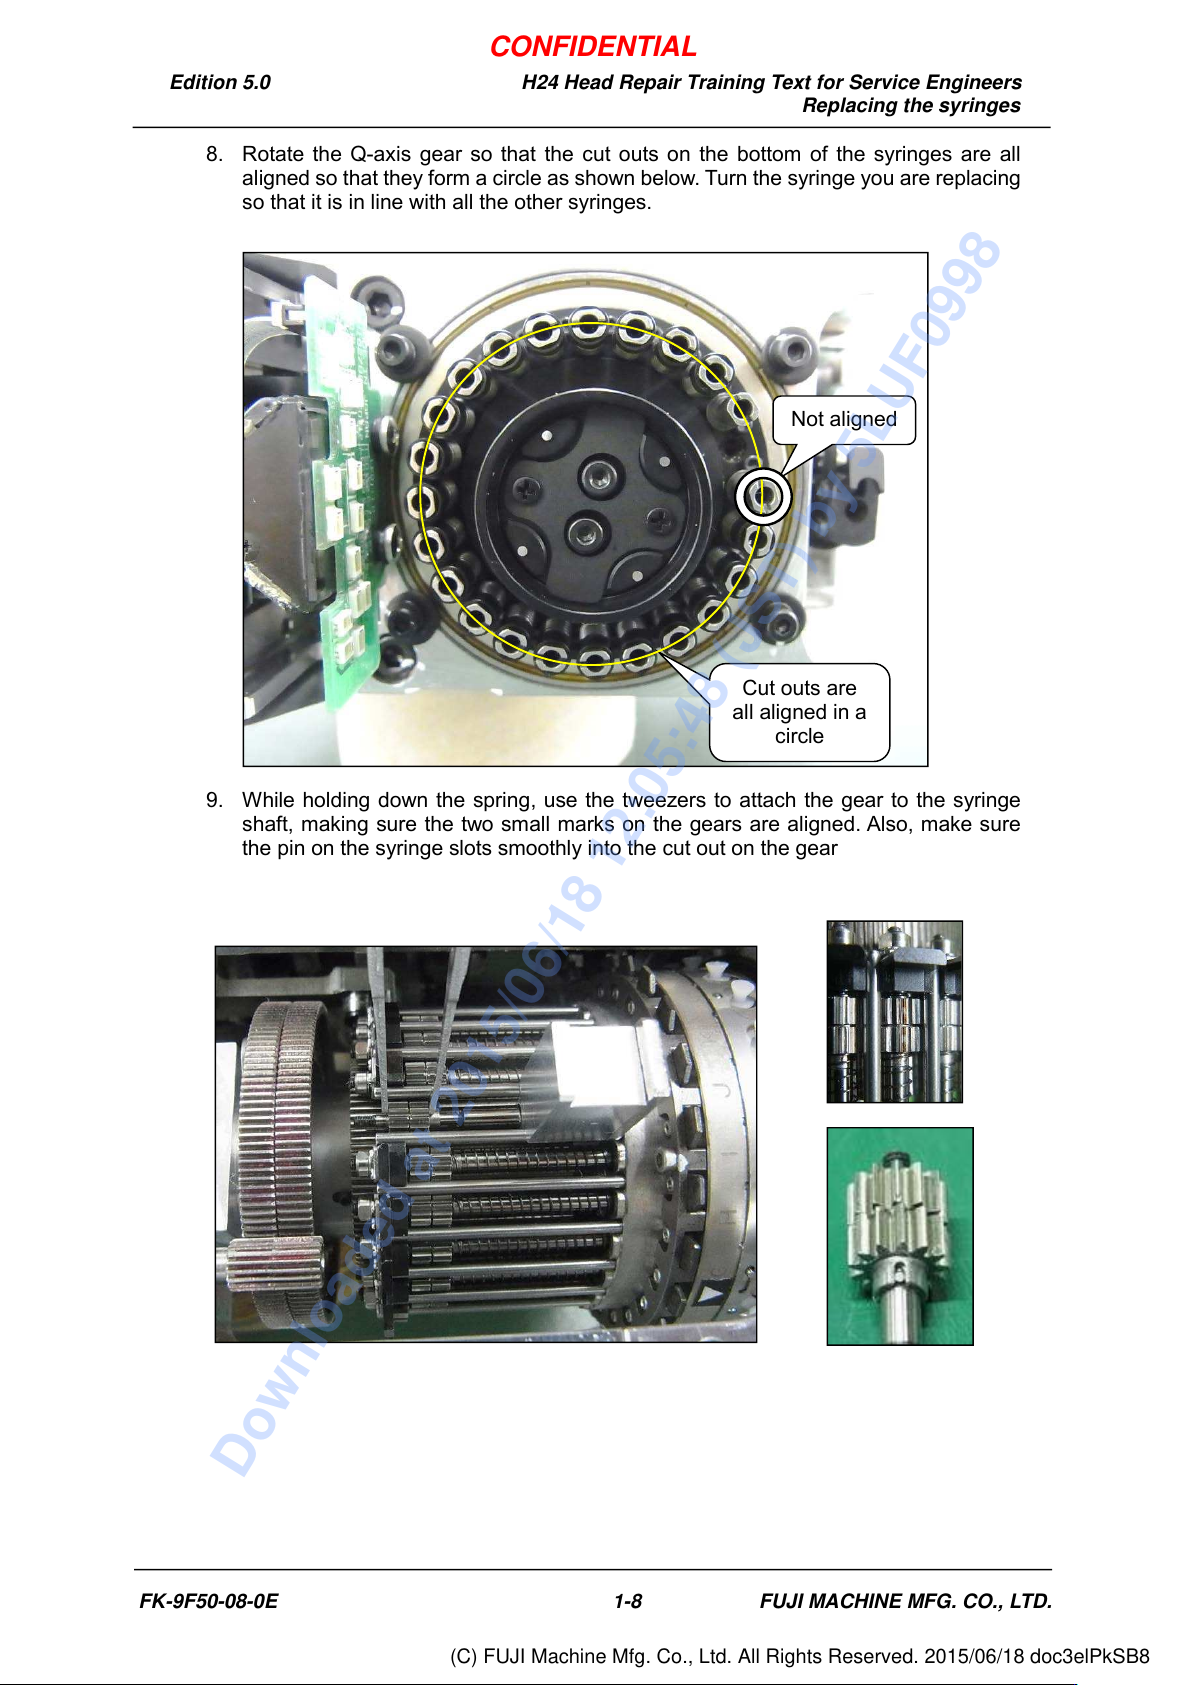
8. Rotate the Q-axis gear so that the cut outs on the bottom of the syringes are all
aligned so that they form a circle as shown below. Turn the syringe you are replacing
so that it is in line with all the other syringes.
9. While holding down the spring, use the tweezers to attach the gear to the syringe
shaft, making sure the two small marks on the gears are aligned. Also, make sure
the pin on the syringe slots smoothly into the cut out on the gear
Cut outs are
all aligned in a
circle
Not aligned
FK-9F50-08-0E 1-8 FUJI MACHINE MFG. CO., LTD.
CONFIDENTIAL
Downloaded at 2015/06/18 12:05:48 (JST) by 5LUF0998
(C) FUJI Machine Mfg. Co., Ltd. All Rights Reserved. 2015/06/18 doc3elPkSB8
Edition 5.0 H24 Head Repair Training Text for Service Engineers
Replacing the syringes
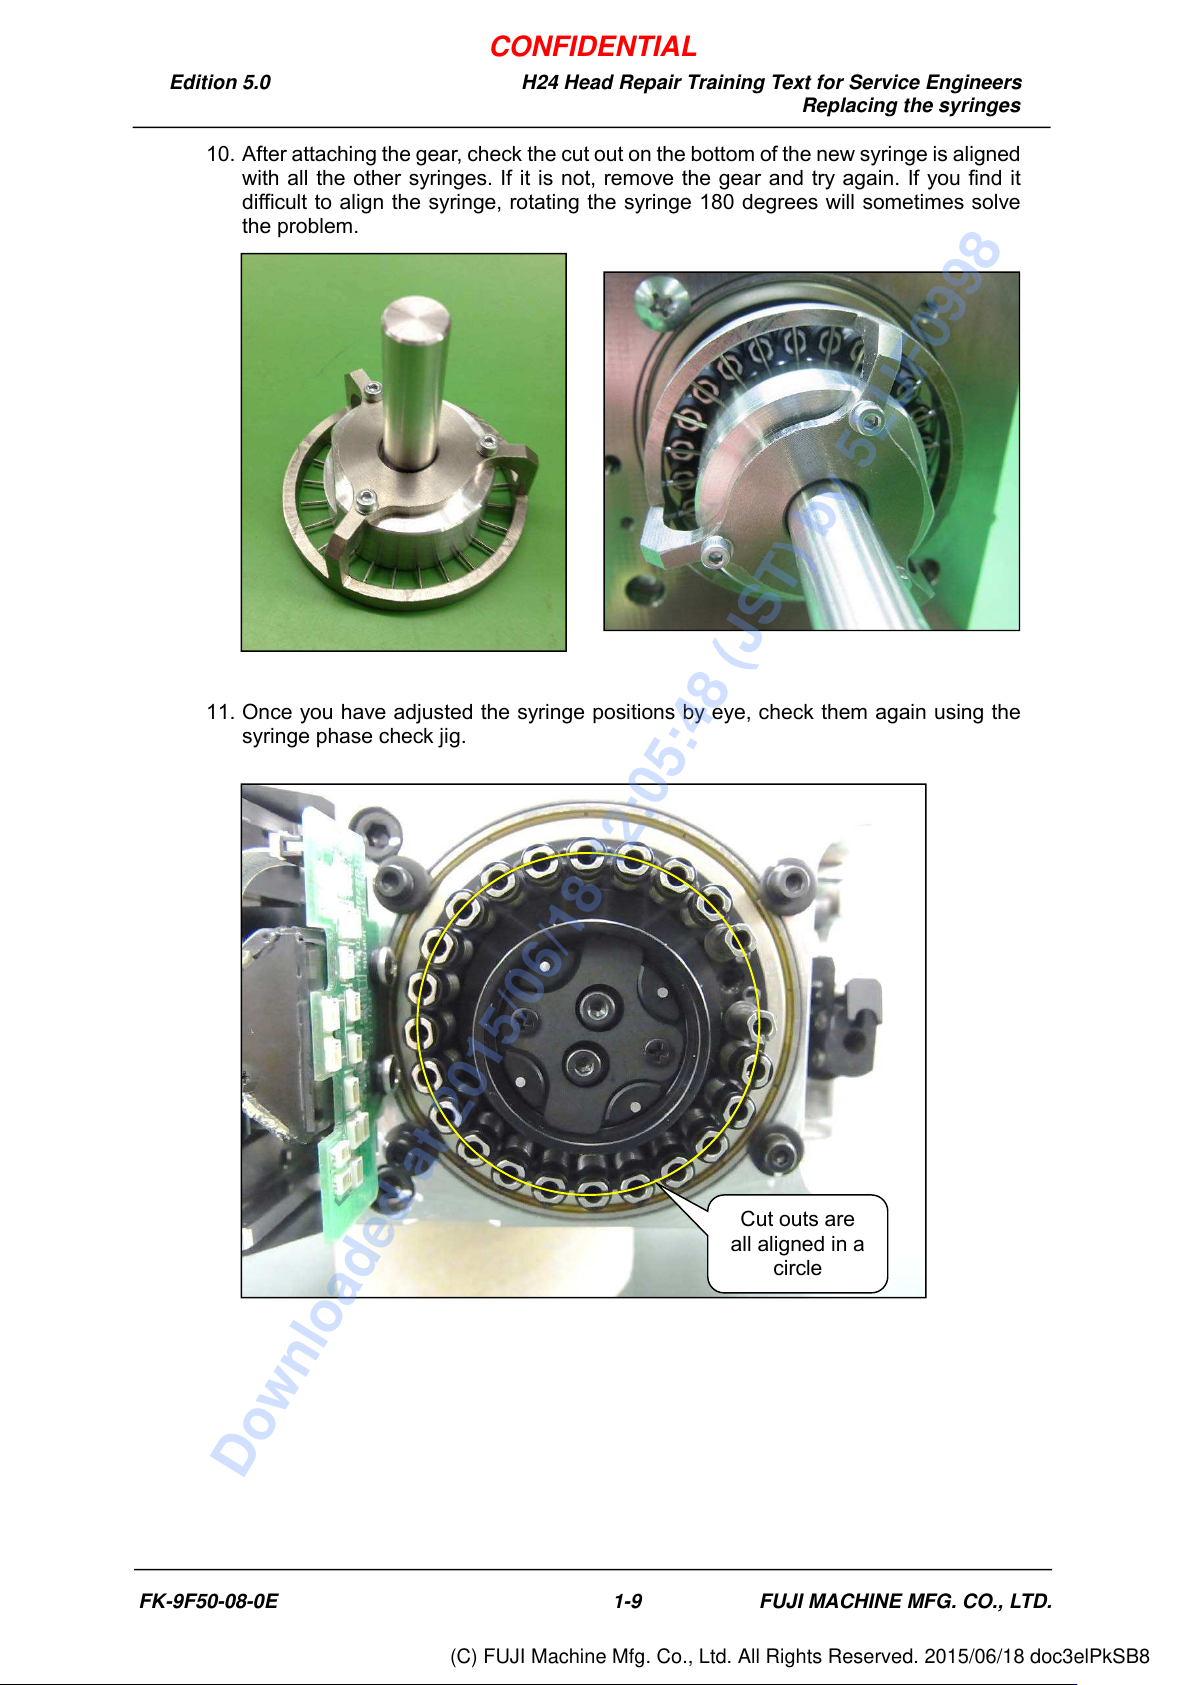
10. After attaching the gear, check the cut out on the bottom of the new syringe is aligned
with all the other syringes. If it is not, remove the gear and try again. If you find it
difficult to align the syringe, rotating the syringe 180 degrees will sometimes solve
the problem.
11. Once you have adjusted the syringe positions by eye, check them again using the
syringe phase check jig.
Cut outs are
all aligned in a
circle
FK-9F50-08-0E 1-9 FUJI MACHINE MFG. CO., LTD.
CONFIDENTIAL
Downloaded at 2015/06/18 12:05:48 (JST) by 5LUF0998
(C) FUJI Machine Mfg. Co., Ltd. All Rights Reserved. 2015/06/18 doc3elPkSB8
Edition 5.0 H24 Head Repair Training Text for Service Engineers
Replacing the syringes
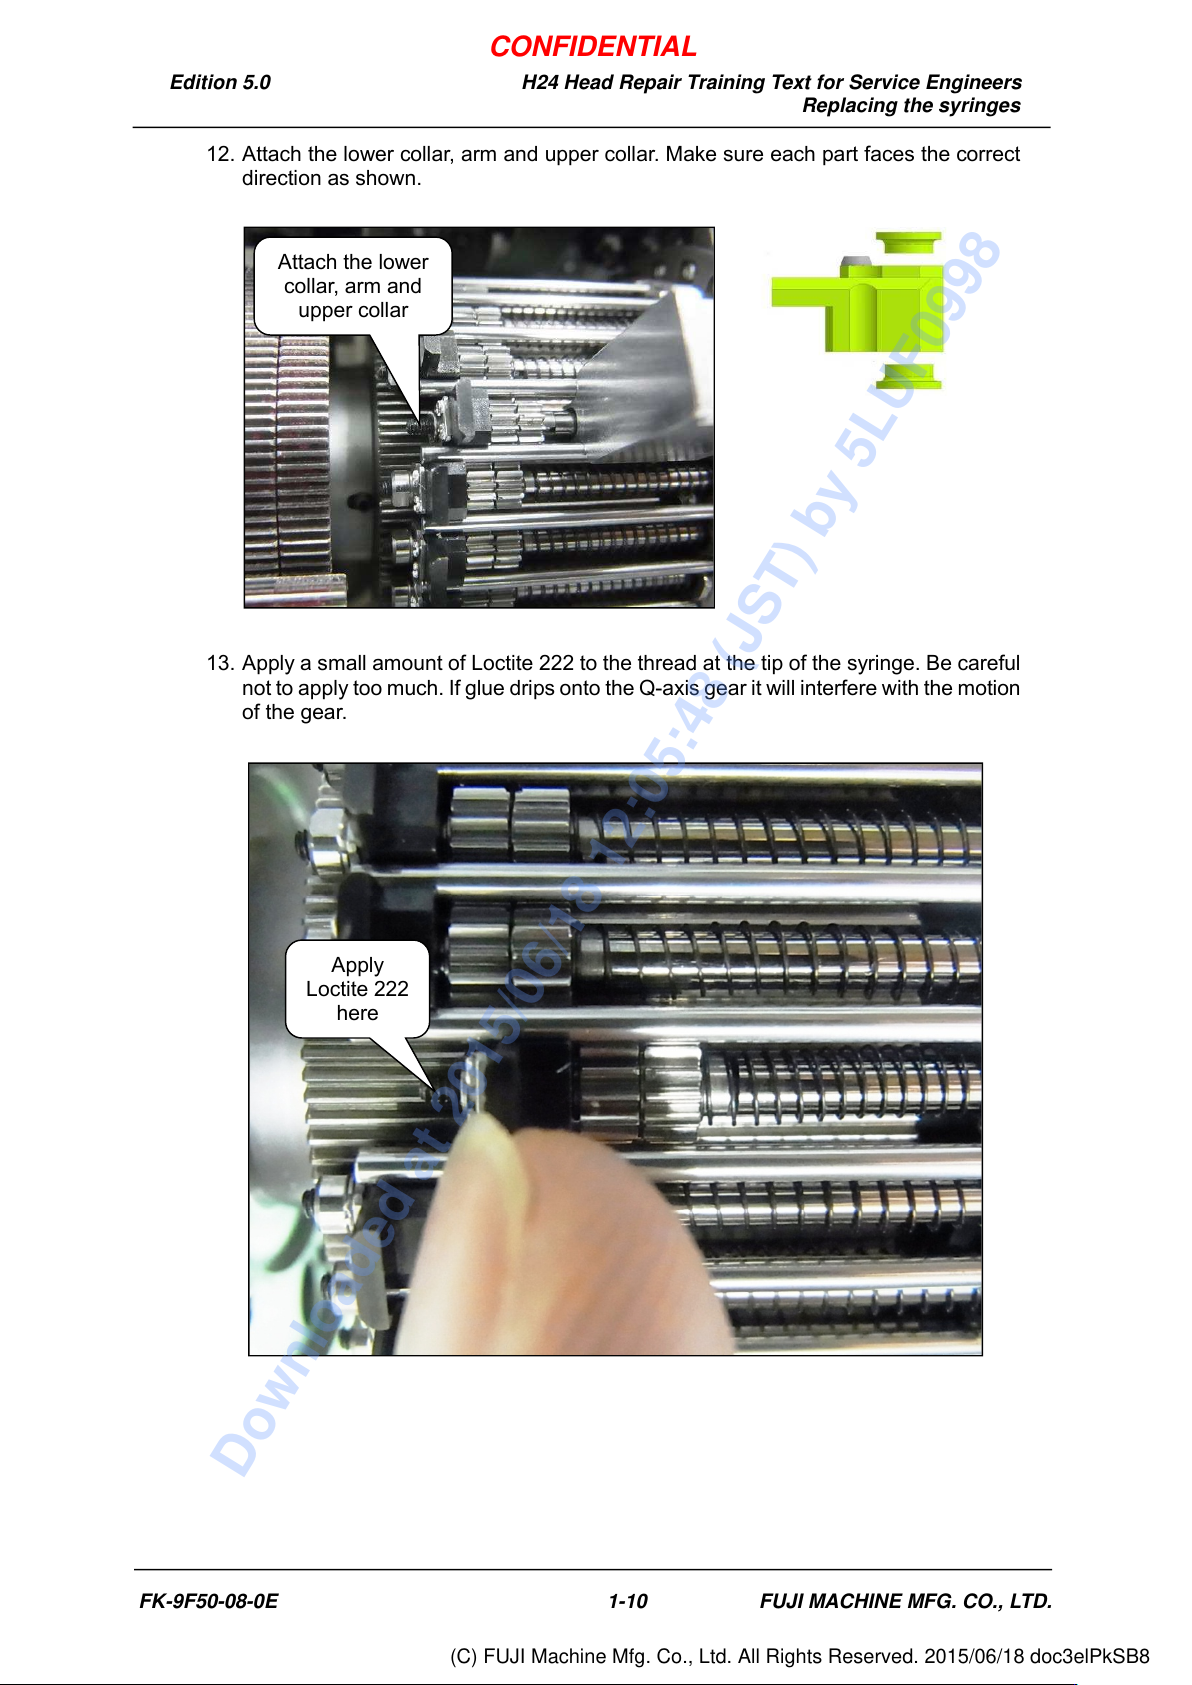
12. Attach the lower collar, arm and upper collar. Make sure each part faces the correct
direction as shown.
13. Apply a small amount of Loctite 222 to the thread at the tip of the syringe. Be careful
not to apply too much. If glue drips onto the Q-axis gear it will interfere with the motion
of the gear.
Apply
Loctite 222
here
Attach the lower
collar, arm and
upper collar
FK-9F50-08-0E 1-10 FUJI MACHINE MFG. CO., LTD.
CONFIDENTIAL
Downloaded at 2015/06/18 12:05:48 (JST) by 5LUF0998
(C) FUJI Machine Mfg. Co., Ltd. All Rights Reserved. 2015/06/18 doc3elPkSB8