00197394-03_AI_Smart-Pin-Support_X-S_DE_EN.pdf - 第116页
3 Installation 3.8 Final work 116 Assembly Instructions / Montageanleitung SIPLACE X-Series S Smart Pin Support 05/2019 3.8 Final work ► Refit the waste container. ► Insert the pins into the SPS magazines. ► Move the com…
3 Installation
3.6 Converting the nozzle station and the reject bin (SIPLACE X3 S, X4 S only)
Assembly Instructions / Montageanleitung SIPLACE X-Series S Smart Pin Support 05/2019 115
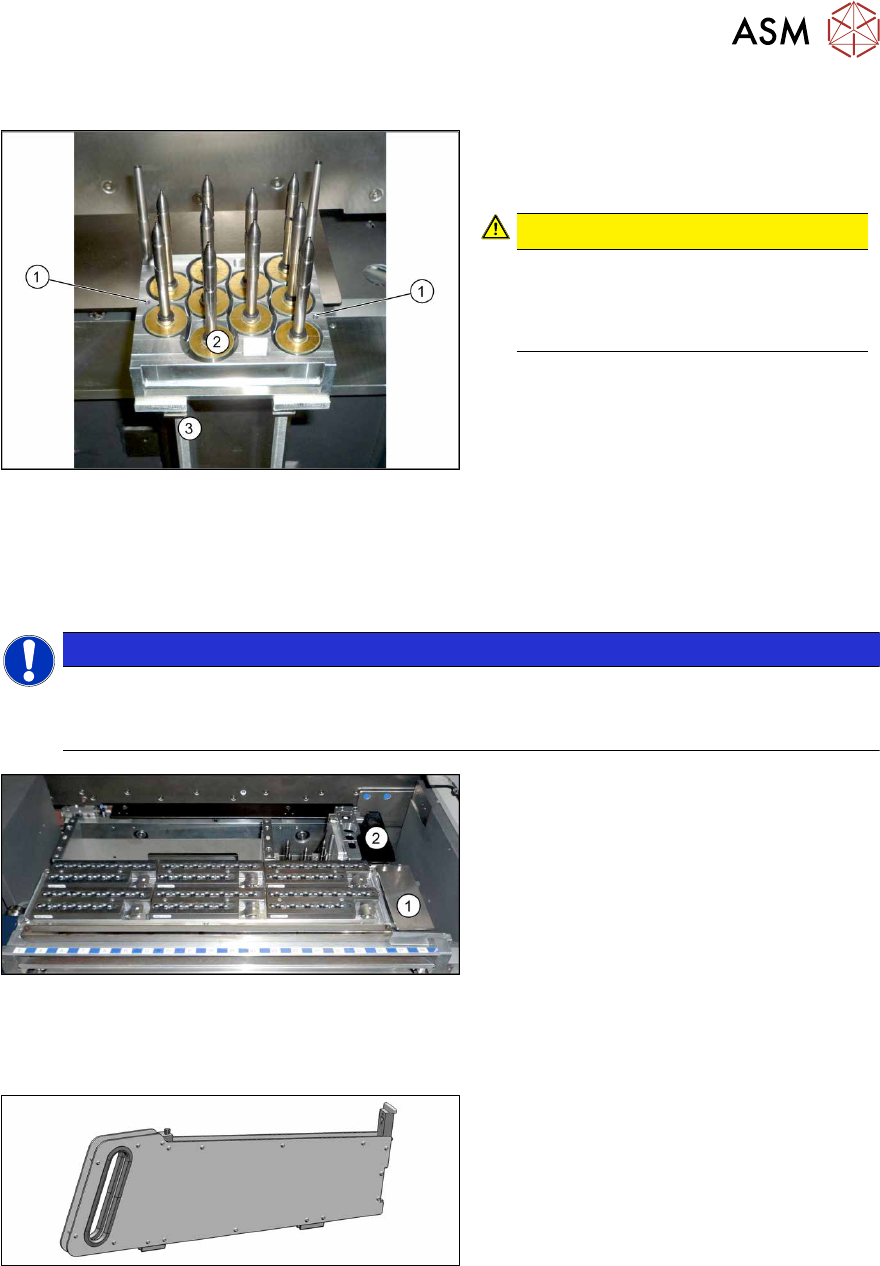
3.5.4 Assembling the Q10 magazine
Fig.47: Q10 magazine
► Position the magazine on the holder (3)
and screw into place with the fastening
screws(1).
CAUTION!
Observe the installation position.
The calibration garage (2) must be on
the side turned away from the con-
veyor.
.
3.6 Converting the nozzle station and the reject bin (SIPLACE
X3 S, X4 S only)
NOTICE
Assembly instructions
► For details, also read the assembly instructions for "NC row 2 / NC before MTC2 –
SIPLACE X‑SeriesS" [DE+EN:00197369‑xx].
Fig.48: Nozzle station and reject bin
► If present, the nozzle station and the
corresponding reject bin must be
moved from(1), further inwards to(2).
► Fit a cover plate at the previous
place(1).
► Repeat these steps, as required, for all
locations.
3.7 Inserting the dummy feeder
Fig.49: Dummy feeder
► SIPLACE X4S, X4iS: At locations 1
and3, fit the "COT-X filler piece with
fiducial 2slots" [00519876‑xx] to
track39.
This occupies tracks 38 and39.
► SIPLACE X3S: At locations 1, fit the
"COT-X filler piece with fiducial
2slots" [00519876‑xx] to track39.
This occupies tracks 38 and39.
3 Installation
3.8 Final work
116 Assembly Instructions / Montageanleitung SIPLACE X-Series S Smart Pin Support 05/2019
3.8 Final work
► Refit the waste container.
► Insert the pins into the SPS magazines.
► Move the component trolley into the machine.
► Switch the machine on.
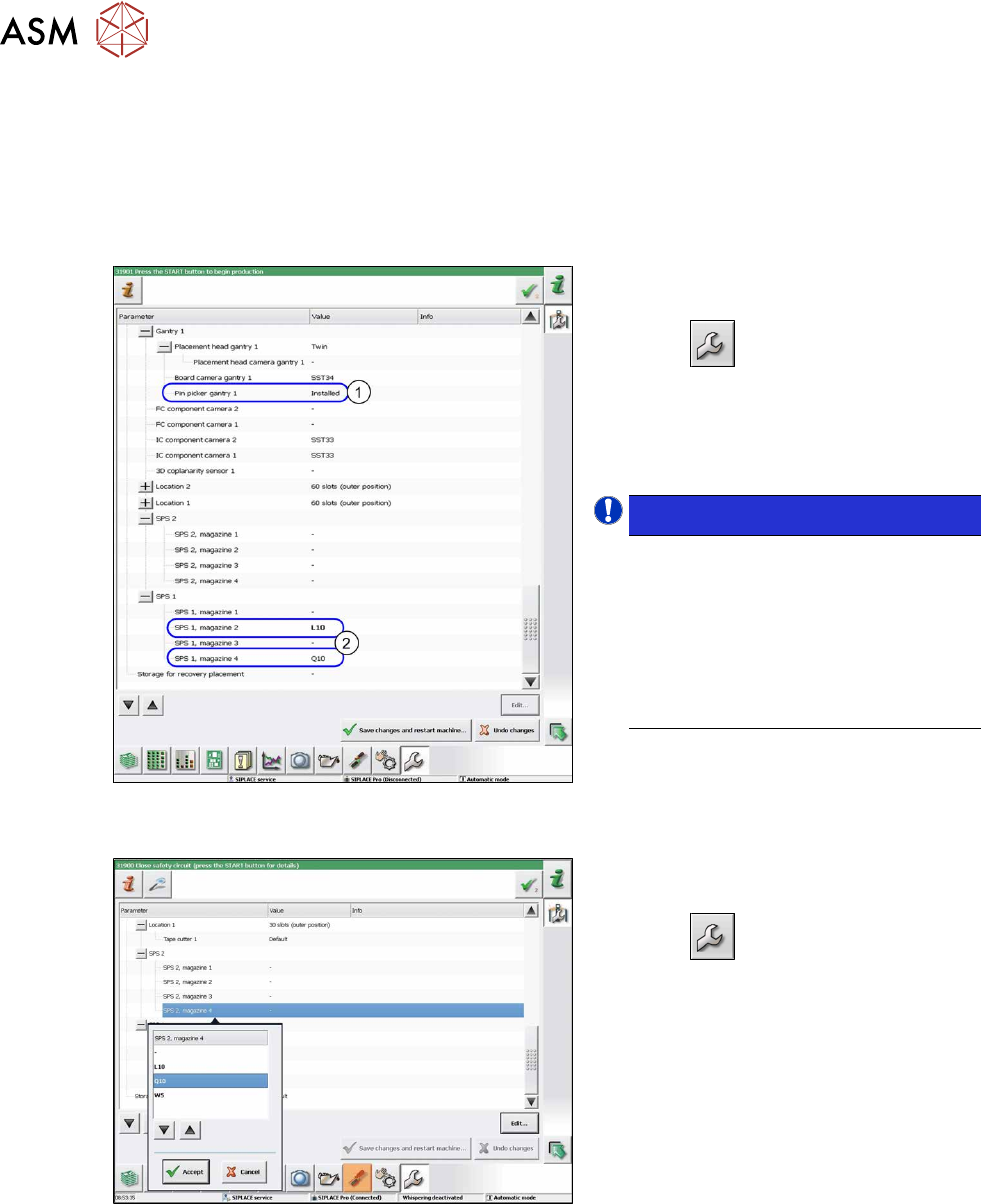
Fig.50: Configuration of Smart Pin Support (using example
of SX2)
For automatic configuration with connected
"fiducial recognition board":
► Select
.
► Select Machine Configuration.
► Check whether the pin picker(1) and
the magazines (2) appear in the station
software.
NOTICE!
If the pin picker or the magazine are
not recognized in the software, check
all connections and the DIP switch set-
tings.
If you have installed a Q10 magazine
together with an MTC at location 2,
you will need to configure this manu-
ally in the software. (see below)
.
Fig.51: Configuration of Smart Pin Support
For manual configuration without "fiducial re-
cognition board":
► Select
.
► Select Machine Configuration.
Perform the following steps in sequence for
all SPS magazines:
► Select the magazine.
► Click on Edit....
► Enter the magazine type and select Ac-
cept.
Calibration
► Calibrate the Smart Pin Support. For more information, read section 5.3.1 "Performing Cali-
bration" [}121].
The installation is now complete.
4 Maintenance
4.1 Maintenance Tasks Smart Pin Support - Minor
Assembly Instructions / Montageanleitung SIPLACE X-Series S Smart Pin Support 05/2019 117
4 Maintenance
CAUTION
Observe the maintenance instructions!
The following chapters are only excerpts from the maintenance manual.
► Refer to the maintenance manual for your machine if you need complete information
about maintenance for the Smart Pin Support.
The following cleaning tasks must be performed to maintain the Smart Pin Support:
●
Vacuuming the magazines
●
Cleaning the interface on the pin picker
●
Cleaning the pins
4.1 Maintenance Tasks Smart Pin Support - Minor
4.1.1 Maintenance Intervals
Maintenance tasks
Smart Pin Support
Duration
[min]
Each
week
Every 3
months
Every 6
months
Every
12
months
Vacuuming the magazines 1 X
4.1.2 Tools, Consumables, Spare and Wear Parts
●
Vacuum cleaner
4.1.3 Preparatory Steps
► Move all component trolleys out of the machine.
See also
2 1.2 "Preparatory work..." [}75]
4.1.4 Performing Maintenance Tasks
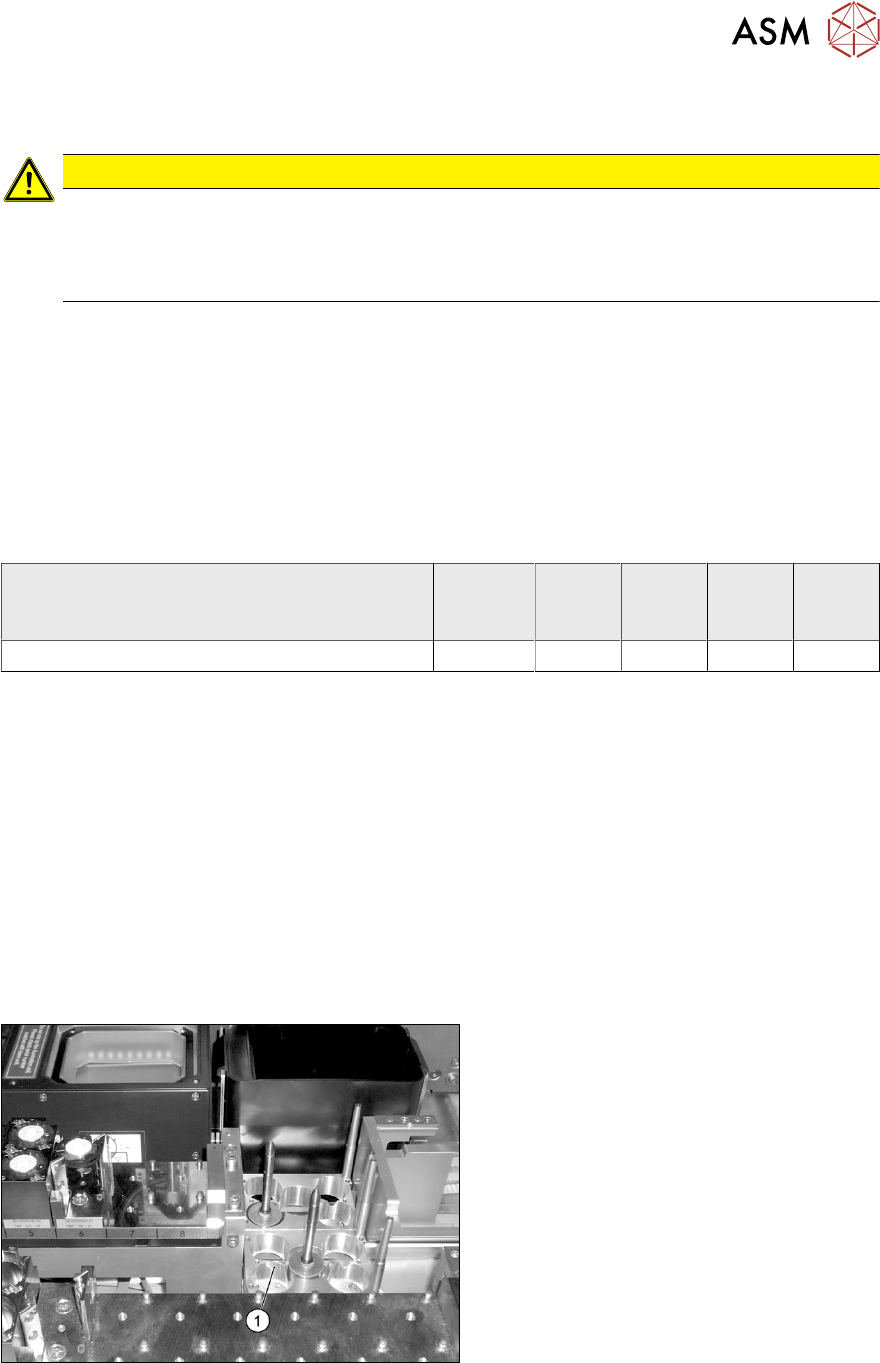
4.1.4.1 Vacuuming the Magazines
Fig.52: Vacuuming the magazines
► Vacuum all pin magazines (1).