c900795.R02_EN.pdf - 第57页
3 Mechanical Section 3-19 ■ Installing the DP head on the nozzle holder ■ Dispense setting Manual > Dispense * When installing the DP head, be sure to specify the settin gs for the installed DP head an d syringe. * If…
3 Mechanical Section
3-18
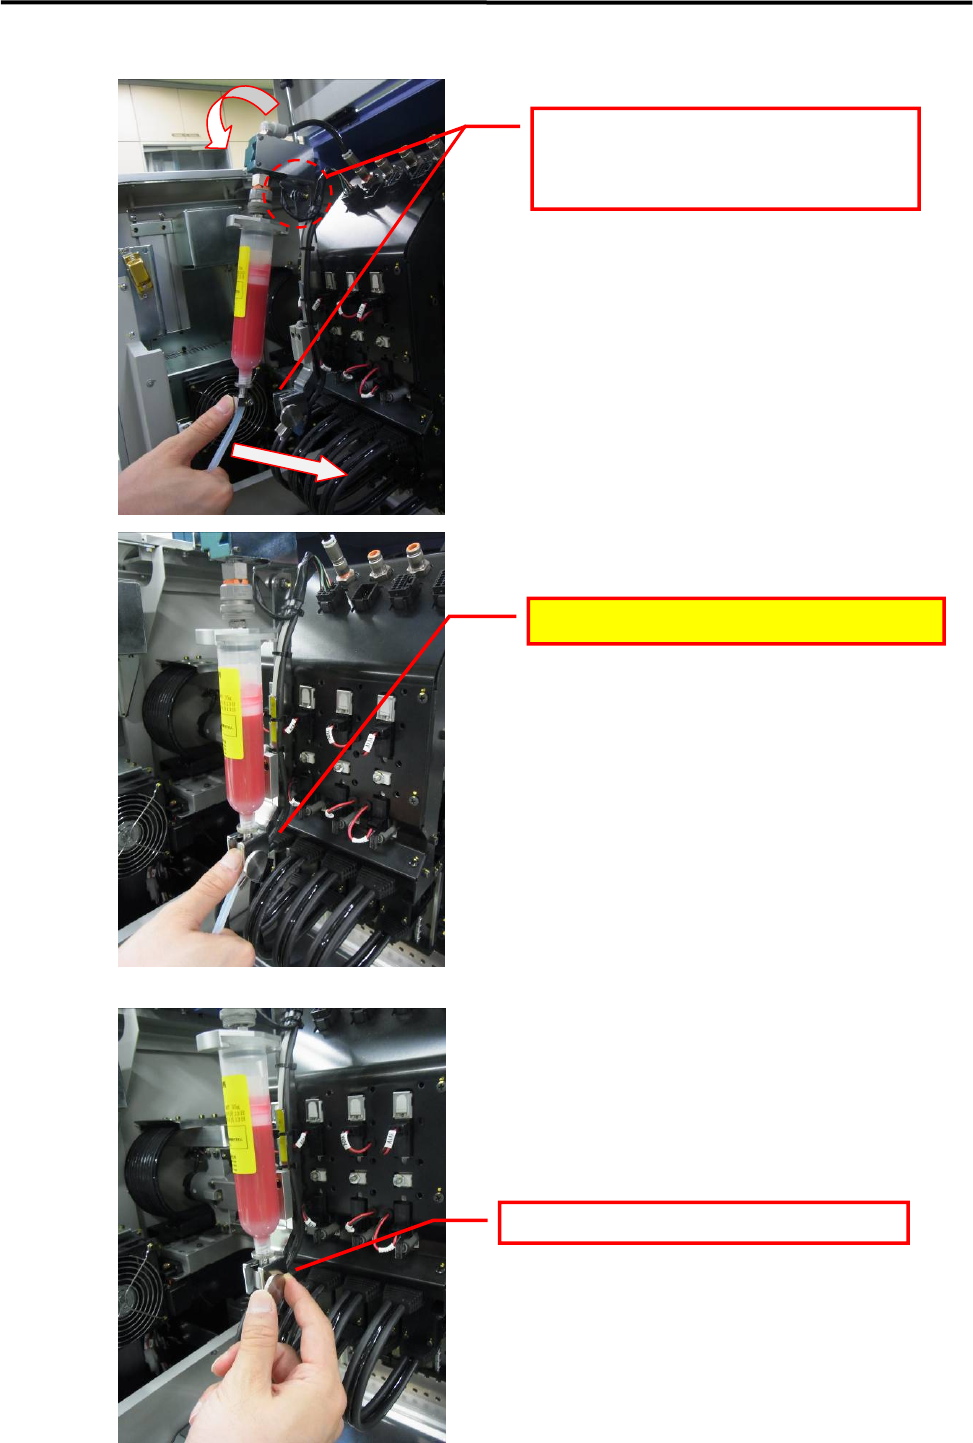
■ Securing the syringe
While pulling the valve's moving part
forward, press the syringe joint into the
adapter base.
Press in until a latching sound (click) is heard.
Tighten the finger screw to secure the syringe.
3 Mechanical Section
3-19
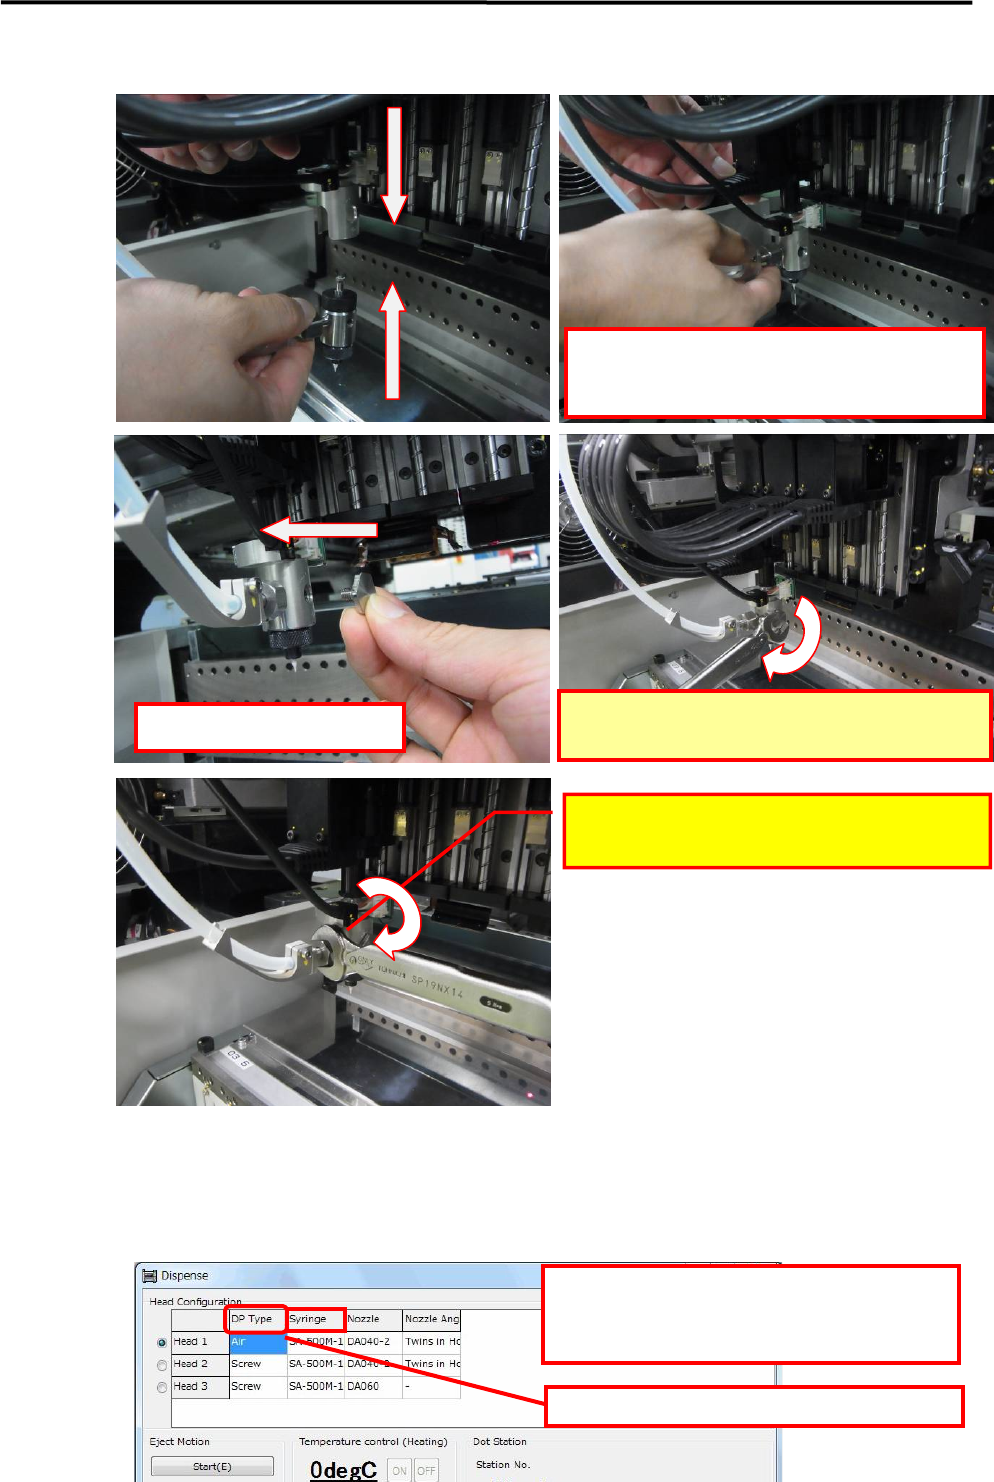
■ Installing the DP head on the nozzle holder
■ Dispense setting
Manual > Dispense
* When installing the DP head, be sure to specify the settings for the installed DP head and syringe.
* If unable to press it all the way to the rear,
slightly shift the screw pump shaft and
hexagon phase.
Install the screw's lock screw.
Use the accessory torque wrench to tighten.
LE6-M5W22-100 /WRENCH,14-5NM
Use the accessory torque wrench to tighten.
LE6-M5W22-100 /WRENCH,14-5NM
Right-click here to select the dispense head type.
Right-click here to select the syringe type.
* If the desired type is not in the library, create a
syringe library.
3 Mechanical Section
3-20
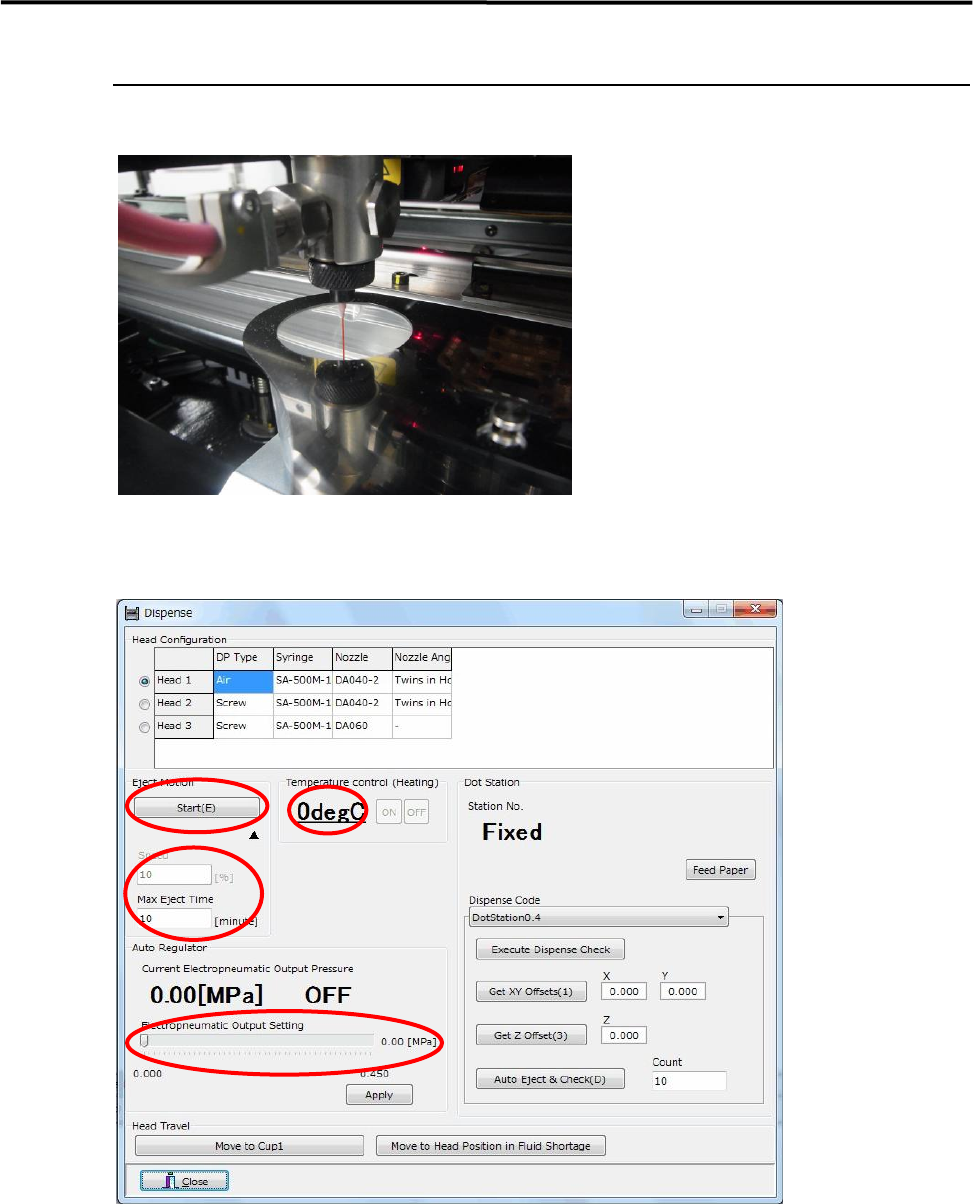
Filling the screw pump
Fill the screw pump with material to make it operational.
■ Procedure
Open the "Manual" screen (Manual > Dispense)
① Check the temperature control setting
If the material requires heating, press the ON button to heat it. (Refer to the syringe library for
temperature settings.)
② Electropneumatic output setting
Specify the setting at the setting bar, then press the [Apply] button. (Refer to the syringe library for
pressure settings.)
③ Checking the eject operation settings
Speed: 10%; Max. Eject Time: 10 minutes
①
②
③
④