4OM-1431-006_w.pdf - 第89页
1-31-1 When the tape guide is detached or attached, be sure to keep the Y -axis linear scale free of nicks and scratches. Notice T ape Guide Attachment Position of Cut Unit Fixing Jig Fluorine Sheet, Urethane Clamp Every…
1-31
WARNING
Pay close attention to the cutter blade during the maintenance work.
•
Lack of attention will result in a hand injury, etc.
Wear gloves and take the greatest care in performing the work.
•
Besuretoattachthexingjigto
thecutunitduringthe
maintenance work for safety purposes.
When the tape guide is
detached or attached,
be sure to keep the Y-axis
linear scale free of nicks
and scratches.
Notice
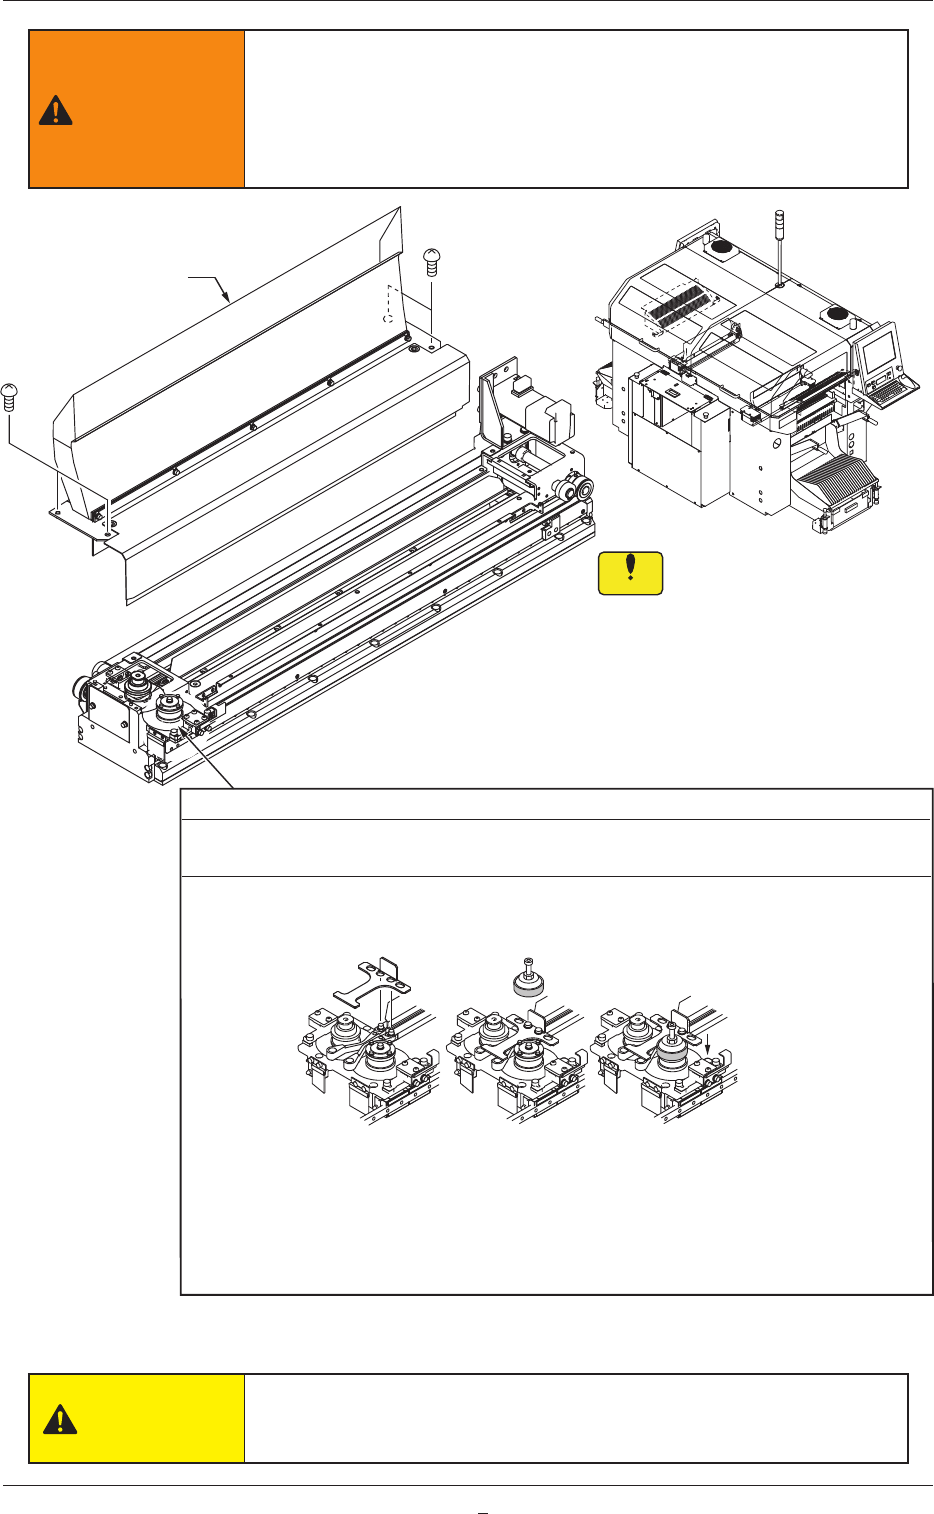
Tape Guide
Attachment Position of
Cut Unit Fixing Jig
Flat Ring
Every 3 Months Replacement
Required Time: 10 minutes
(1) Remove four screws and detach the tape guide.
(2) Use the inner holes of the cut unit fixing jig with the tape clamp being closed and
attach the jig with the bent portion being directed upward.
(3) Cut the used flat ring with a cutter on market and detach it.
(4) Attach a new flat ring to the flat ring replacement jig.
(5) Put the flat ring replacement jig on the roller on the oscillating side (outside of the
machine) and push down the flat ring until it is inserted into the groove of the roller.
Replacement Jig
Attached
Fig. 4A19-3
CAUTION
Whentheatringiscut,takecarenottogetinjuredbythe
commercially available cutter.
3.3 Inspection, Cleaning, and Lubrication Spots
0802-002
1-31-1
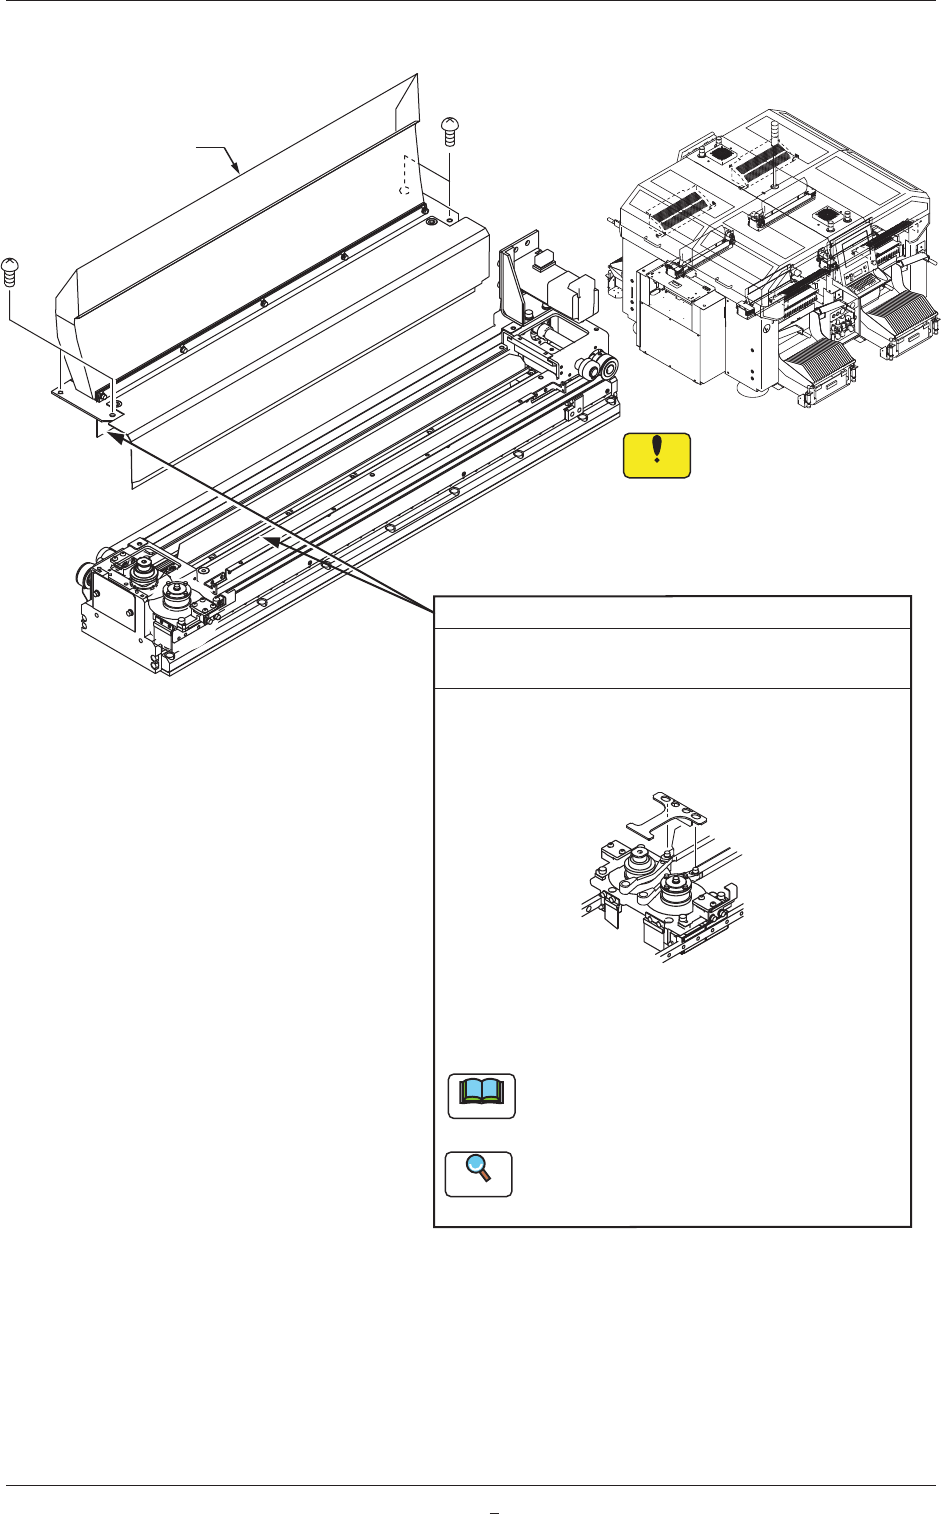
When the tape guide is
detached or attached,
be sure to keep the Y-axis
linear scale free of nicks
and scratches.
Notice
Tape Guide
Attachment Position of
Cut Unit Fixing Jig
Fluorine Sheet, Urethane Clamp
Every Year Replacement Required Time: 5 minutes
(1) Remove four screws and detach the tape guide.
(2) Use the outer hole of the cut unit fixing jig and
attach the jig with the bent portion being directed
downward.
(3) Replace the fluorine sheet and the urethane clamp.
Refer to "4.3 Replacement of Fluorine Sheet
and Urethane Clamp" for the replacement
procedure.
Note
After the fluorine sheet has been replaced,
activate the cutter without a tape and cut the
fluorine sheet.
Reference
Fig. 4A19-4
3.3 Inspection, Cleaning, and Lubrication Spots
0802-001
1-32
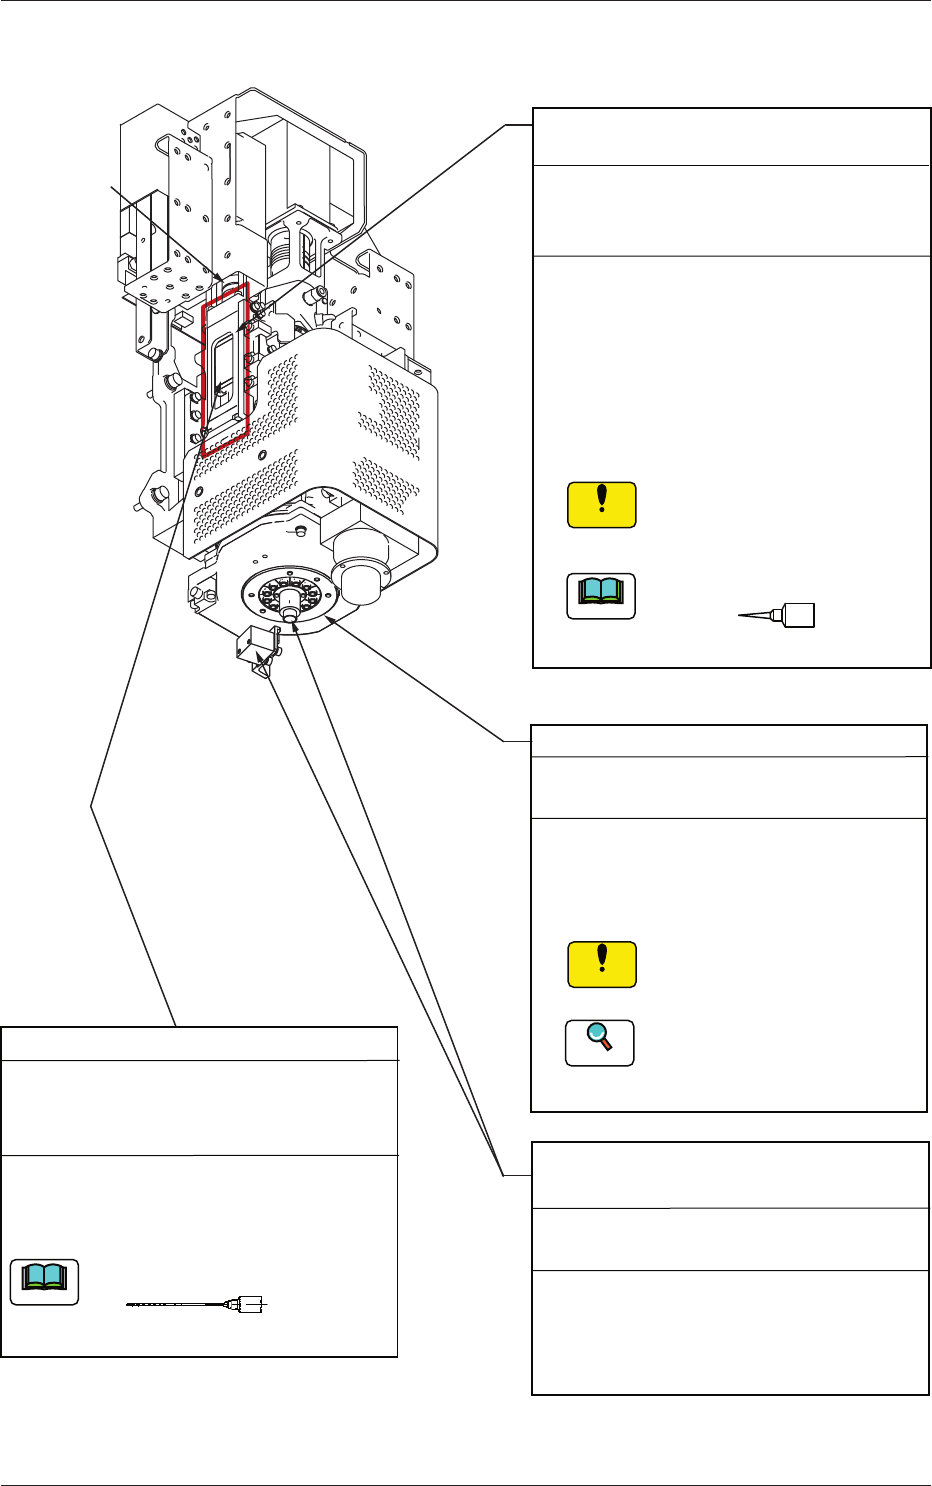
3.3.7 Head Section
Coupling
Linear Measure Sensors
(Light Emitter and Receiver)
Every Day Cleaning
Required Time: 5 minutes
If sebum and oil, etc., adhere to the surface
of the linear measure sensor, wipe them
off with a cotton swab soaked in absolute
ethanol.
Nozzle U/D Linear Guides (NL Axis)
(2 places)
Every Month Cleaning and Lubrication
(DAPHNE EPONEX GREASE No. 1)
Required Time: 5 minutes
(1) Wipe off the old grease with a rag and
apply a small amount of new grease
with a syringe.
(2) Move the NL-axis 19 mm up and down
using the manual (inching) operation
to create a smooth coating of grease.
(3) Wipe off excess grease.
Take ample care not to leave
any waste threads after
cleaning.
Use No. 18 (green) nozzle.
No.18
Notice
Note
Notice
Diffusion Plate
Every Month Cleaning
Required Time: 2 minutes
(1) Store all nozzles in the nozzle stocker
(housing) through window navigations.
(2) Wipe the diffusion plate with a dry
lens cleaning cloth.
Sebum or oil should not
adhere to the surface of the
diffusion plate.
Refer to "6. "Nozzle Change"
Window" in "Chapter 3 (Vol. 2)"
for the procedure of nozzle storage.
Nozzle U/D Ball Screw (NL Axis)
Every 3 Months Cleaning and Lubrication
(DAPHNE EPONEX GREASE No. 1)
Required Time: 5 minutes
Wipe off the old grease with a rag and
apply a small amount of new grease to the
groove of the ball screw with a syringe.
Use No. 19 (brown) nozzle.
Note
No. 19
Reference
Fig. 4A20
3.3 Inspection, Cleaning, and Lubrication Spots
0811-003