00193407-02 HWWS SIPLACE Machine Accuracy EN.pdf - 第105页
. Seite 5 © Siemens AG . . Änderungen vorbehalten SIPLACE Placement Systems ¾ fix the revolver head front par t at the head stand, or alternatively, place the front part into the protective cover (del ivered with a new h…
. Seite 4
© Siemens AG . . Änderungen vorbehalten
SIPLACE
Placement Systems
Pieces Type Dimension Location
4 DIN 84 M2x4mm Z-bearing
3 DIN 912 M3x5mm Bearing race
2 DIN 916 M1
,
6x2
,
5mm Forced-air tube
2 DIN 912 M2x4mm Driver plate
3 DIN 912 M3x8mm Star
4 DIN 912 M4x16mm Front part head
1 DIN 912 M5x16mm Star motor
2 DIN 912 M3x10mm Valve drive
ensure the following spare parts are available:
¾ raceway (00319327-06)
¾ miniature rolling bearing (00320165-02)
¾ spare screws
DIN 84: slotted head screws
DIN 912: hexagon socket screws
DIN 916: grub screw
Spare Parts
. Seite 5
© Siemens AG . . Änderungen vorbehalten
SIPLACE
Placement Systems
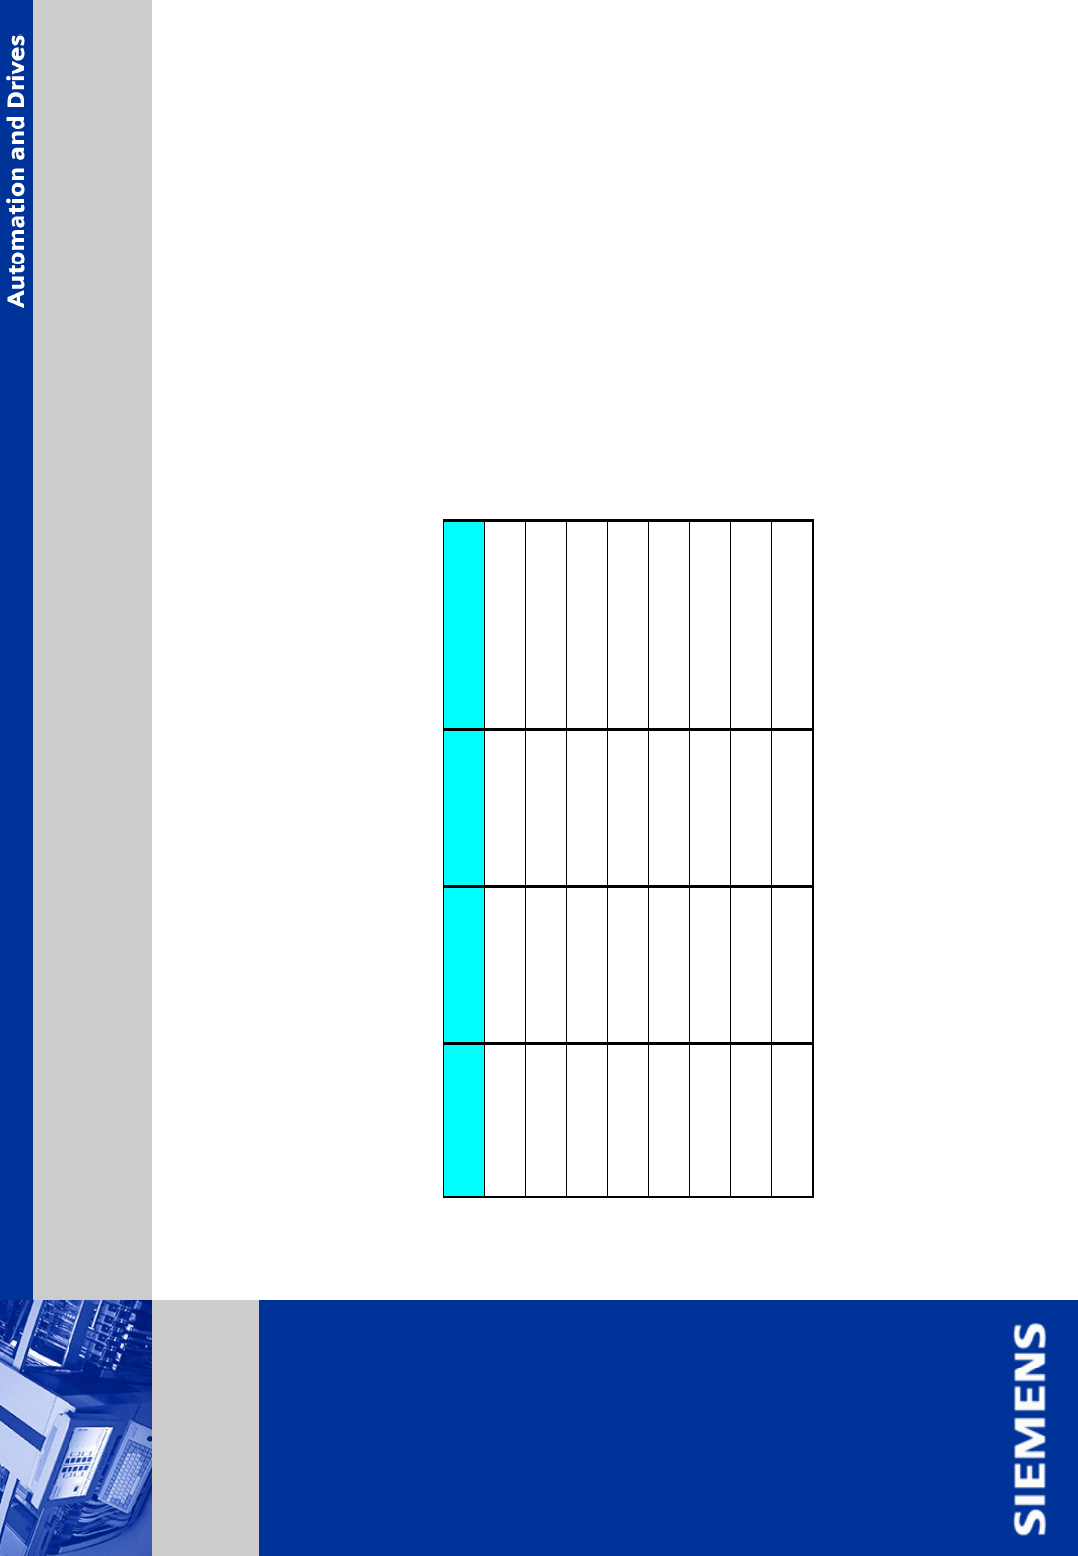
¾ fix the revolver head front part at the head stand,or alternatively,
place the front part into the protective cover (delivered with a new head)
if available.
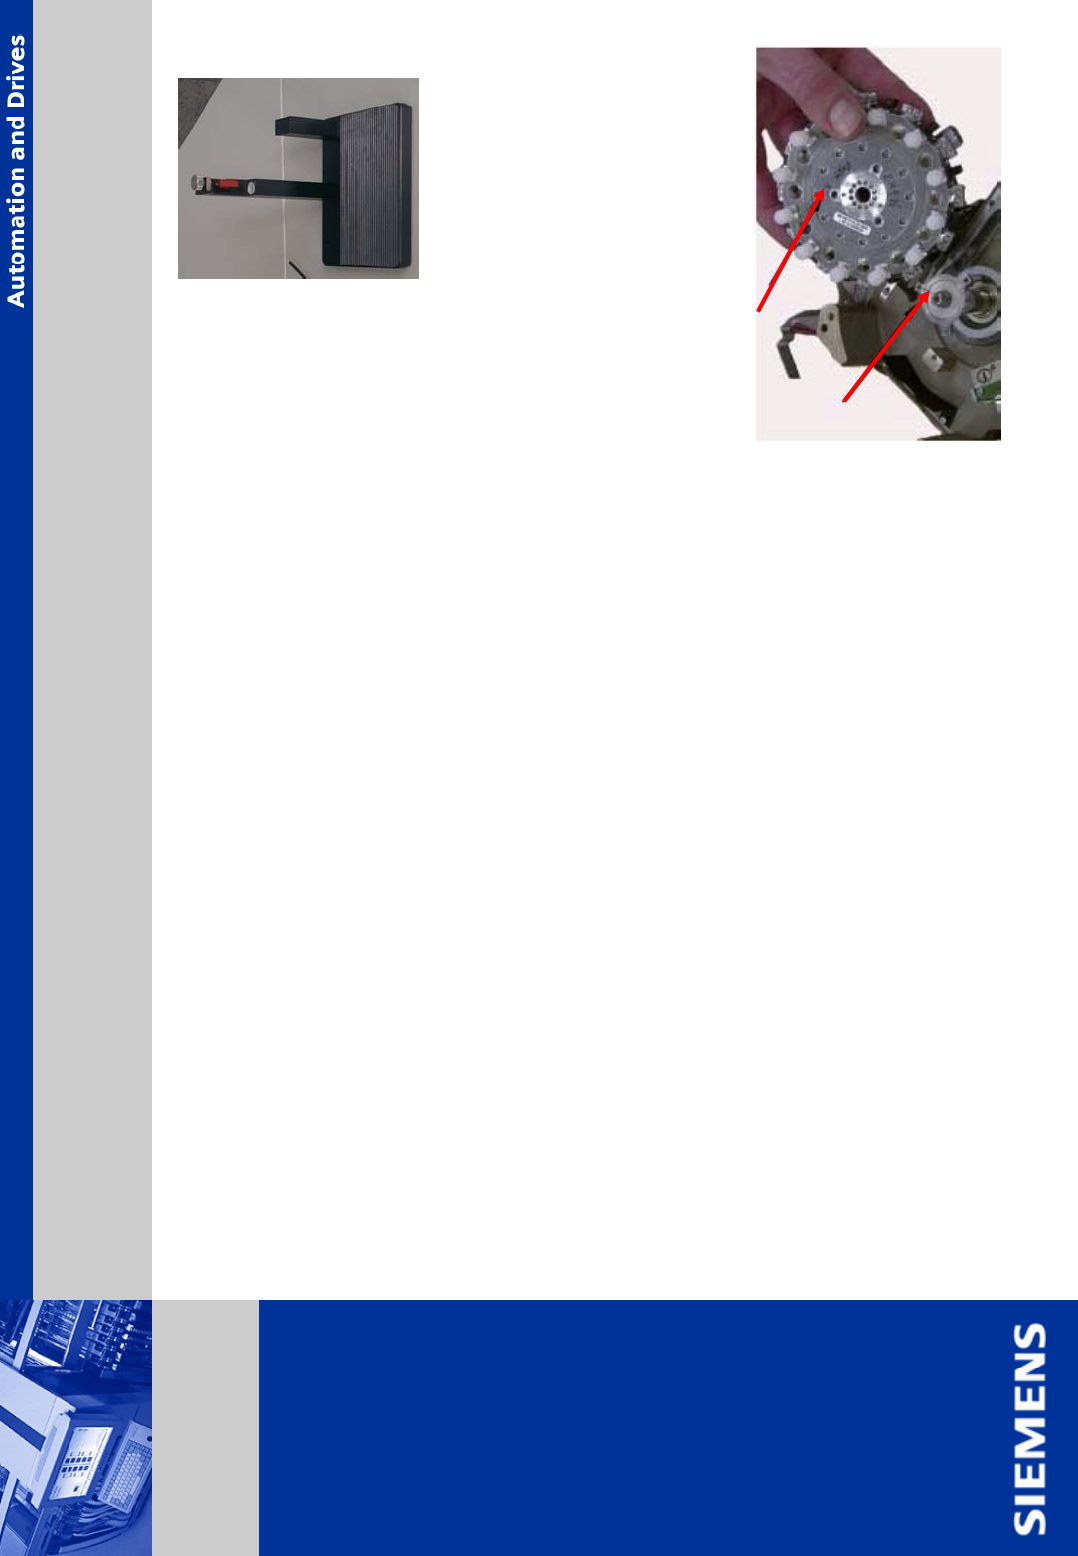
¾ remove the sleeves and keep them in the container provided for this
purpose
¾ remove the vacuum distributor.
¾ remove the 3 hexagon socket screws M3x8 (allen wrench 2.5 mm) star.
¾ lift the star carefully until you feel slight resistance.
Pull the 3 segments, located below the screw holes outwards.
ATTENTION: when reassembling, fasten the star to motor shaft in the
same position as it was before disassembly. To do this, mark a
screw positions on the star and on the shaft.
Disassembly Z-Axis
. Seite 6
© Siemens AG . . Änderungen vorbehalten
SIPLACE
Placement Systems
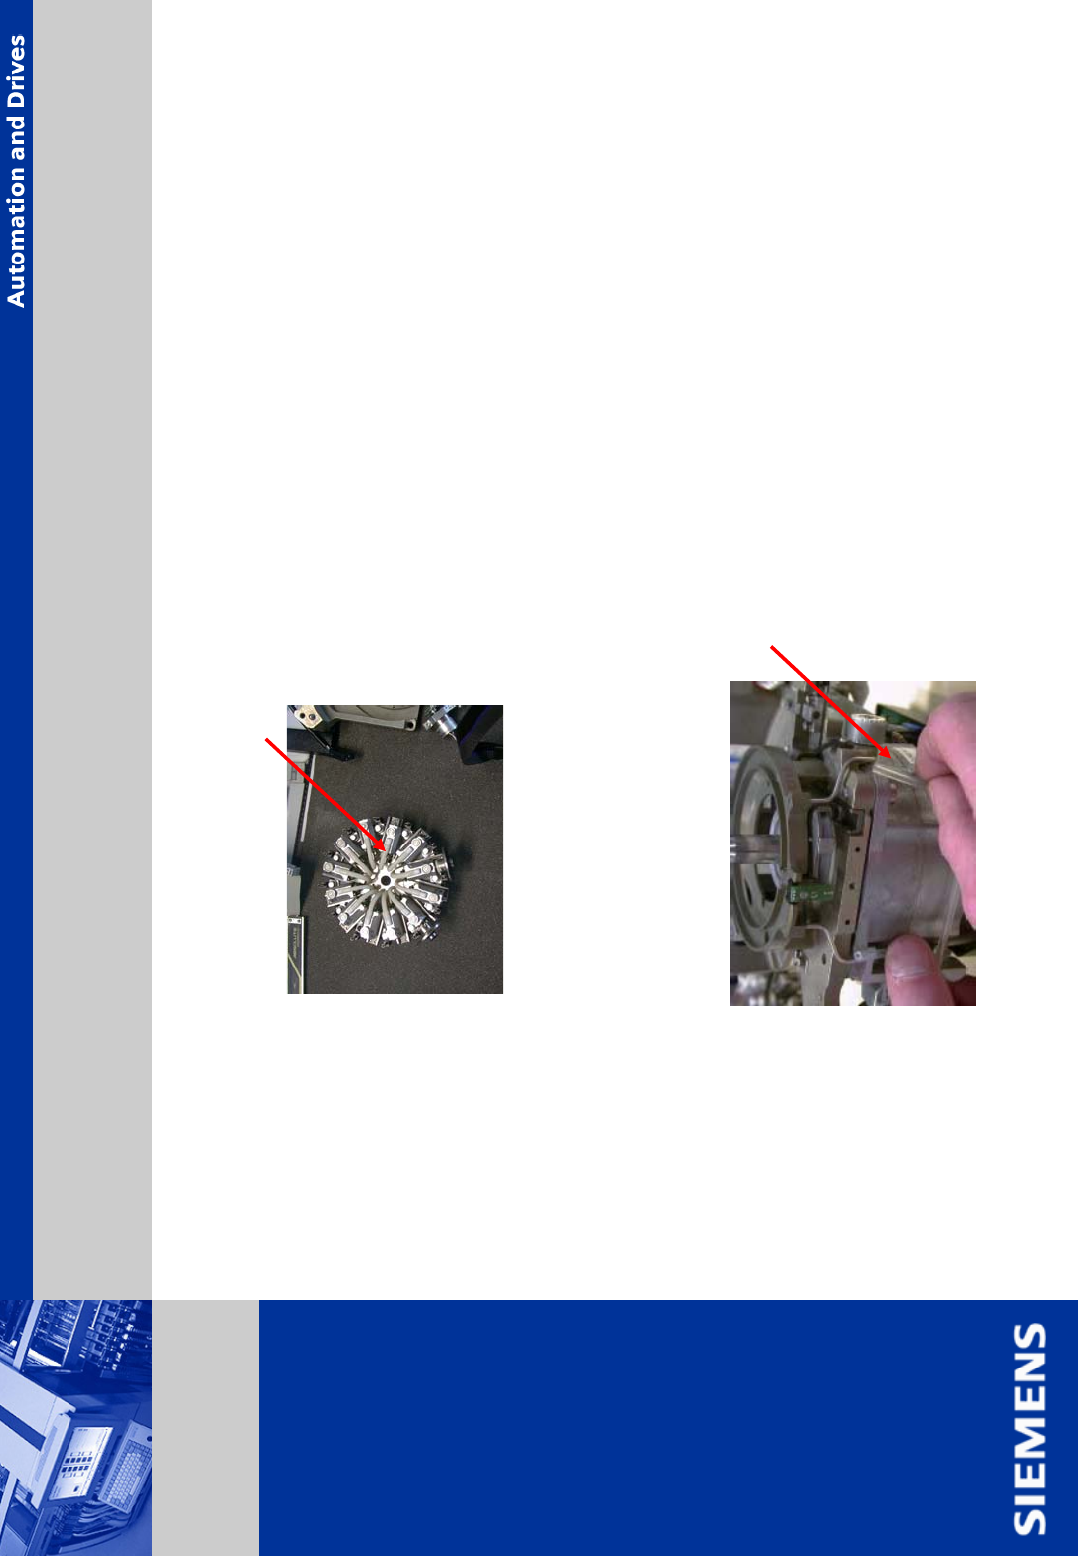
¾ check all segments and hose connections. Exchange the star if it is damaged.
¾ set the star down very carefully with valve plungers down.
¾ clean segments as described in maintenance manual.
¾ pull the compressed air hoses from the forced-air tubes.
Disassembly Z-Axis (continuing)