00193407-02 HWWS SIPLACE Machine Accuracy EN.pdf - 第116页
. Seite 16 © Siemens AG . . Änderungen vorbehalten SIPLACE Placement Systems ¾ place the gauge for the raceway onto the star motor shaft. ¾ tighten the raceway screws. ¾ use new screws to tighten this part. Assembly Z-Ax…
. Seite 15
© Siemens AG . . Änderungen vorbehalten
SIPLACE
Placement Systems
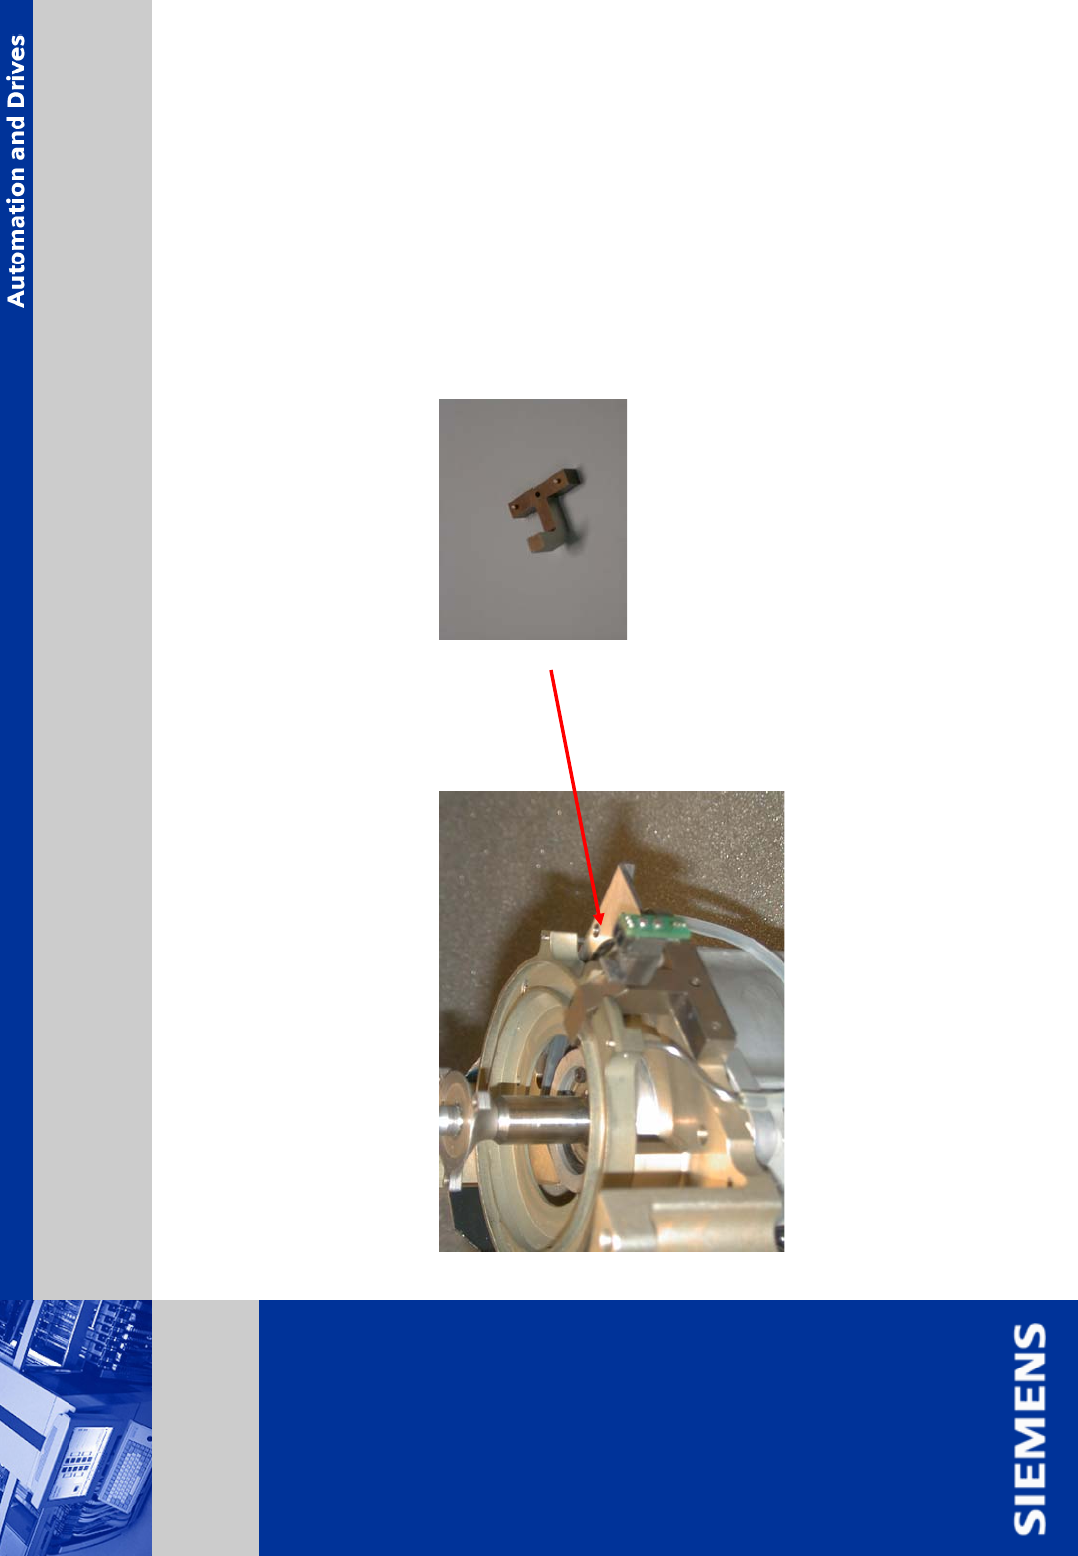
¾ remove any contamination from the raceway.
¾ insert the raceway.
¾ insert the screws (DIN 912 M3x5mm), do not tighten them.
¾ place the raceway gap gauge in star position 1.
Assembly Z-Axis (continuing)

. Seite 16
© Siemens AG . . Änderungen vorbehalten
SIPLACE
Placement Systems
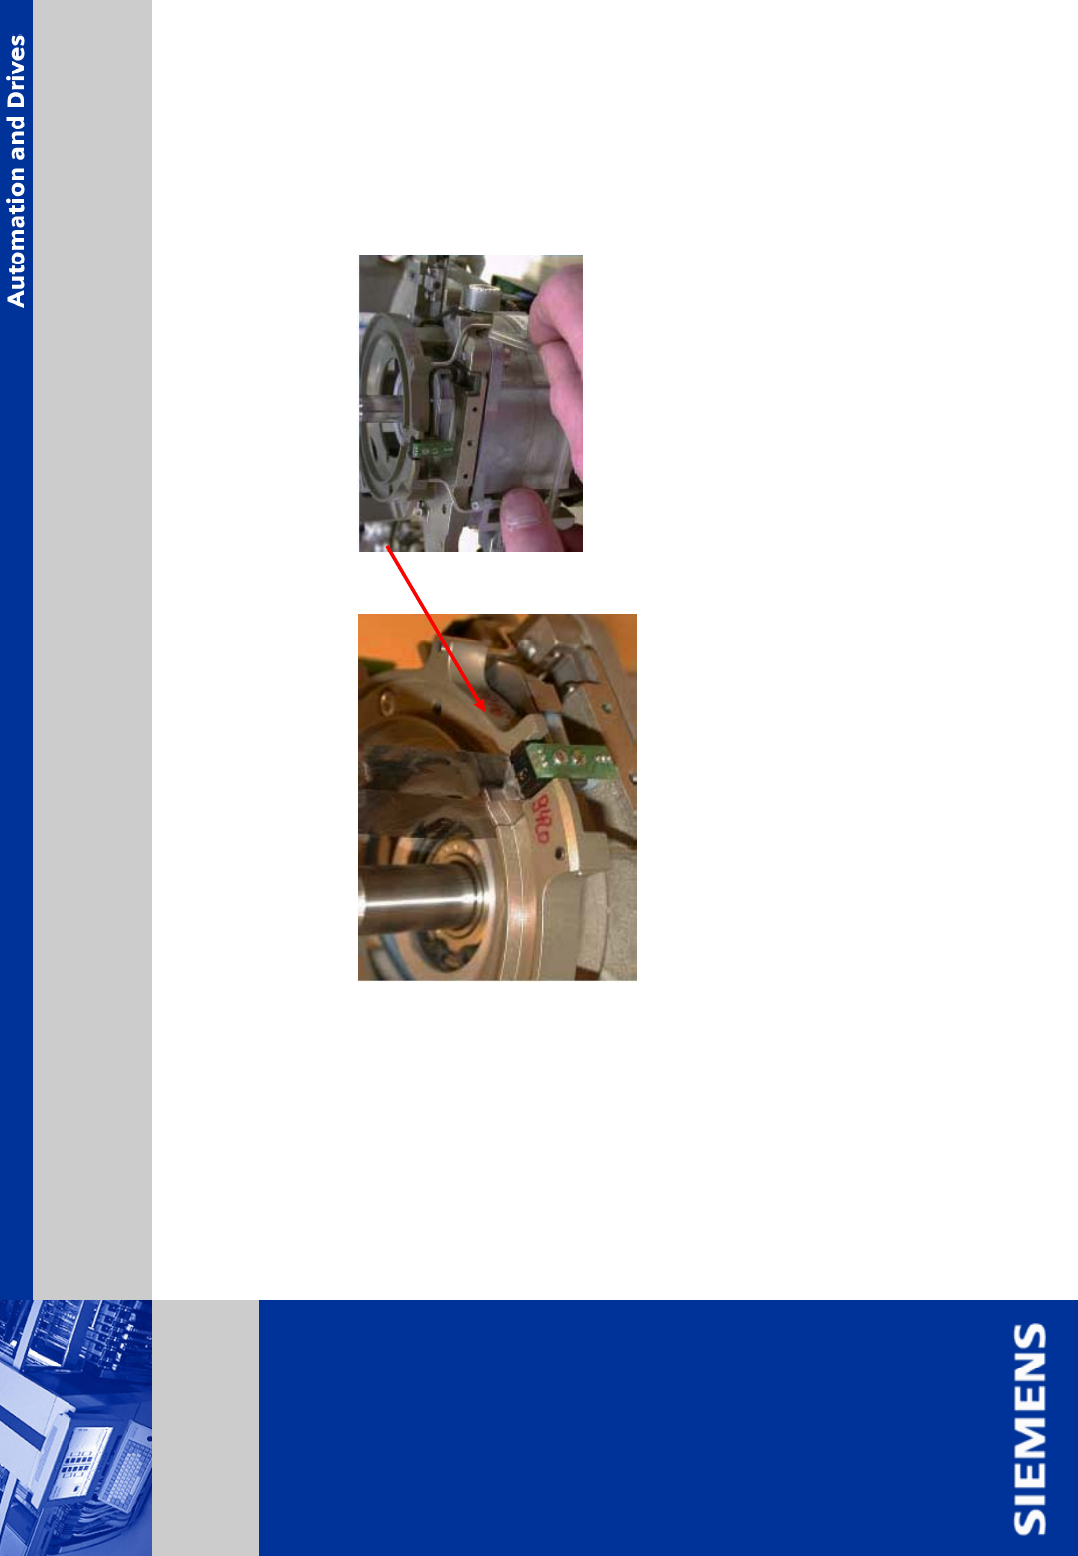
¾ place the gauge for the raceway onto the star motor shaft.
¾ tighten the raceway screws.
¾ use new screws to tighten this part.
Assembly Z-Axis (continuing)
. Seite 17
© Siemens AG . . Änderungen vorbehalten
SIPLACE
Placement Systems
¾ take out the raceway gap gauge.
¾ use either 0.01 mm, 0.02 mm or 0.03 mm feeler gauge to the right and left of the Z-axis
to center it in the raceway gap.
¾ move the z-axis up and down and check if the z-axis is centrically placed.
¾ tighten the screws of the z-axis driving plate.
¾ remove the feeler gauges.
¾ move the z-axis up and down with a slightly pressure to the left and to the right. You should
not feel any ‘scratching movement’, otherwise the z-axis has to be centered again.
¾ put the forced-air hoses back on.
Assembly Z-Axis (continuing)