SM411F_Service Manual.pdf - 第172页
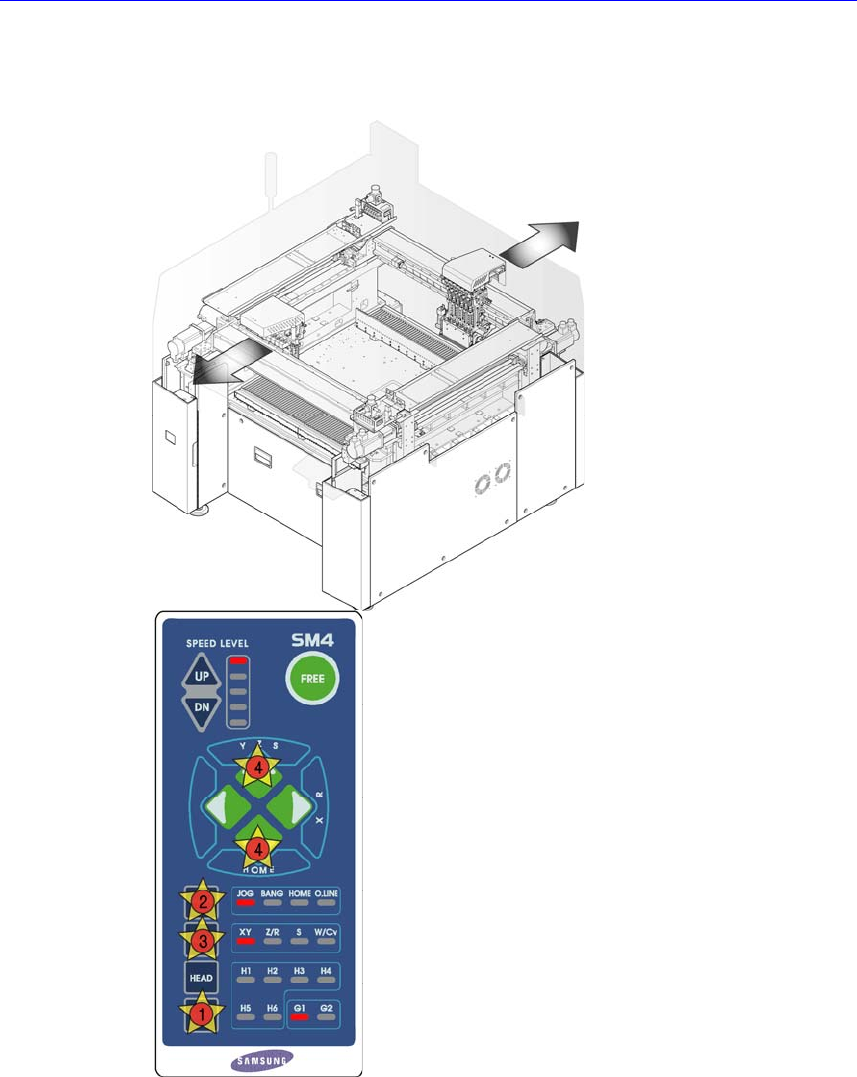
Electric Device Camera I/O Board 1. Manipulate the teaching box to move the head assembly to both ends as much as possible. 2. T urn Off the PC in normal way . Then turn of f the main switch on the front side of the mach…

Electric Device
3. Remove the air tube connected to the board.
4. Unscrew the board fixing screws using the screw driver to remove it.
5. After replacing the board, connect the air tube and assemble it in the reverse
order of disassembling.
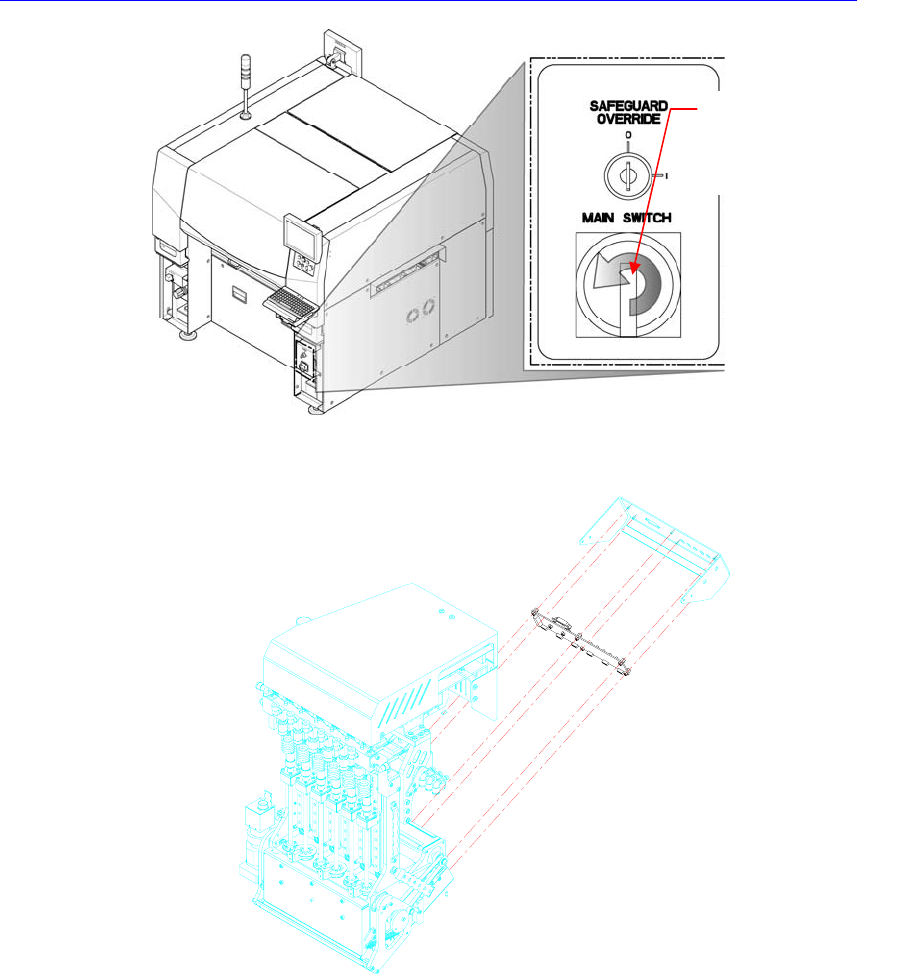
6. Turn on the main switch on the front side of the machine and set the head
vacuum by referring to “
오류
!
참조
원본을
찾을
수
없습니다
.
오류
!
참
조
원본을
찾을
수
없습니다
.”.
When tying the vacuum & blow cables and solenoids, tie them so that interference
with the pneumatic air controls can be avoided.
Direction in which the
main switch is turned
off (counterclockwise)
TIE WORK
Fixing Bolt
Electric Device
Camera I/O Board
1. Manipulate the teaching box to move the head assembly to both ends as much
as possible.
2. Turn Off the PC in normal way. Then turn off the main switch on the front side
of the machine.
Electric Device
3. Disconnect the camera cable connected to the board.
4. Remove the camera cover by using the wrench.
5. Unscrew the fixing screws by using the screw driver and replace the board.
6. The assembling is performed in the reverse order of disassembling.
7. After turning on the main switch on the front side of the machine, perform the
fly camera related light mapping by referring to “
오류
!
참조
원본을
찾을
수
없습니다
.
오류
!
참조
원본을
찾을
수
없습니다
. (page
오류
!
책갈
피가
정의되어
있지
않습니다
.)“.
Direction in which the
main switch is turned
off (counterclockwise)