00193370-0202.pdf - 第61页
SIPLACE Axis T est er Handbuch für das Achsprüfgerät / Axis T est er Manual Ausgabe 08/2003 Edition 8 Using the menus 61 Fig. 8 - 5 “Configuration” menu 8.3.1 “Panel” menu This me nu is used to configu re the four BNC o …
Handbuch für das Achsprüfgerät / Axis Tester Manual SIPLACE Axis Tester
8 Using the menus Ausgabe 08/2003 Edition
60
8.2 Main menu
Press this membrane button from the start-up window (see Fig. 8 - 2) to display the main
menu.
Fig. 8 - 3 Main menu of the user interface
Æ Use the and cursor keys to select individual menu options.
Æ Select to open a menu.
Æ Select “Quit” to close the main menu.
Æ Select “Shutdown” to save all your changes and shut down the axis tester.
PLEASE NOTE: 8
All your settings and values will be lost if you unplug the ribbon cable from the axis controller
before saving your settings. 8
Æ The “About…” menu option contains device-specific information, such as the software version,
serial number, etc.
Fig. 8 - 4 “About ...” menu option
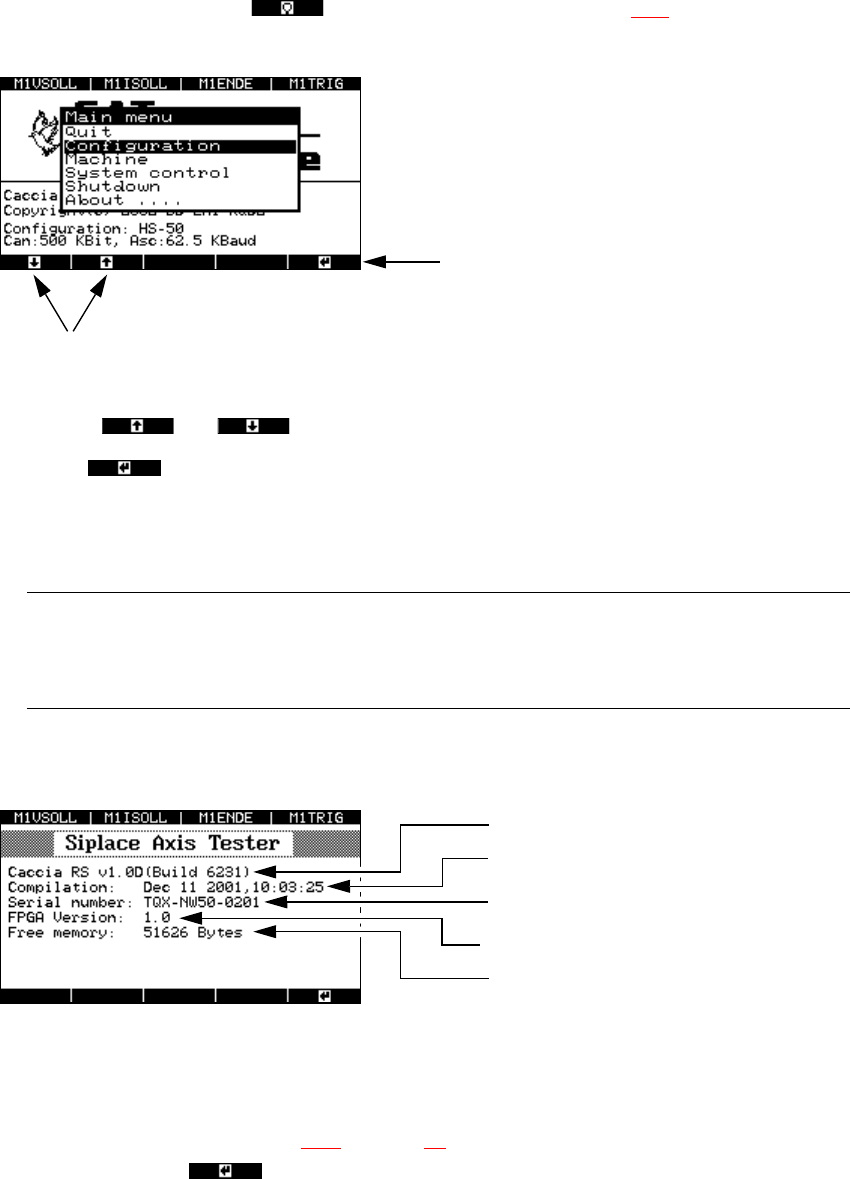
8.3 “Configuration” menu
Æ From the main menu (see Fig. 8 - 3 on page 60) select the “Configuration” menu and press
membrane button .
The ‘Configuration’ menu appears.
Up and Down cursor keys
RETURN
Software version
Indicates when the software was compiled
Serial number of the axis tester
FPGA: Field Programmable Gate Array
Free memory
SIPLACE Axis Tester Handbuch für das Achsprüfgerät / Axis Tester Manual
Ausgabe 08/2003 Edition 8 Using the menus
61
Fig. 8 - 5 “Configuration” menu
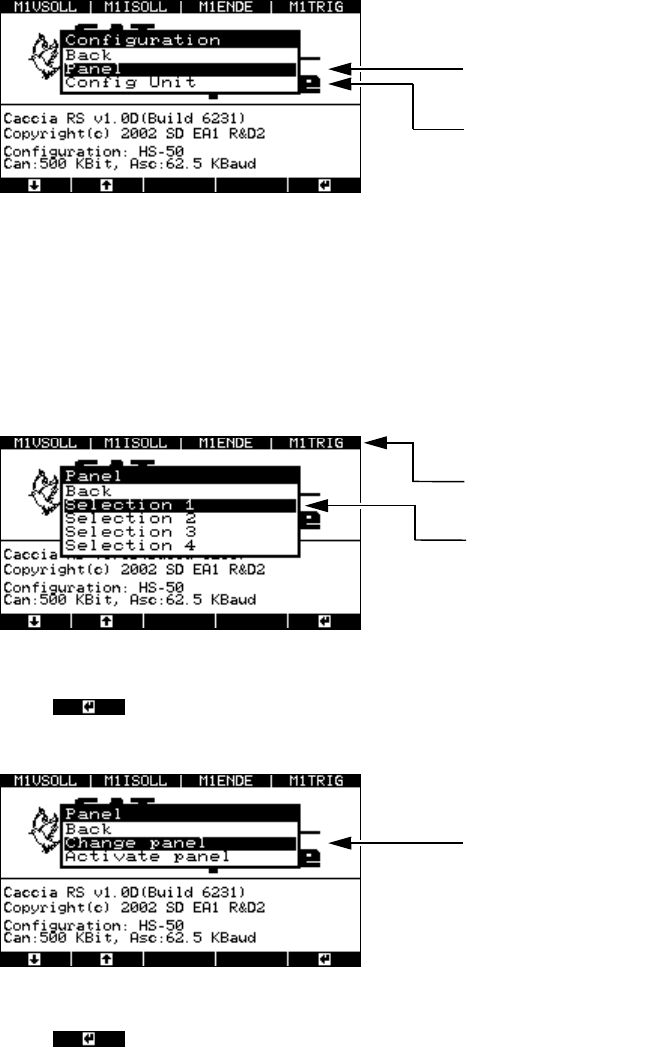
8.3.1 “Panel” menu
This menu is used to configure the four BNC output panels. Each is configured in a different win-
dow. You can assign 4 signals to each of the 4 BNC sockets from a choice of 30 available signals.
Fig. 8 - 6 “Panel” menu, selecting the panel assignment group
Æ Press to confirm the selected group, e.g. “Selection 1”. The next menu appears with
the “Change panel” and “Activate panel” options.
Fig. 8 - 7 “Panel” menu, “Change panel” option
Æ Press to confirm your choice of “Change panel”.
The menu for selecting the BNC socket appears.
Menu for assigning signals to
the BNC panels
Menu for configuring the signal sampling fo
r
the axis controllers
Assignment of the BNC sockets in the 1st
selection window
Selection window for the 1st panel assign-
ment group
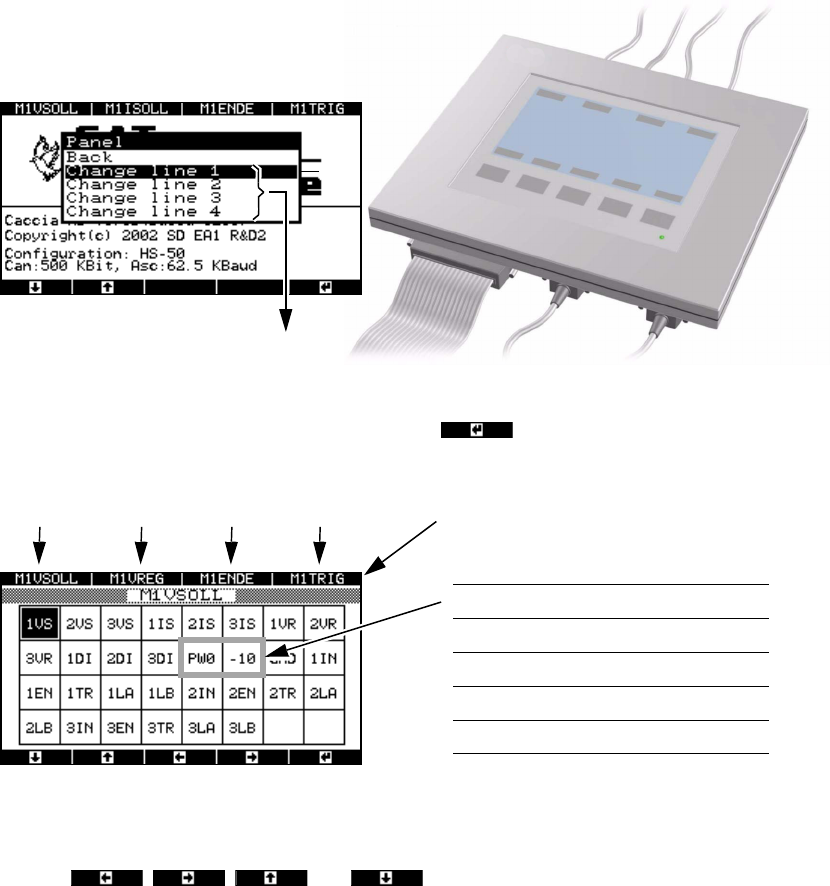
To the “Change line 1 … 4” menu
Handbuch für das Achsprüfgerät / Axis Tester Manual SIPLACE Axis Tester
8 Using the menus Ausgabe 08/2003 Edition
62
Fig. 8 - 8 “Panel” menu, selecting the line (BNC socket)
Æ Select a BNC socket and press membrane button .
A range of signals appears in the next window.
Fig. 8 - 9 “Panel” menu, range of available signals
The two bordered fields change according to the selection group.
Æ Use the , , and buttons to move the black mark in order to
select the required signal from the available choice.
BNC sockets 1 … 4
N
M
O
P
Signals
Selection 1 PW0 -10
Selection 2 PW1 5
Selection 3 PW2 BNC
Selection 4 PW3 GND
BNC1 BNC2 BNC3 BNC socket assignment BNC4