00193370-0202.pdf - 第81页
SIPLACE Axis T est er Handbuch für das Achsprüfgerät / Axis T est er Manual Ausgabe 08/2003 Edition 8 Using the menus 81 8.5.4 “Port s” m en u Æ Se lect the “P orts” option fro m the “System control” menu . The men u for…
Handbuch für das Achsprüfgerät / Axis Tester Manual SIPLACE Axis Tester
8 Using the menus Ausgabe 08/2003 Edition
80
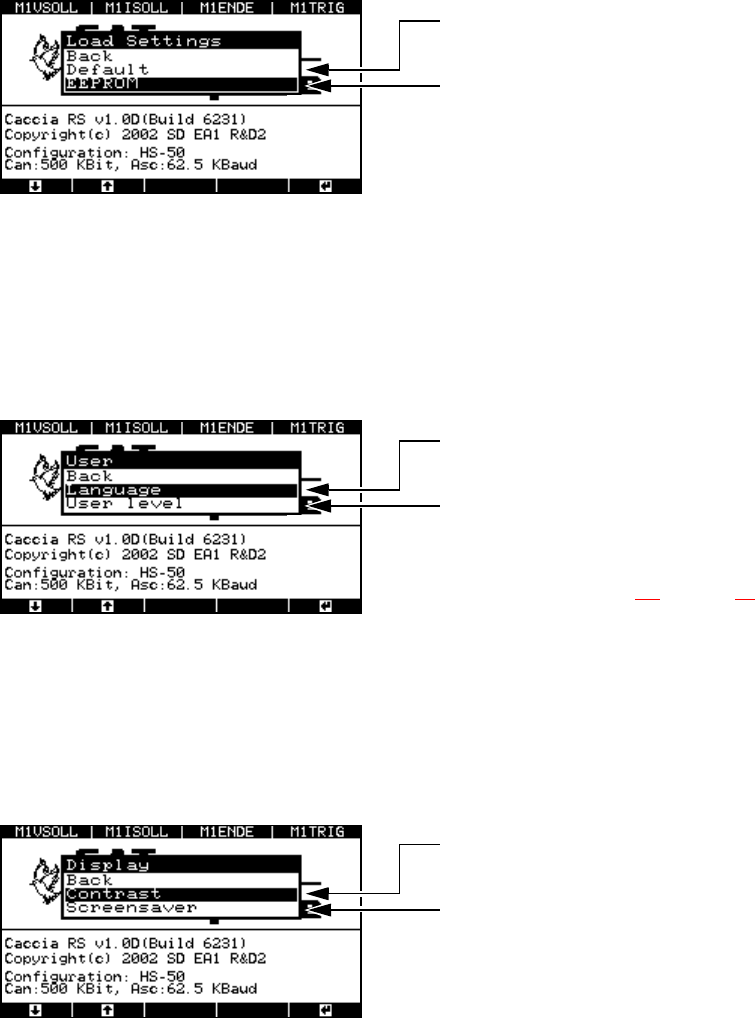
The menu for loading settings appears.
Fig. 8 - 50 “Load settings” menu
8.5.2 “User” menu
The “User” menu allows you to select the user interface language: German or English. You can
also set the user level. At the “Beginner” user level, you only have access to a limited choice of
menus from the user interface.
Fig. 8 - 51 “User” menu
8.5.3 “Display” menu
Æ Select the “Display” option from the “System control” menu.
The menu for configuring the CAN connection and serial port appears.
Fig. 8 - 52 “Display” menu
Factory defaults that cannot be modified
Here you can adopt the most recently saved
settings
“Yes” to accept
“Back” to cancel
Select German or English as the interface
language
Select “Expert” or “Beginner” as the user
level: if you choose “Beginner”, then the num-
ber of options in the “Machine” and “About”
menus is limited. Selection of the user level
is described in section 8.1
on page 59.
Display contrast settings:
Brighter ↔ Darker
Screen saver configuration:
- Duration
- Change type
- Set the delay

SIPLACE Axis Tester Handbuch für das Achsprüfgerät / Axis Tester Manual
Ausgabe 08/2003 Edition 8 Using the menus
81
8.5.4 “Ports” menu
Æ Select the “Ports” option from the “System control” menu.
The menu for configuring the CAN and serial ports appears.
Fig. 8 - 53 “Ports” menu
8.5.4.1 “CAN port” menu
Select the “CAN IDs” option from the “CAN port” menu. Here you can change the sending or re-
ceiving address.
Fig. 8 - 54 “CAN IDs” menu
Fig. 8 - 55 “Sending CT-ID” window
Use the and cursor keys to change the numbers, and the and
cursor keys to select the position within the hex number.
Configure the CAN ID
Configure the serial port
If you select “Sending CT-ID”, the window for
entering the hex address appears.
CAUTION: 8
Do NOT change the default hex value, since
this will prevent communication being estab-
lished with the axis controller. 8
Handbuch für das Achsprüfgerät / Axis Tester Manual SIPLACE Axis Tester
9 Maintenance Ausgabe 08/2003 Edition
82
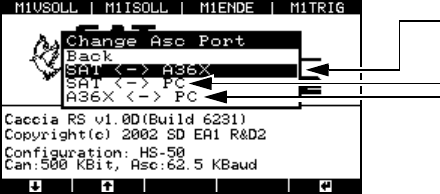
8.5.4.2 “Asc port” menu
Æ Select the “Asc port” option from the “Ports” menu, and then select “Change Asc port”.
The “Change Asc port” menu appears.
Fig. 8 - 56 “Change Asc port” menu
SAT ↔ A36X
The axis tester - axis controller connection is always configured as the default. The signal is
transferred via the ribbon cable.
SAT
↔ PC
Choose this setting in order to update the axis tester software.
A36X
↔ PC
With this configuration, the axis tester acts as the mediator between the A36X axis controller
and the PC connected at the 9-pin sub-D socket. With suitable programs, you can transfer data
(such as counter values or status bytes) from the axis controller to an external PC.
9 Maintenance
The actual axis tester is maintenance-free. You should, however, check the connecting cables ev-
ery year, particularly the ribbon cable, for:
– damage to the insulation
– cable breaks and
– uninterrupted electrical connections between the ribbon cable and connectors.
To select the port:
Axis tester - axis controller (default)
Axis tester - PC
Axis controller – PC