SOM-1655-002.pdf - 第65页
64 Tg0742-PM-SO 0307-002 13.1 IP Address Setting Procedure 13.1 IP Address Setting Procedure This explains on Japanese screen. (1) If the TIM-X100 has been connected to the LAN before the power is turned on, disconnect. …

63 Tg0742-PM-SO0307-002
13. LAN Setting
LAN setting procedure is described here for the V. bend detection
unit.
13. LAN Setting
• Check the computer name, IP address and subnet mask used in the
V. bend detection unit, in advance.
(a) Take care that the same IP address in other machines
cannot be used.
(b) The IP address setting is required, so that it can be
accessed with the IP Address and subnet mask settings
in TIM-X100.
64 Tg0742-PM-SO0307-002
13.1 IP Address Setting Procedure
13.1 IP Address Setting Procedure
This explains on Japanese screen.
(1) If the TIM-X100 has been connected to the LAN before the
power is turned on, disconnect.
(2) Turn on the power.
(3) Start up the machine.
(4) Press the [ctrl] key twice on the keyboard and switch to the V.
bend detection unit window.
(5) Re-start the V.bend detection unit
• Operation Sequence : “Start”
→ “Shutdown” → “Re-start”.
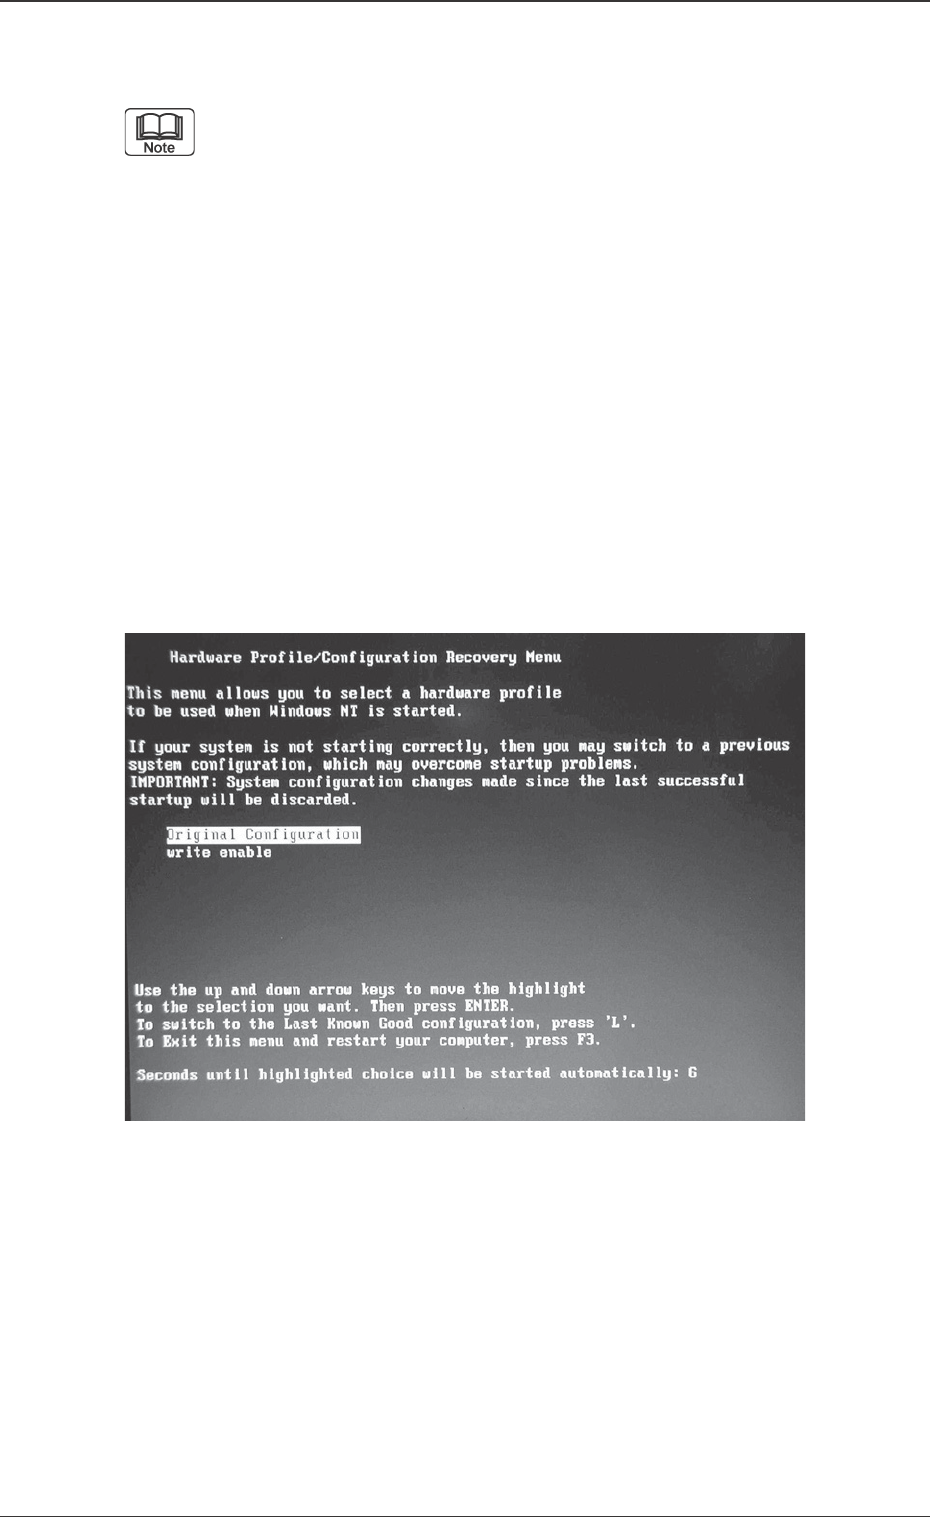
(6)
During the start-up operation, press the [↓] key in the
“Write Enable / Disable Section” window (Fig. 36) and
select “write enable”, then start up the V. bend detection
unit in the write enable mode.
Fig. 36 “Write Enable / Disable Section” window
65 Tg0742-PM-SO0307-002
Fig. 37 Network Setting
Fig. 38 TCP/IP Properties Selection
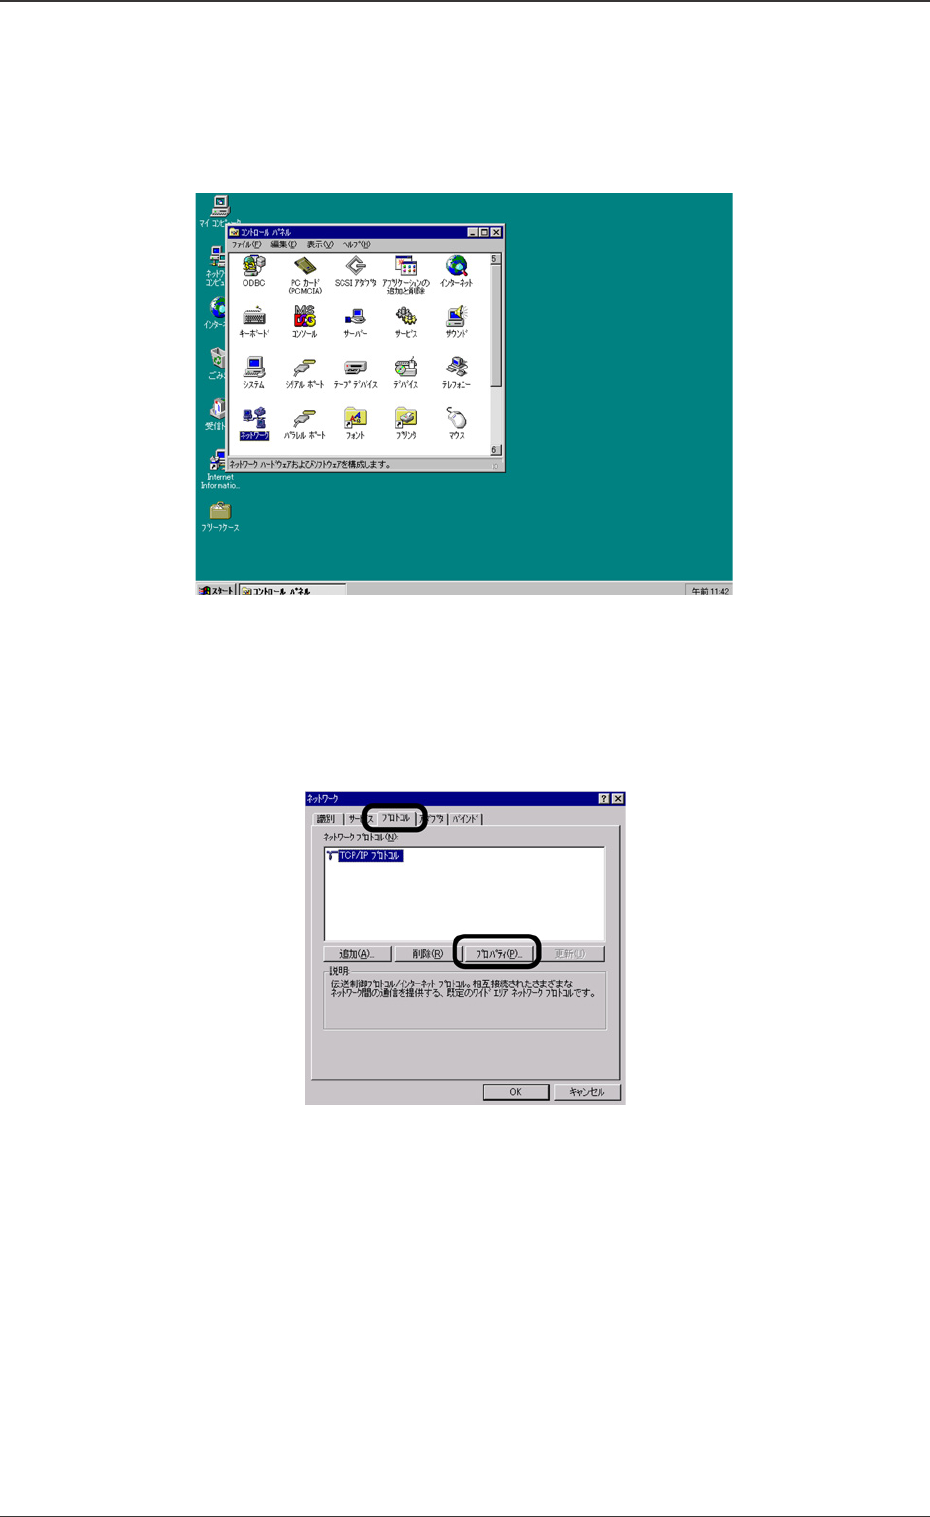
(7) Set the parameters for the V.bend detection unit, using Win-
dows.
When the V-bend detection unit has been started up, select
“Start”, “Setting”, “Control Panel” and “Network” in that order.
(8) The setting window will be opened. Select the [Protocol] tab and
then, select [TCP/IP] and press the [Properties] button.
13.1 IP Address Setting Procedure