SOM-1655-002.pdf - 第70页
69 Tg0742-PM-SO 0307-002 13.2 Setting Procedure for Communication with Main Machine 13.2 Setting Procedure for Communication with Main Machine The parameters are set for the communication between the TIM- X100 main machi…
68 Tg0742-PM-SO0307-002
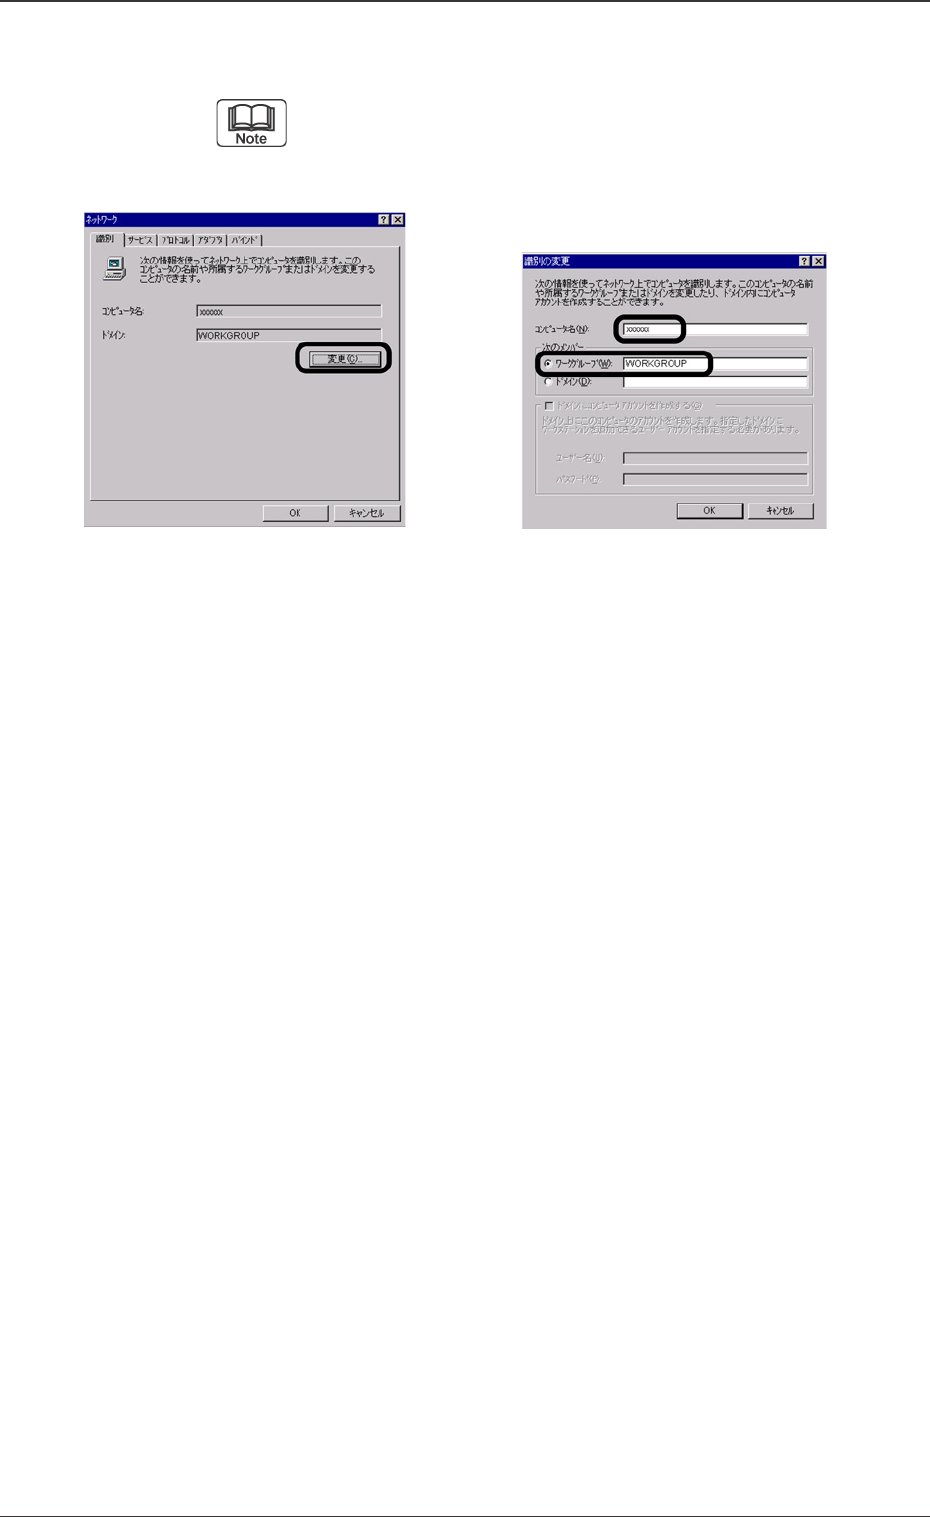
(13) Return to the Network Setting window and press the [Change]
button in the Recognition tab sheet.
Then set the computer name. Participation in the
domain is not normally required. If it is required by the
user, set the domain.
Any name is all right for the computer name (set the name as
the same as the computer name set in the DNS). Set the
option button in the WORKGROUP and set the
WORKGROUP.
(If the WORKGROUP name is specified or participation in the
domain is needed by the user, follow the user’s instructions.)
(14)
Press the [OK] button.
(15) Restart the machine and if it starts up normally then the
setting has been completed.
13.1 IP Address Setting Procedure
Fig. 42 WORKGROUP SettingFig. 41 Computer Name Setting
69 Tg0742-PM-SO0307-002
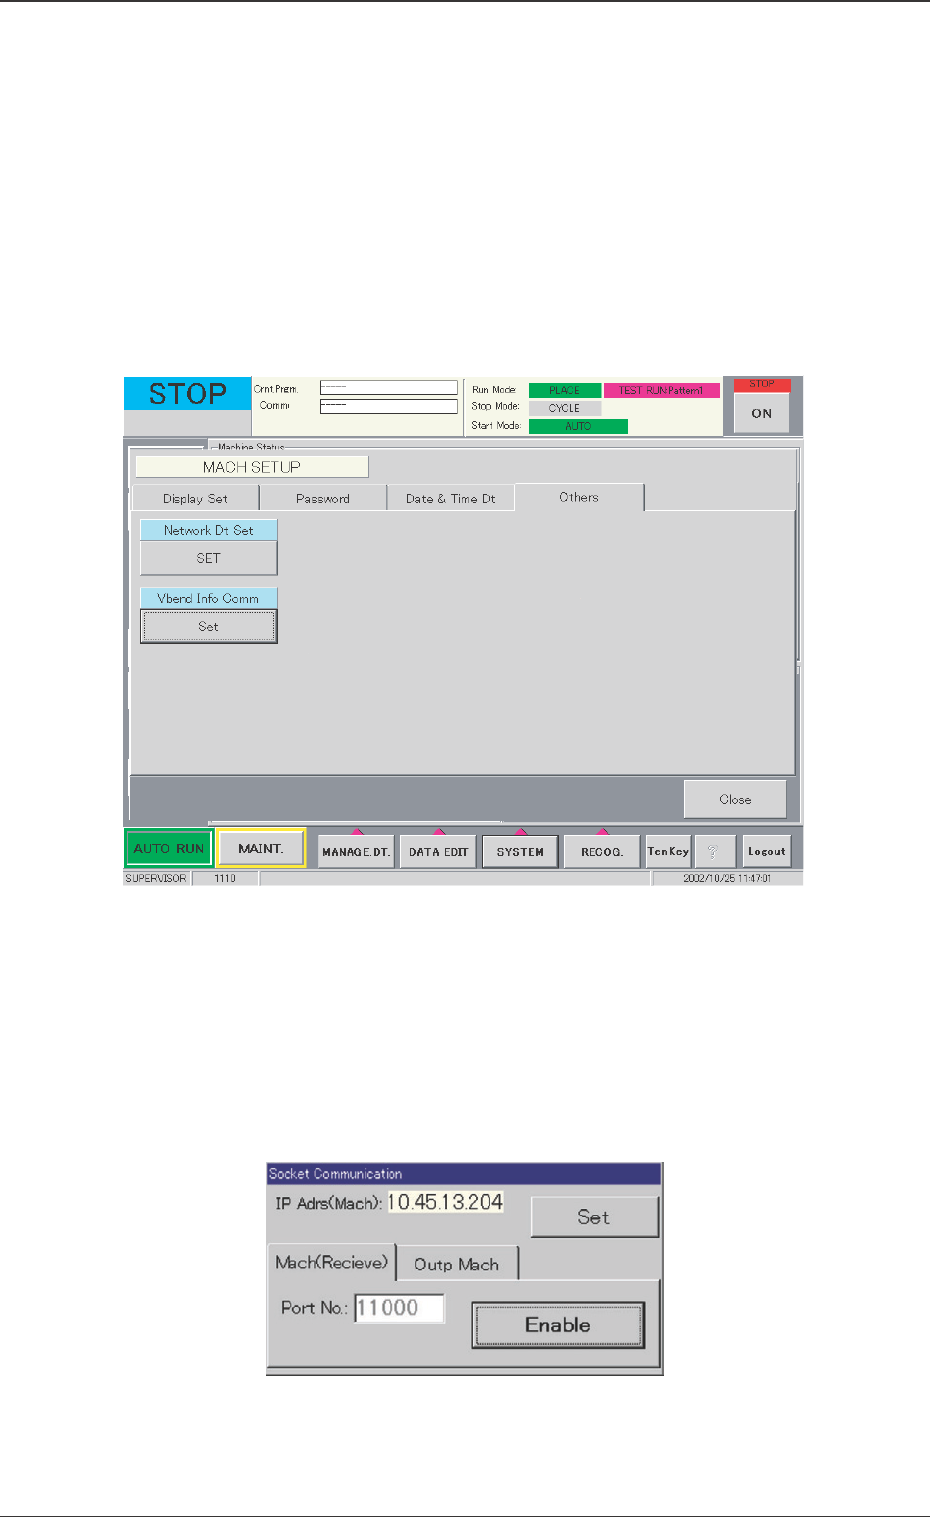
13.2 Setting Procedure for Communication with Main Machine
13.2 Setting Procedure for Communication with Main
Machine
The parameters are set for the communication between the TIM-
X100 main machine and the V. bend detection unit.
••
••
• Window Layout
When the [Others] tab is pressed in the "MACH SETUP" window, the
following window appears.
••
••
• Communication Setting Procedure
(1) When the [Set] button is pressed in the "Vbend Info Comm"
data box, the following "Socket Communication" window ap-
pears.
Fig. 47
Fig. 48
70 Tg0742-PM-SO0307-002
13.2 Setting Procedure for Communication with Main Machine
(2) Press the [Mach(Receive)] tab.
(3) Check the "Port No." and press the [Enable] button. Then, set
"11000" in the "Port No." data box.
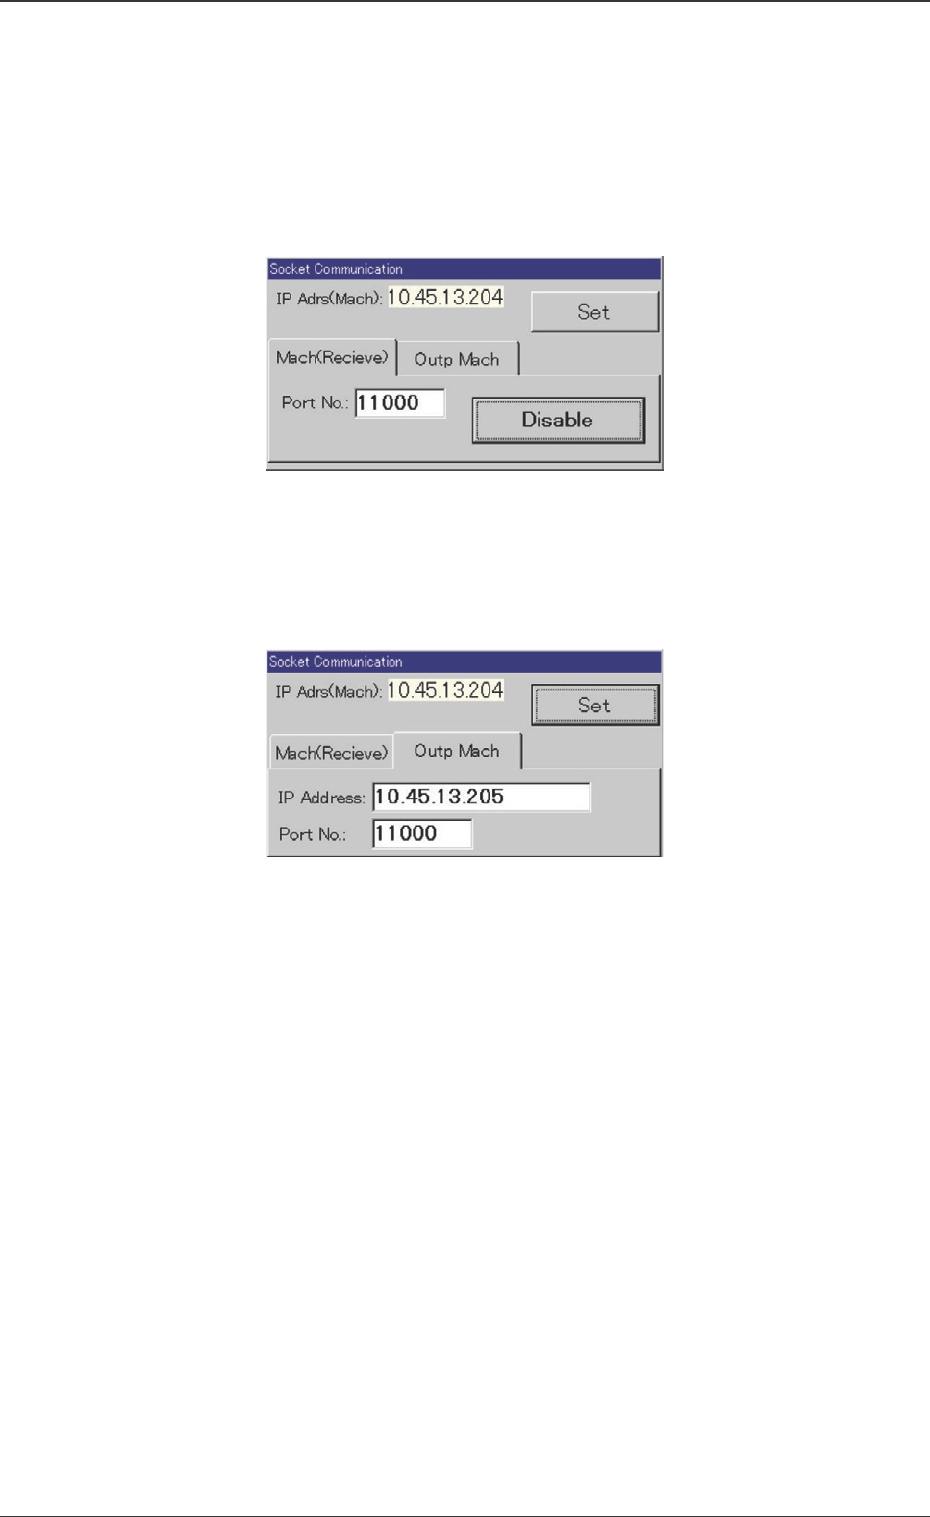
(4) Press the [Disable] button.
(5) Press the [Outp Mach] tab.
(6) Set the IP address of the V. bend detection unit in the "IP
Address" data box.
(7) Set "11000" in the "Port No." data box.
(8) Press the [Set] button.
(9) Close the "Socket Communication" window.
(10) Turn off the TIM-X100 main machine and re-start.
Fig. 49
Fig. 50